

After I’ve created an extruded Gothic Tracery design in FreeCAD, I like to Export the top Face of that design as an SVG file that I can use in other FreeCAD designs and in scrollsawing (the poor-person’s laser cutter).
This post describes, step-by-step, how I Export one Face of a Body, in FreeCAD 1.0. A companion post explains the process of Importing a Decorative SVG file into FreeCAD.
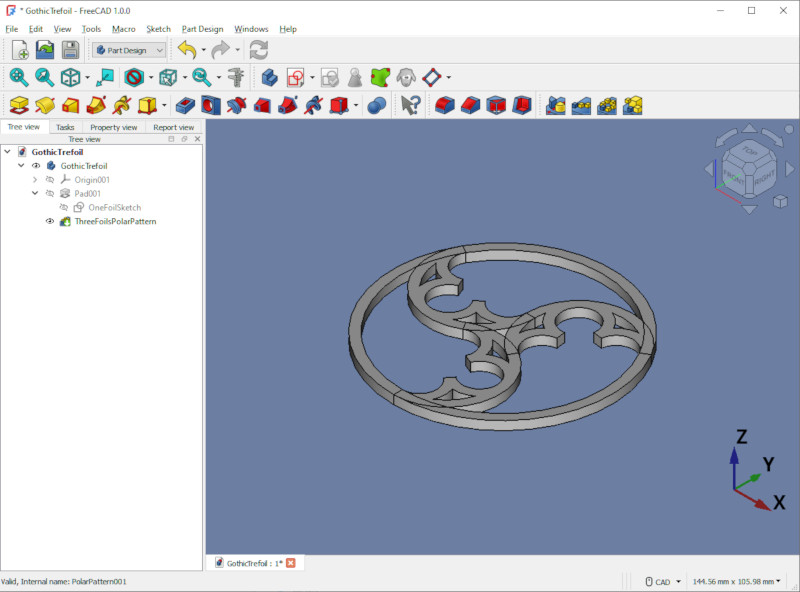
In this example, I’ve created a Gothic Trefoil design in FreeCAD: it’s a Sketch of the 2D tracery which I then extruded (Pad) to become a 3D Body.
We’re going to Export the top Face of this Body as an SVG file.
You can download this FreeCAD file and the resultant SVG file from my Cults3D Post: Gothic Tracery Trefoil decoration to emboss or engrave.
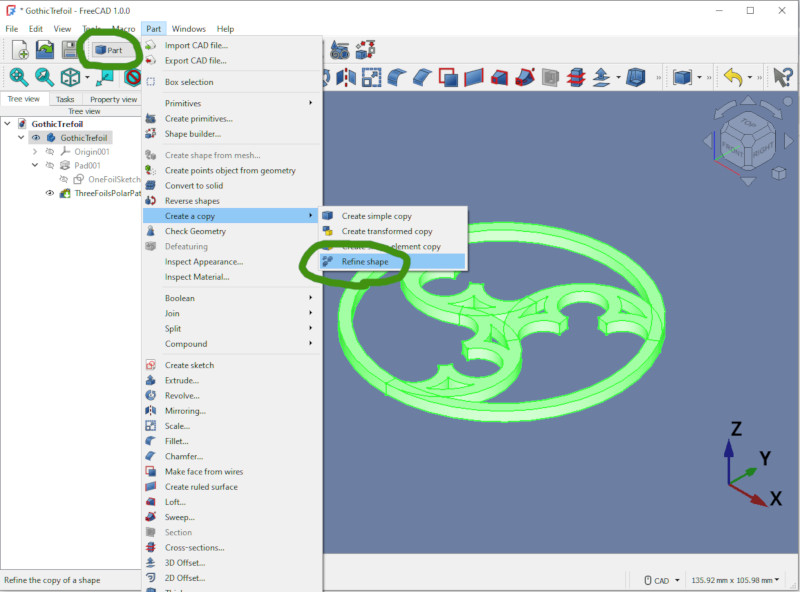
You can see from the above screenshot that the design has some overlapping elements. Those overlaps will make it a little tedious to select all the parts of the Faces that make up the top of the Body, so we’ll Refine it first.
In the Part Workbench, select the Body in the Tree View. Make sure to select the Body, and not some element of it.
Then select Part / Create a copy / Refine Shape
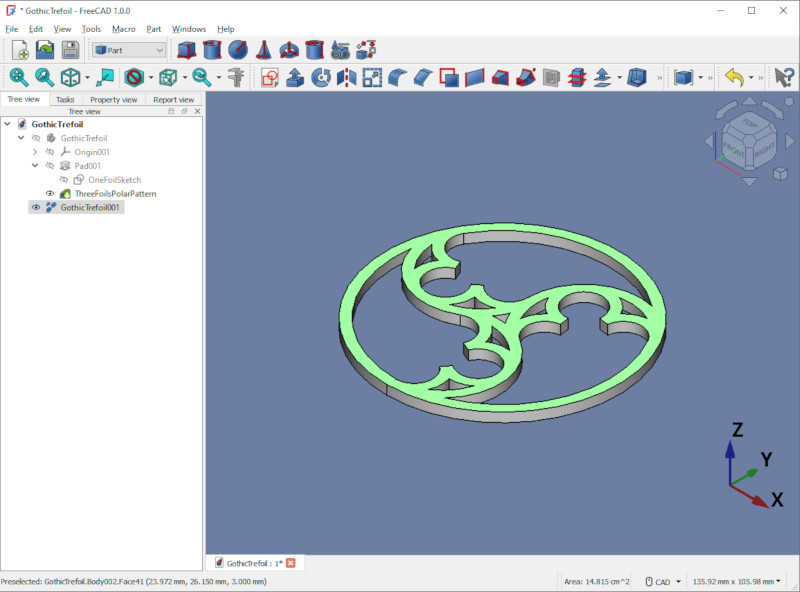
Click on the top Face of the new Body (the Refined Shape). Don’t click on or select the whole Body – we want just the top Face.
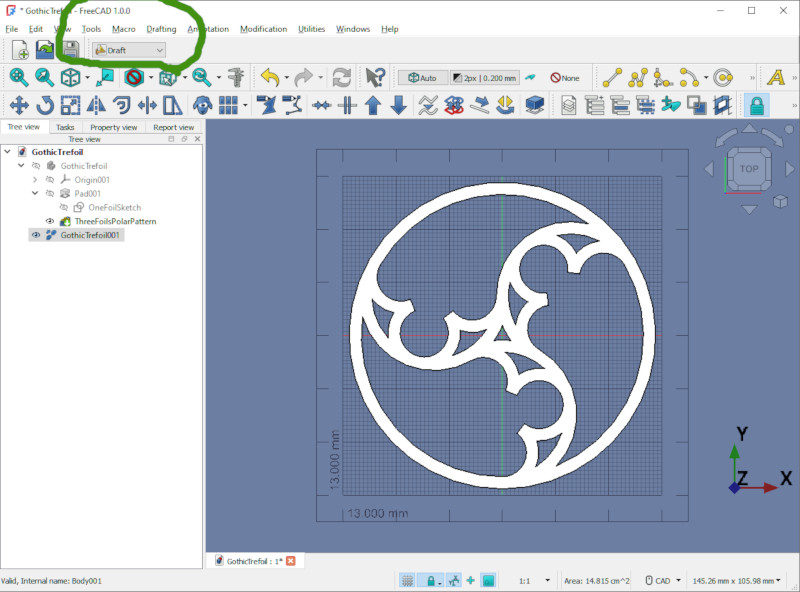
We’re going to use the Draft Workbench, but before we do that we need to orient the view.
Click on the Top view in the view cube – the cube in the upper-right. Notice that even though the top Face of the Body is still selected, FreeCAD doesn’t show it as selected – that’s ok.

Now that we’ve oriented our view, choose the Draft Workbench.
The top Face of the Body should still be selected after all this. If you’re unsure you can switch to an Isometric (angled) View – make sure to switch back to the Top view when you’re done checking.
Click on Modification / Shape 2D View.
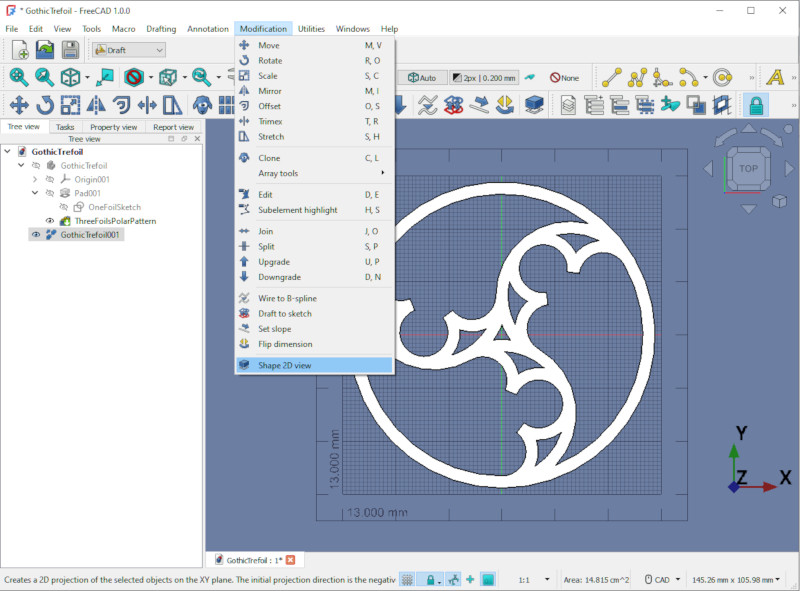
Now the flat design exists as a Draft Sketch in the Tree View. It’s a bit hidden by the Refined Shape we created it from.
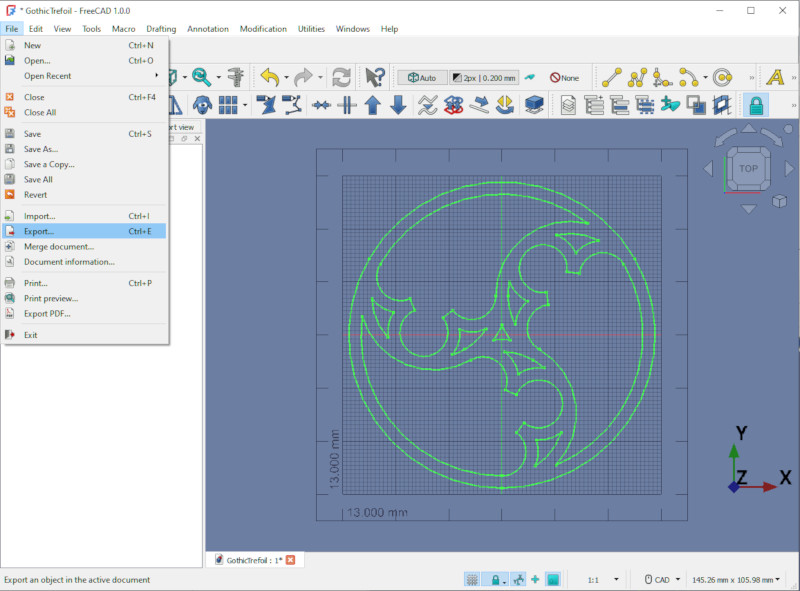
Hide the Refined Shape so we can see the Draft Sketch.

Select that new Draft Sketch in the Tree View, then choose File / Export…
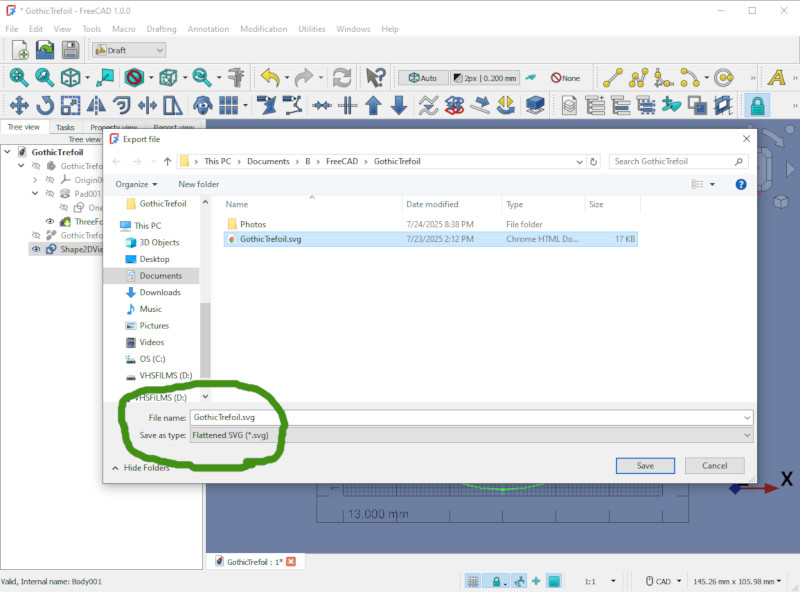
In the resulant File Export dialog, in Save As Type, choose Flattened SVG – not any other SVG format. This is also your opportunity to give the SVG file a reasonable name – I named it GothicTrefoil.svg
One last thing: the resultant SVG file is referenced to the upper-left of the design rather than the center of the design. We’ll use Inkscape to fix this issue.
Open the SVG file in Inkscape.
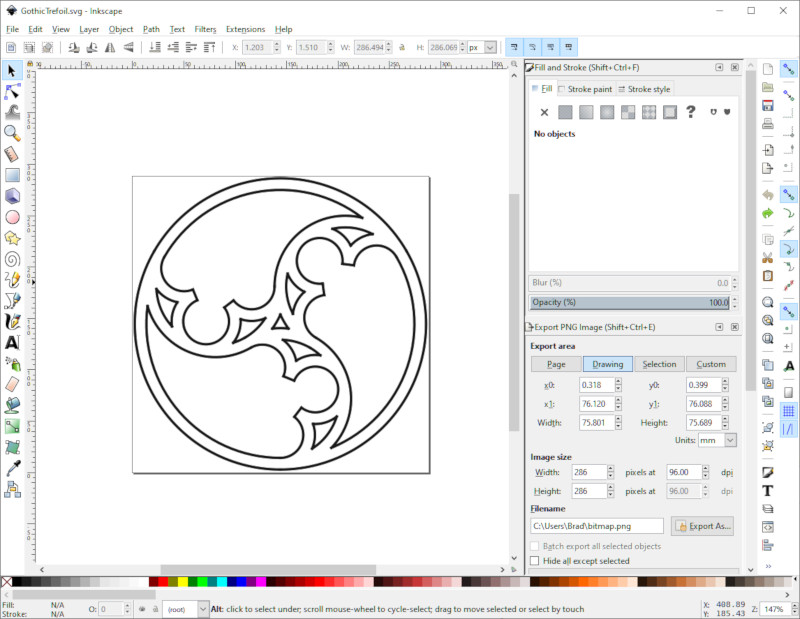
Drag the design so that its center is at the upper-left corner (coordinate 0, 0) of Inkscape’s paper.
Then File / Save

Congratulations! Now you’re design exists as an SVG file that you can treat like any other SVG file. For example, you can read the companion post that explains the process of Importing a Decorative SVG File into FreeCAD.
Have corrections or comments? Join the conversation at my BlueSky post about the Gothic Trefoil design or contact me through the social media links at the left.