
This page describes how to create the cover for a book you will distribute through CreateSpace, using the image editor Gimp. If you instead use Adobe Photoshop, you will find the operations similar, but the details will be different from what I describe here.
Gimp is an open source image editing application, with many features similar to those of Adobe Photoshop. I prefer Gimp because I prefer open source applications to proprietary applications, and because I’m not a professional graphic artist I don’t feel I’d benefit from Photoshop’s more powerful features.
You can find plenty of advice on how to compose the image of yourbook cover in Gimp by searching the net for “Createspace cover Gimp” or such. What follows is the process I prefer for getting the basic image ready to edit.
These instructions assume you have already downloaded your CreateSpace cover template file.
PDF size problems
I use Gimp 2.8.22 to import template .png files and export the resulting covers to PDF files. I’ve sometimes found the exported PDF, when imported back into Gimp, is one pixel narrower than required: for example, 3550 pixels instead of 3551 pixels. Based on my experiments, I have several pieces of advice – really just superstitious behaviors – that seem to avoid the problem. Your results may vary, depending on which version of Gimp you use, and your particular habits.
If you want to understand the nitty-gritty details of the problem, see my post about cover art size issues.
- Never click in the size or resolution fields in the Image / Canvas Size…, Image / Print Size…, or Image / Scale Image… dialogs. If you click in one of those text fields, Gimp seems to recalculate the others, which can introduce size errors into your exported PDF.
- Restart Gimp before you export your final cover PDF. I noticed that restarting Gimp seemed to avoid the size problem.
- Start with the template .png file. That is, do not create a new file from scratch, and do not start with the template pdf file. Your cover creation workflow should be that the template .png becomes a Gimp .xcf file, which you edit, then export as a PDF. It seems that the template .png file contains the resolution as well as the size in pixels of the image, with values that CreateSpace wants. If you start from a blank Gimp file and set the pixels size and resolution, the numbers may not come out correctly.
Measure the required print size and image size
You will use these measurements to double-check the size of your finished cover before exporting to PDF.
- Start Gimp
- Select File / Open
- Select the .png template file you extracted earlier. Don’t use the extracted .pdf file, because starting from there may introduce size errors later on.
- Select Image / Print Size…
- Do not click in the text fields of the resulting dialog . Clicking seems to introduce size errors later.
- Write down the Width and Height (in inches) from that dialog. For our example book, the cover has a 11.837″ Width and 8.750″ Height.
- Click the Cancel button to close the Print Size dialog. Do not click OK, which may introduce size errors later.
- Select Image / Scale Image…
- Do not click in the text fields of the resulting dialog.
- Select, in the Image Size part of the dialog, “px” (that is, Pixels).
- Write down the Width and Height (in pixels). For our example book, the cover has a Width of 3551 pixels and a Height of 2625 pixels.
- Click Cancel to close the Image Size dialog.
Start with the Template .png as a Gimp Layer
- Start Gimp
- Select File / Open
- Select the .png template file you downloaded earlier. Don’t use the extracted .pdf file, because that can introduce size errors later.
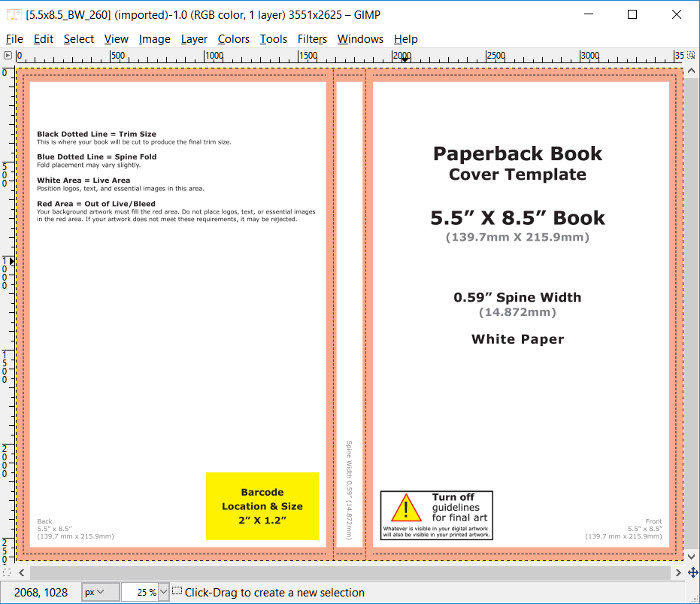
Template imported into Gimp - Erase (fill with white) all the text except the yellow Barcode block.
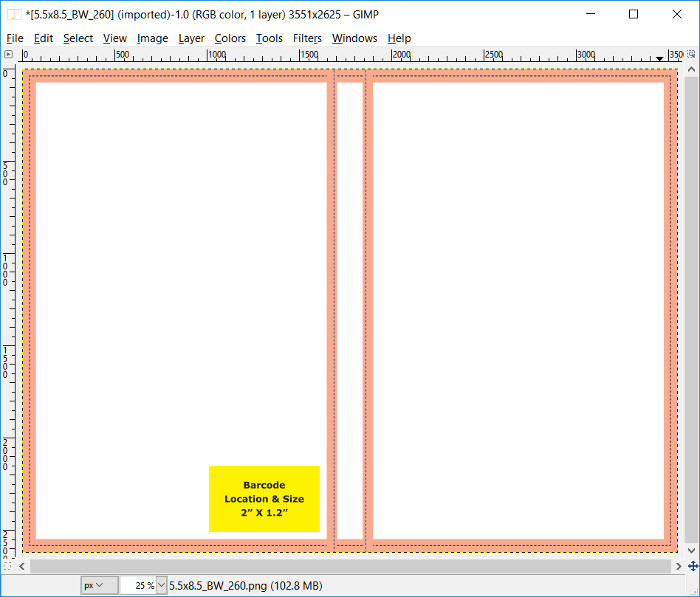
Template with the text removed - Select Layer / Transparency / Color to Alpha…
- In the resulting dialog, click the solid colored rectangle just to the right of the From: label.
- In the resulting dialog, make sure the R, G, and B values are 255, 255, 255.
- Click OK to close the Color Picker dialog.
- Click OK to close the Color to Alpha dialog.
- Notice that everything in the template that used to be white is now transparent (represented by a checkered pattern).
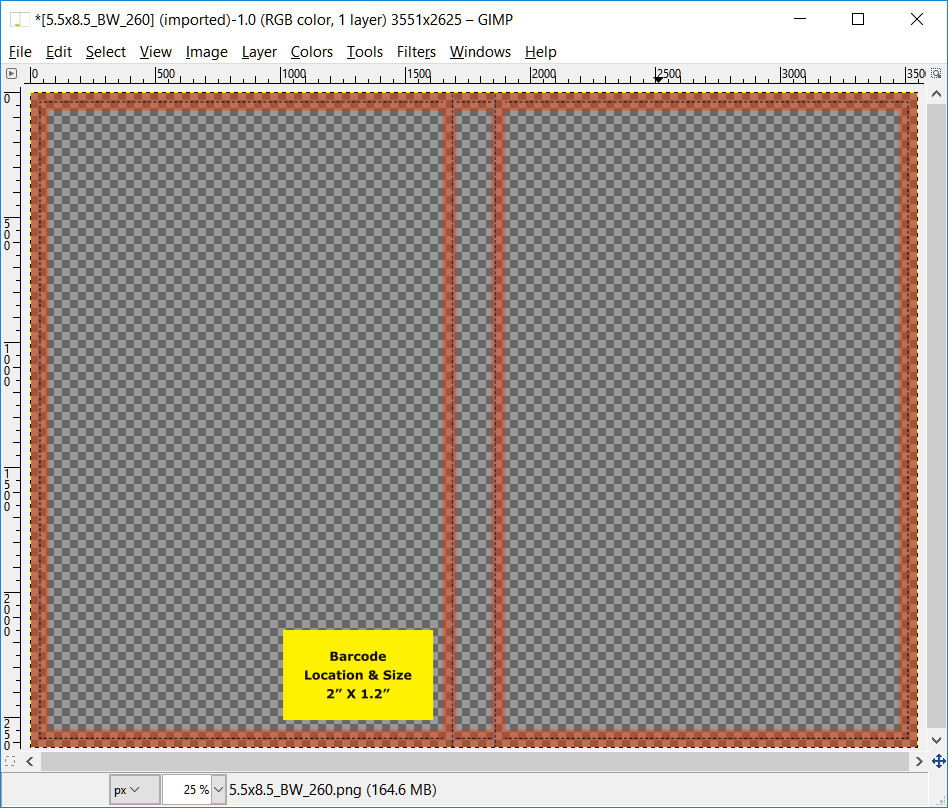
Template with white changed to transparent - Select Layer / New Layer… This new layer will eventually be the background layer for your cover art.
- In the resulting dialog, under Layer Fill Type, select Transparency (or whatever you like for your cover editing). You may also wish to give the new Layer a name, such as “Background“.
- Click OK
- In the Layers – Brushes panel, drag the template layer upward so that it’s the topmost layer. As you add layers later, keep the template as the topmost layer, so that you’re always looking through the template into your cover art.
- In the Layers – Brushes panel, click on the layer you’ve named Background.
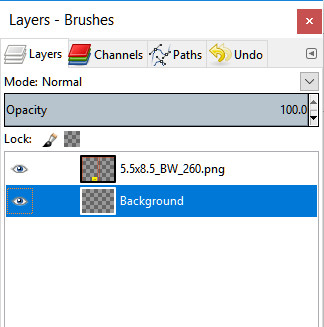
Rearranged Layers, with Background selected - Now is a good time to save your Gimp (.xcf) file. Use this .xcf file as the starting point for any cover you want to create for this particular edition of this paperback book. Note: if you change the number of pages in your book, you’ll need to repeat all the steps above to start over with a new template file.
Now you can edit your book cover, and you’ll see the template on top of that cover. Any area that is transparent in the template is a safe place to put images and text; any area that is isn’t transparent in the template is an area that you shouldn’t put important text or images into. In producing the physical book, CreateSpace will trim (edges), fold (spine), or cover (yellow barcode area) those non-transparent areas.
Whenever you want to see what your cover-in-progress looks like without the template, click the eye icon for the template layer in the Layers – Brushes panel.
Again, while editing your cover, never click on the text fields in the Canvas Size, Print Size, or Scale Image dialogs. Clicking in those fields seems to cause Gimp to recalculate the image size or resolution, which can introduce size errors later.
CreateSpace has a helpful description of The Top 10 File Review Rejection Reasons, which contains a link to the downloadable CreateSpace PDF Submission Specification, whose Cover Specification section gives detailed requirements for your book cover PDF file.
Export your finished cover in PDF format
Once you’ve finished editing your cover image and are happy with it, you’ll want to export your image as a PDF file that you’ll eventually upload to CreateSpace. You’ll likely also want to export the image as a Jpeg (.jpg) format file, for other uses, such as putting a cover image on your web site.
To export your cover image in PDF and Jpeg in Gimp:
- If Gimp is running, exit Gimp. I’ve found doing this seems to minimize the chance of introducing size errors into the finished PDF file.
- Start Gimp.
- Select File / Open
- Select the Gimp .xcf file that is your saved, finished cover.
- Click Open
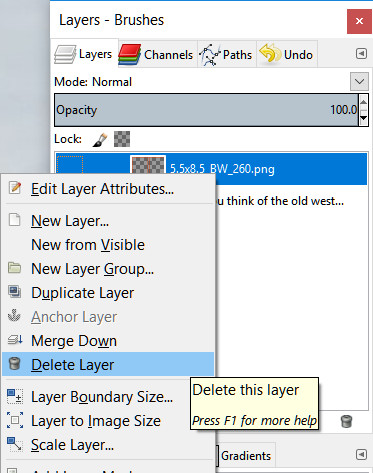
- Delete the Template layer: In the Layers – Brushes panel, right-click on the template layer and select Delete Layer:
Delete the Template Layer - Delete any other layers that you don’t want to appear in your cover, such as other ruler lines and positioning grids.
- Un-hide all the layers that you want to appear in your cover, by clicking the eye icon for that layer in the Layers – Brushes panel.
- Select Image / Flatten Image. You do this to meet part of CreateSpace’s cover specification: that the PDF should contain only one layer.
- The resulting view in Gimp is what your final cover will look like:
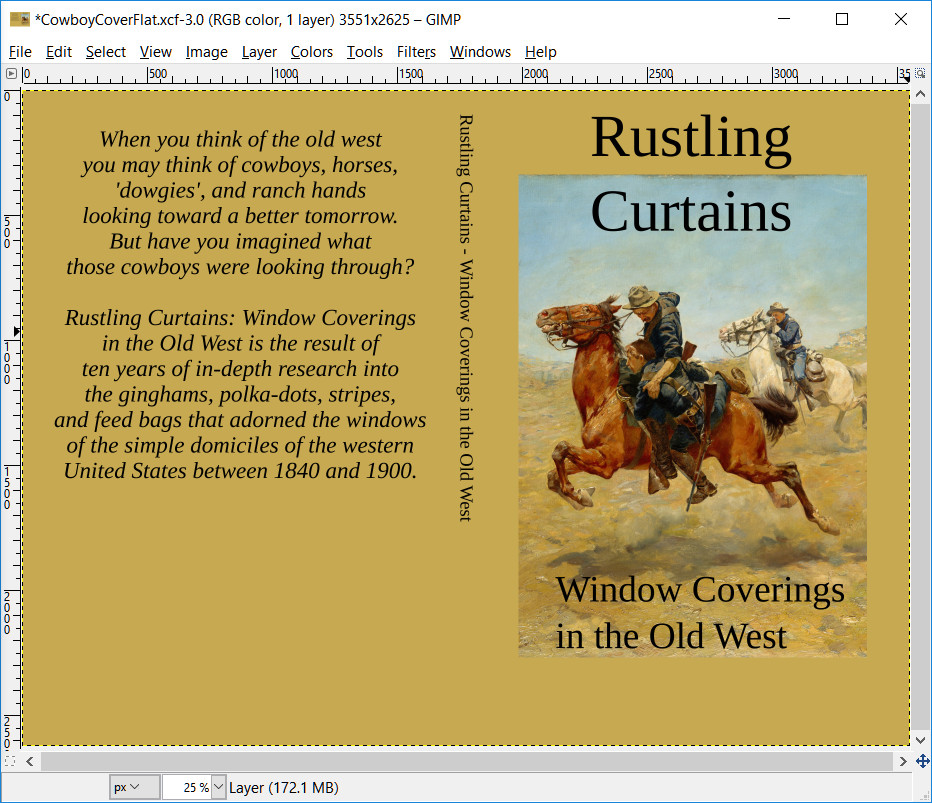
Flattened Cover Image - Double-check that the image size in pixels still matches the measurements you made of the template file: select Image / Scale Image… as you did when you measured the size of the Template file. Again, don’t click the text fields in that dialog, and remember to click Cancel rather than OK, to avoid size errors.
- Export the jpeg-format file: Select File / Export…, choose the folder to save the jpeg in, and type the new filename of the jpeg file. NOTE: be sure to type the extension (the last letters of the filename) as “.jpg” so that Gimp knows what format to export the file in. Some people believe that saving the file in Jpeg format is necessary before you save in PDF format – I’m not sure about that, except that saving in Jpeg does no harm.
- Click Export
- Double-check that the print size in Inches and the print resolution in pixels/inch matches the measurements you made of the template file: select Image / Print Size…, as you did when you measured the size of the Template file. Again, don’t click on the text fields in that dialog, and exit the dialog via Cancel rather than OK.
- Export the PDF-format file:
- Select File / Export…, choose the folder to save the PDF in, and type the new filename of the PDF file. NOTE: be sure to type the extension as “.pdf” so that Gimp knows what format to export the file in.
- In the resulting dialog, un-check “Apply layer masks…“, “Convert bitmaps to vector…“, and “Omit hidden layers and layers with zero opacity“.
- Click Export.
- Wait for the export filename dialog to close; it may take several seconds, as Gimp generates the PDF file.
- Close the modified .xcf cover file without saving. You don’t want to overwrite your working file (the .xcf) with a version that lacks the template layer.
- Re-import the PDF, to double-check the size:
- Close whatever Gimp files are open.
- Select File / Open…
- Select the .pdf file you exported a moment ago.
- Click Open
- In the resulting dialog, click Select All. That should select the one page in the file.
- In that same dialog, change the pixels/in value to 300.000, then click on the Height value.
- The dialog Width and Height (in pixels) should update, and should now match the measurements you made earlier of the Template file.
- Click Import
- Once the file is imported, select Image / Scale Image…, to check the image size in pixels as you did earlier. The image size in pixels should match the measurements you made of the template file.
Next you’ll likely want to upload your cover to CreateSpace and finish submitting your book to CreateSpace. I’m in the process of writing pages covering those steps.
References
- Thanks to Elisabeth Niederhut for her concise and helpful video, How to Make a Book Cover for CreateSpace with Gimp.