After I’ve created an extruded Gothic Tracery design in FreeCAD, I like to Export the top Face of that design as an SVG file that I can use in other FreeCAD designs and in scrollsawing (the poor-person’s laser cutter).
I had such good luck swapping filament mid-print on my Prusa i3 MK3 that I thought I’d try the same on my Lulzbot Mini… with much less good luck.
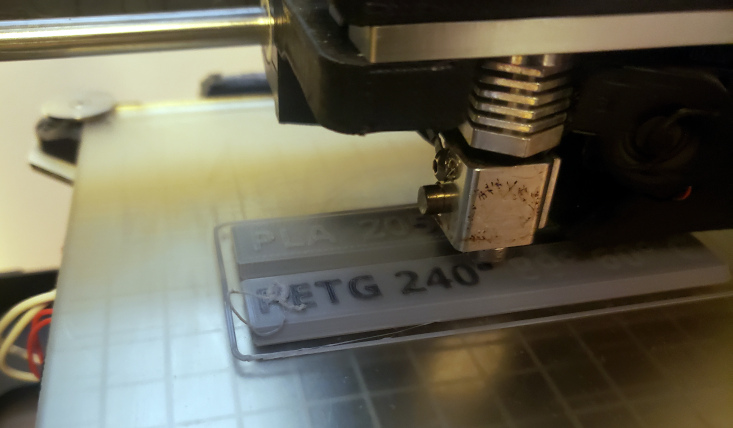
This post lists the ways I’ve tried to swap filament colors at a specific point in the print, using my Lulzbot Mini and CuraLE 4.13.4 and OctoPrint 1.9.3. Your experience may be different – I hope so.
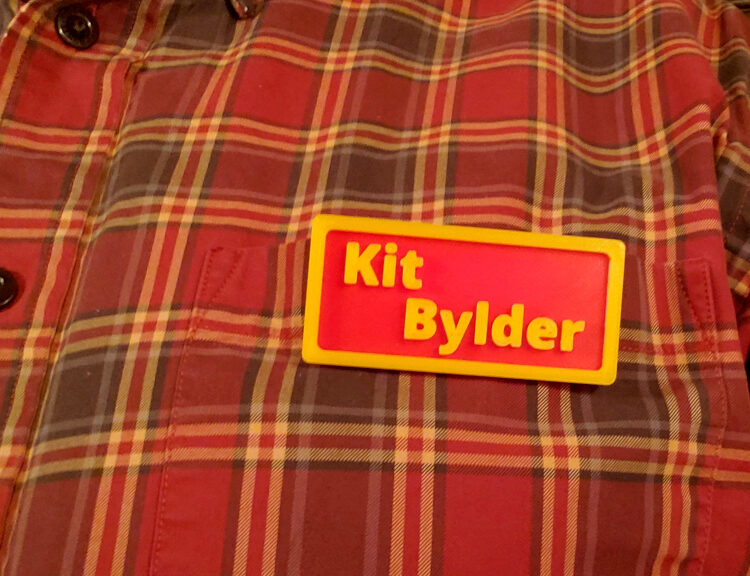
A few years ago at the Portland Oregon 3D printing Meetup, someone suggested we should all make our own name badges so Shashi wouldn’t need to bring as many “Hello, My Name Is” paper tags to the Meetups. A few weeks later I made a badge and a post on how to create your own, using the tools of the time.
This updated post walks you though the making of your own name badge in FreeCAD 0.21, which is a lot easier than it was in earlier versions of FreeCAD.
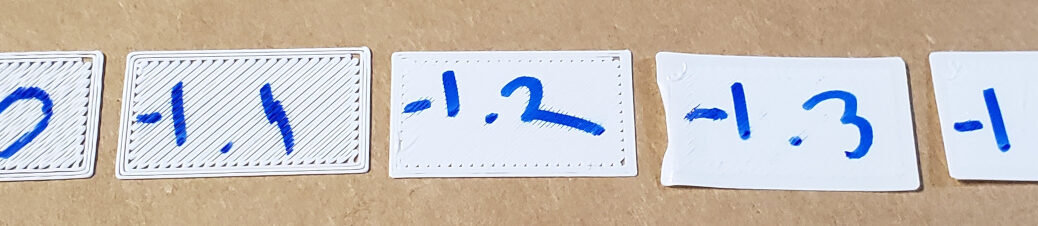
Five years ago I wrote a blog on testing the Z Offset on my Lulzbot Mini, Testing Your 3D Printer’s First Layer Height Calibration. Now that I’ve recently recalibrated my Prusa i3 MK3, I’m using a quicker method to set the Z Offset.
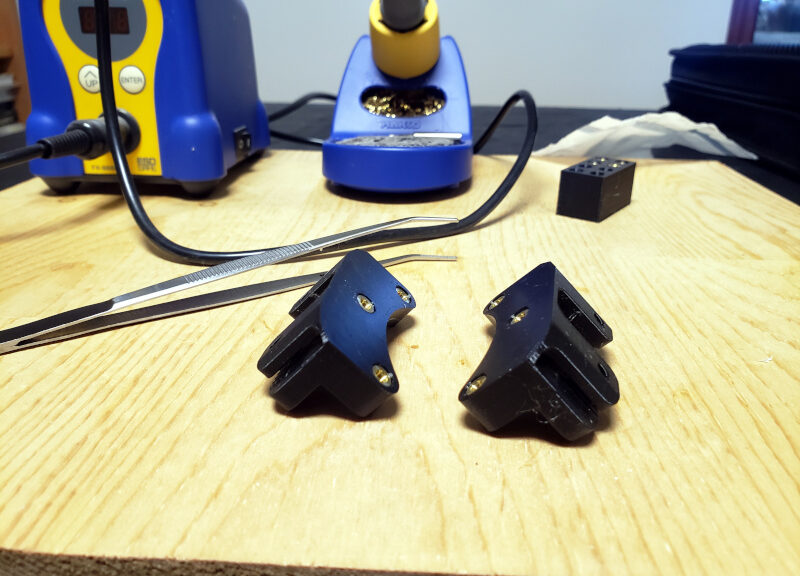
I recently replaced the belts on my Lulzbot Mini. What started off as a simple bit of work ballooned into somewhat more serious work because of a few mistakes I made. The Lulzbot Mini being open source – along with Lulzbot’s excellent documenation – made the repairs possible.
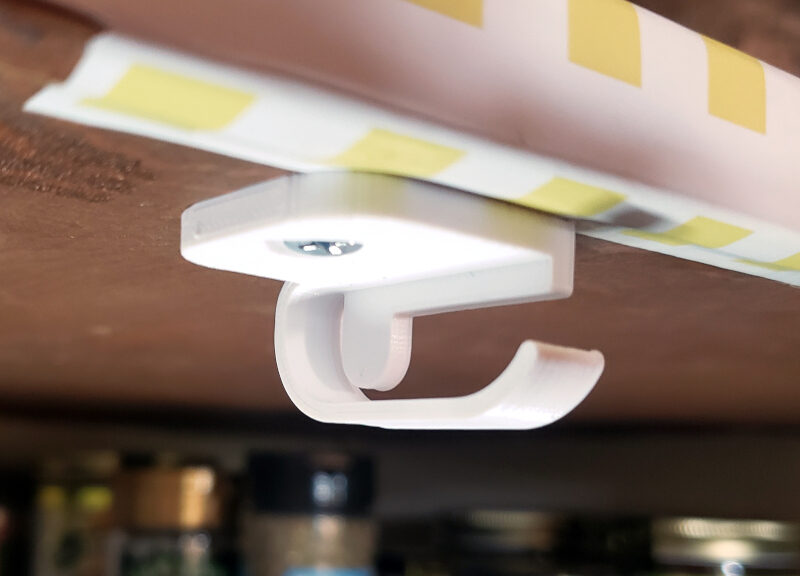
A while ago we bought rechargeable light bars for our pantry shelves, and we love them. The only problem was that because they were held to the underside of the shelf by weak magnets, every time we bumped a light or dropped a heavy jar into the pantry, the light would clatter to the floor.
This post covers my process of creating, in FreeCAD, clips that would hold the lights securely. I’m really pleased at how they turned out.
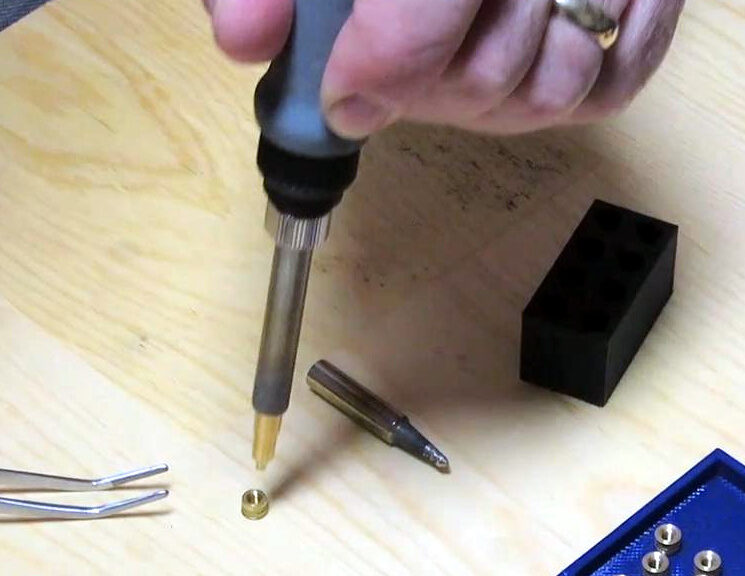
It’s time again for me to replace a couple 3D printed pieces of my Lulzbot Mini printer, so I’ve captured the details here of melting heat-set inserts into PETG 3D printed parts.
I recently found my 2016 Lulzbot Mini 3D printer wasn’t printing the sides of models accurately: when I tried to print a box and lid pair, the lid was too small to fit the box. This error worried me, because the last time that problem happened it was the fault of stress fractures in the Y carriage supports, which took a lot of time and money to repair.
I recently needed to print a replacement door for the Whirlpool dishwasher’s detergent dispenser. This post details my adventure, which took three prints to get it right.
LATE UPDATE: Prusa’s excellent post on food safe printing basically says ABS = bad and that it’s really hard to make a safe 3D print regardless of the type of filament. In my opinion, you’re probably better off buying the Whirlpool replacement part rather than printing something that will harbor bacteria and fungi.