Previously I finished the labels for the glockenspiel. In this post I literally Finish the case.
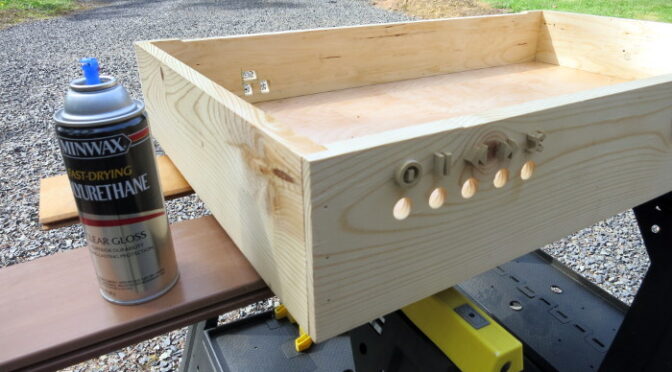
Last weekend and this weekend are nicely warm enough, so I’ve put a few coats of Minwax gloss polyurethane finish on the Robotic Glockenspiel case. In a few days the finish will be dry, and I can do the final fine-sanding (to remove dust captured in the Finish) and assemble the thing.
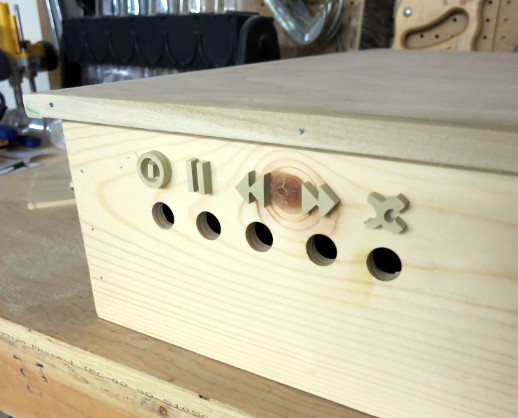
Since trying out woodburned labels, I made another attempt at scrollsawing the button labels for the Robotic Glockenspiel, and am happy enough with the results that I’ve glued the labels to the glockenspiel box. I’m so happy to have finally made up my mind – whew!
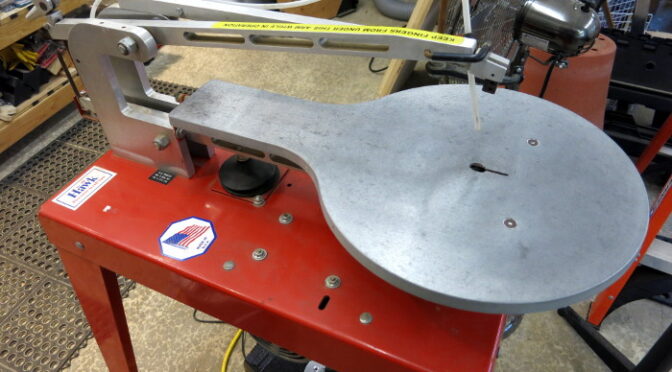
So this blog is a sort of “How to Scrollsaw” in a nutshell.
Since putting a lid on the glockenspiel case, I’ve been wrestling with exactly how to label the robotic glockenspiel buttons: If I had a laser engraver I probably would have engraved (woodburned) the labels on; sticking paper labels on could look pretty sloppy; decals sounded like a production of their own, with the risk of gumming up my printer; painting the labels would require a steady hand; woodburning by hand is another option; so is gluing on scroll-sawn raised labels.
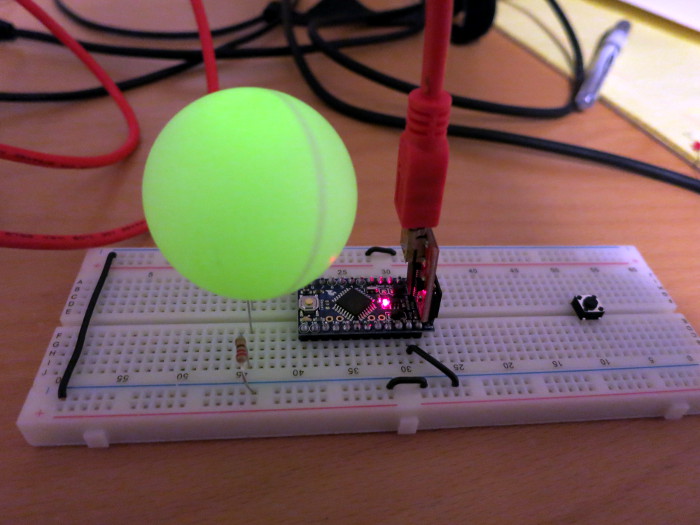
Some time ago I read that you can use a ping pong ball to soften the harsh light of an LED, so I thought I’d try it out.
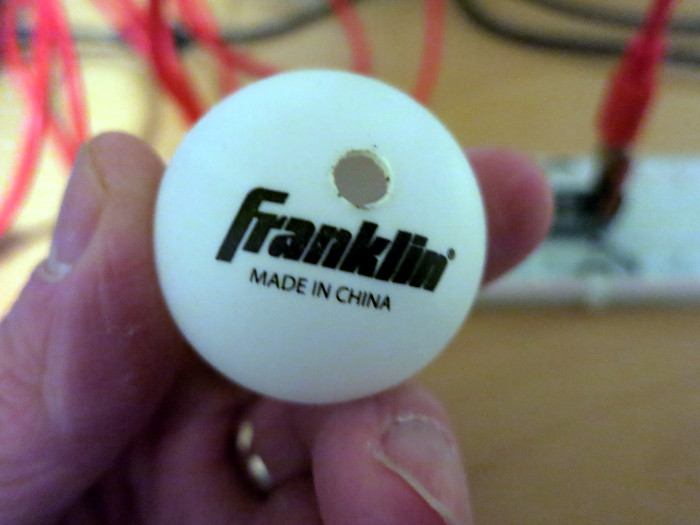
Step 0: pick out a white ping pong ball. I used a standard 40mm ball; I could have used a 35mm Foosball instead.
Step 1: make a hole in the ping pong ball to hold your LED. For a 5mm LED, an ice pick heated on a stove top is an handy tool for making that hole. I haven’t tried a drill press, but that seems another possibility.
Ping Pong ball with hole for LED
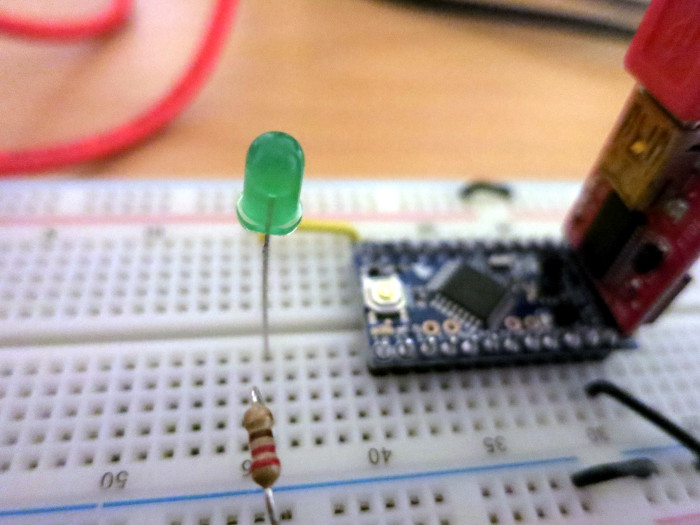
Step 2: set up a circuit to blink an LED, perhaps using an Arduino Pro Mini.
LED ready for the ping pong ball diffuser
Step 3: press the ping pong ball onto the LED. For a more permanent mechanical connection, you could glue the LED into the ping pong ball using a hot glue gun.
Step 4: Enjoy the magical, diffuse light of the LED in the ping pong ball. You may need to turn out the lights to see it well. Have a look at my Blinking Ping Pong Ball LED video of the result.
So a ping pong ball really is a quick and easy light diffuser for your LEDs – disco time! …or you can paint pupils on them to create blinking night-creature eyes as in this Hidden Creatures Arduino & LED Blinking Eyes Kit video.
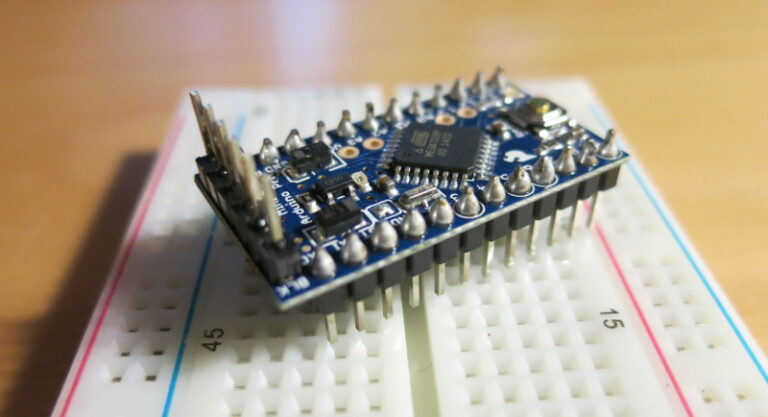
I recently decided to try out the Sparkfun Arduino Pro Mini 5V board. It has almost all the I/O that an Arduino Uno has, in a much smaller board. It comes without connectors, so you can solder in whatever style connector you need. For my uses, I needed to solder on male headers that allow it to plug into a breadboard.
So I tried out a new way of soldering male header pins onto a board. First I snapped off two 12-long headers from a strip of break-away male headers. Then I plugged those headers into a breadboard and laid the Arduino Pro Mini board over them. To keep the flux and solder spatter from getting into the breadboard holes, I put a piece of paper over the unused parts of the breadboard.
Since fixing the sound of the chimes, I’ve been finishing the software for the glockenspiel. Now all the buttons work: on/off, play/pause, skip back, skip forward, and shuffle. Woohoo!
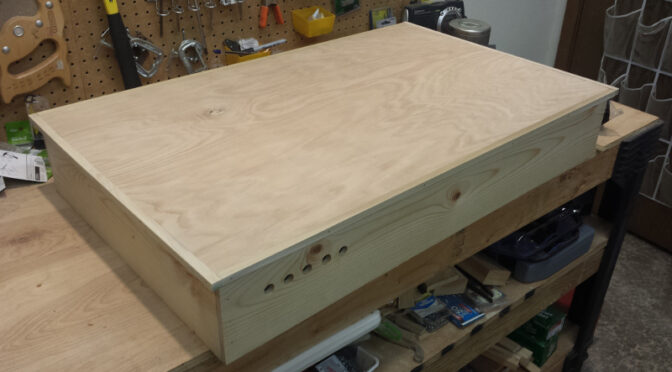
Today I made the lid, attached the molding on the edges of the lid, attached the piano hinge and attached the side hinges. It’s not fine furniture, but I’m learning a lot about how to make The Real Thing. For example, don’t sand the wood with the sandpaper you used to remove rust from your new scrollsaw (ouch!).
All the hardware (except the front latch and the feet, which should install easity) is now installed. So now I’ve taken all the hardware off so I can easily do the labels and spray the finish.
Next I plan to label the buttons – I plan to try woodburning – the end is in sight!