

Often I have a decorative design that I created in Inkscape, and want to emboss or engrave that design into a FreeCAD Body.
This post describes, step-by-step, how I Import a Gothic Tracery design and emboss it on a simple block, in FreeCAD 1.0.
I created this Gothic Trefoil design using FreeCAD 1.0, then Exported it as an SVG file. A companion post explains the process of Exporting a FreeCAD Body’s Face as an SVG File.
You can download this design from my Cults3D Post: Gothic Tracery Trefoil decoration to emboss or engrave.
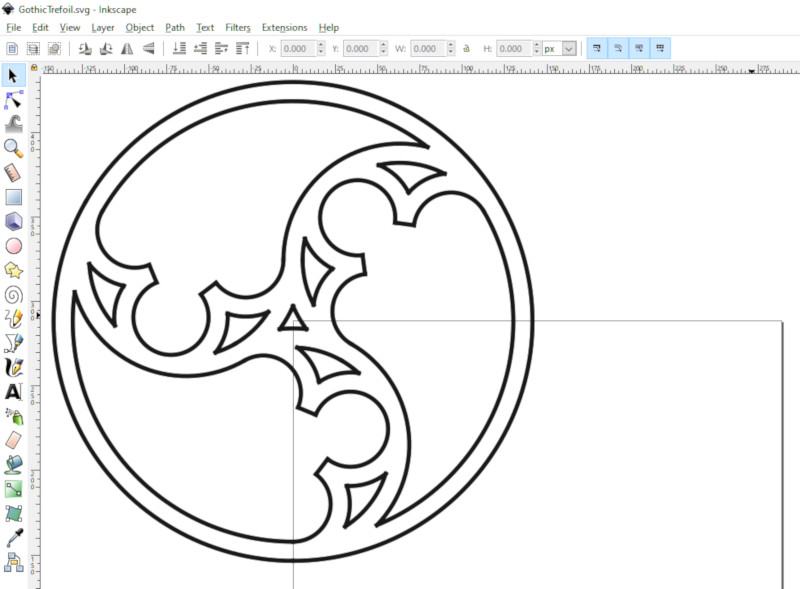
Note that in the above screenshot the design is centered on the upper-left (coordinate 0, 0) of Inkscape’s paper. I dragged the design to that position, then Saved the file,so that in FreeCAD I can scale the design without having to adjust its position.
Create a Body in FreeCAD
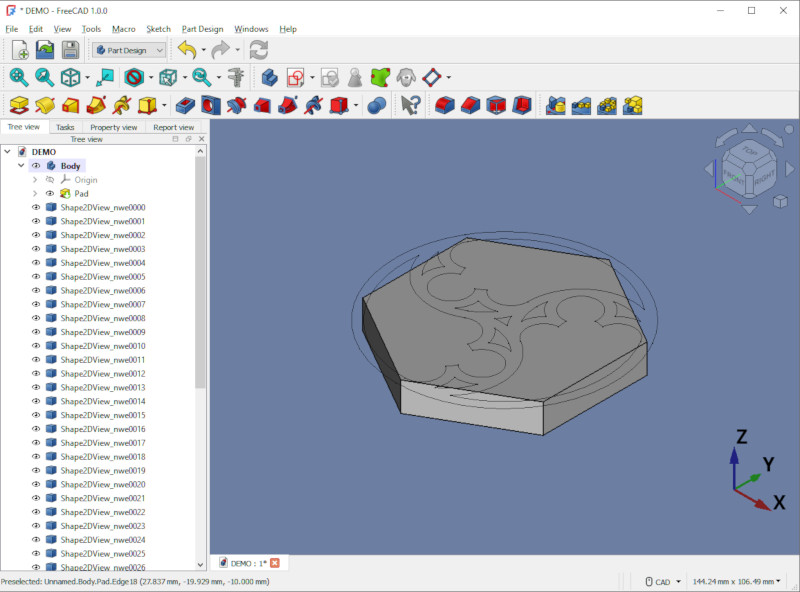
Design the FreeCAD Body that you’re going to engrave or emboss with the SVG file. For this example, I’ve created a simple hexagonal block, whose top Face is at the XY Plane (that is, Z=0).

Import the SVG File
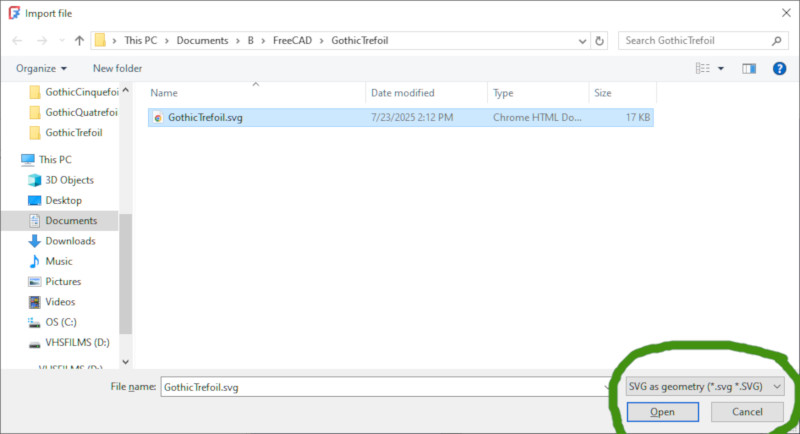
Still in FreeCAD, select File / Import… In the resulting Open dialog, select “SVG as Geometry” for the import type.
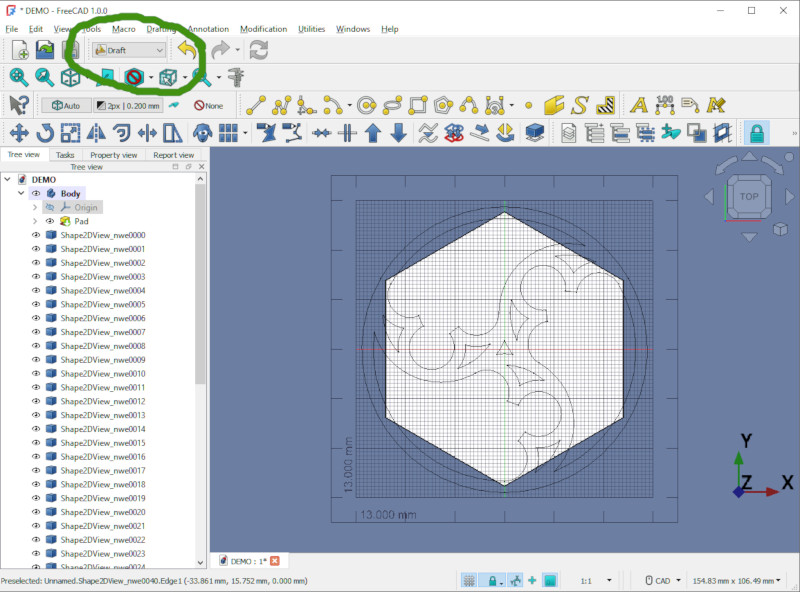
Now the SVG drawing exists in FreeCAD as a set of Paths. We need to convert those Paths to a Sketch.
Convert the Paths to a Sketch
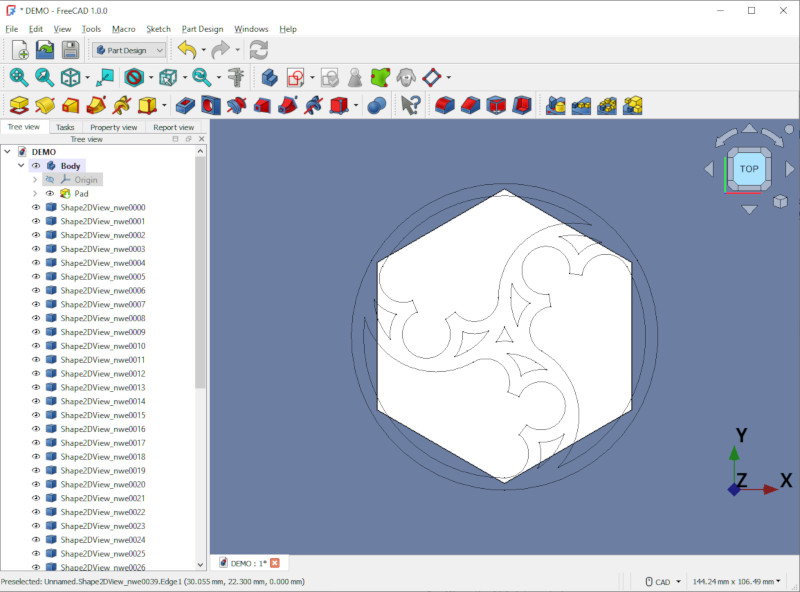
We’re going to use the Draft Workbench, but first we select the Top view, so that the Draft plane will be the XY plane.
Switch to the Draft Workbench.
Select all the imported Paths in the Tree panel (to the left), then click Modification / Draft to sketch
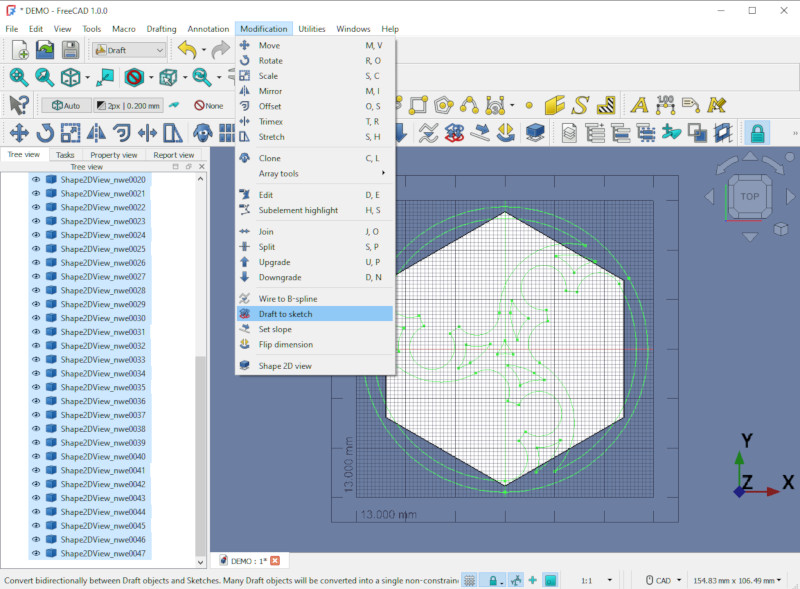
You can now delete all those selected Paths, leaving the resulting Sketch.
The resultant Sketch may have line endpoints that don’t quite match. These non-coincident endpoints make the Sketch not Closed, which will cause a failure if we try to emboss or engrave without fixing these errors.
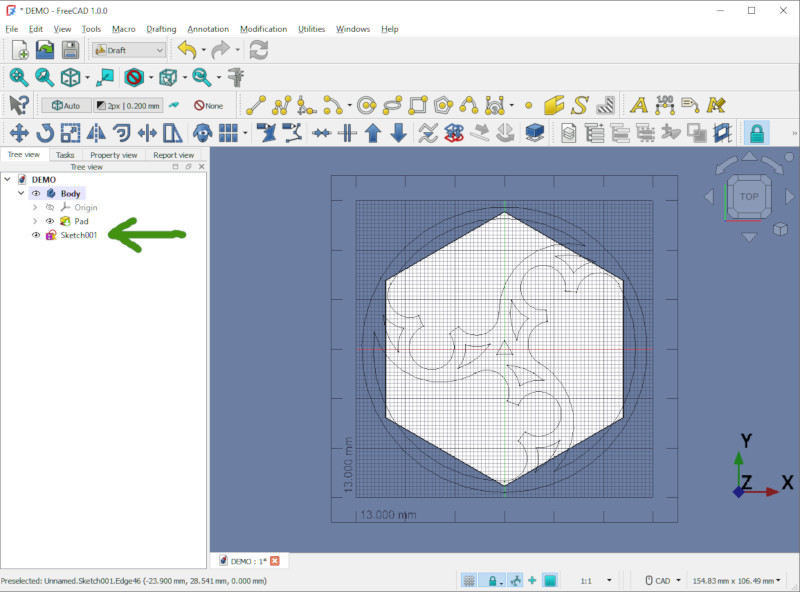
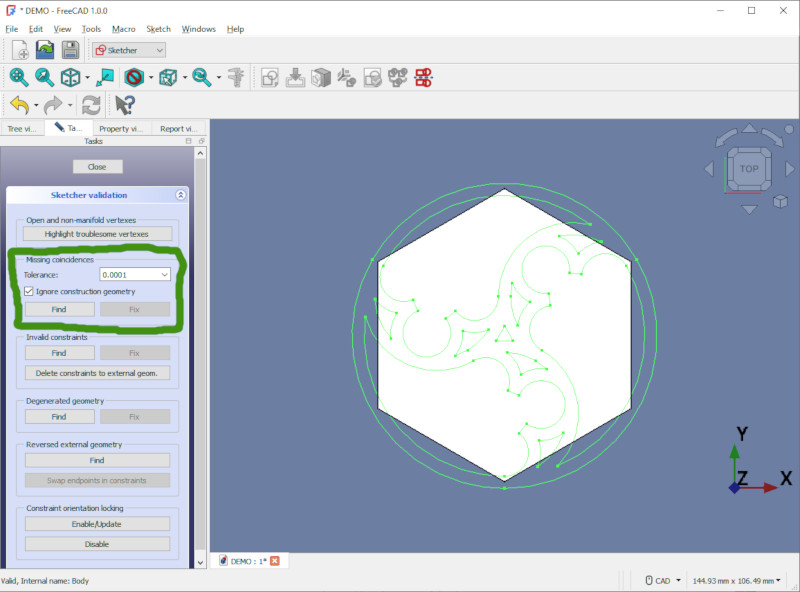
Correct Missing Coincidences
Switch to the Sketcher Workbench.
Select the Sketch in the Tree View (to the left).
Click Sketch / Validate Sketch…
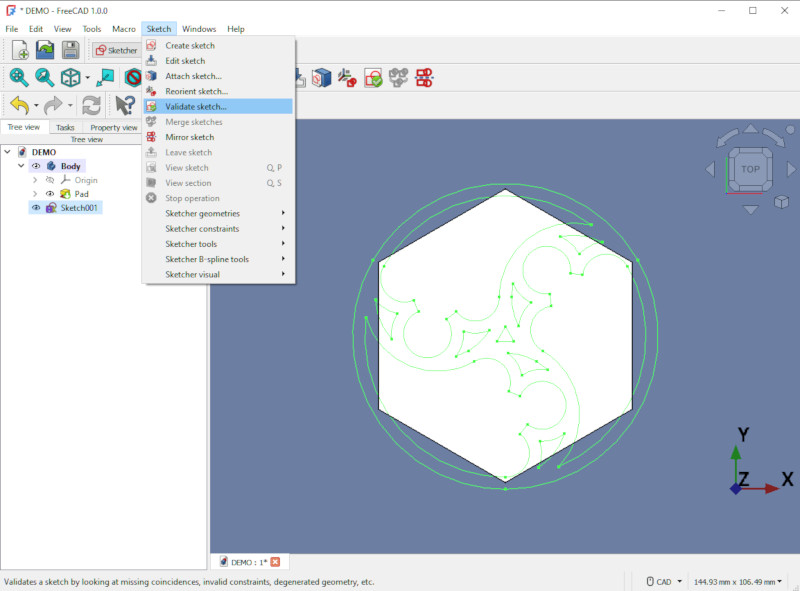
In the Validation Dialog, under Missing Coincidences, click Find, then click Fix, then click Close.
The Sketch is now usable as an ordinary Sketch in FreeCAD. We have a few more steps to do before we can emboss or engrave the Sketch in a Body.
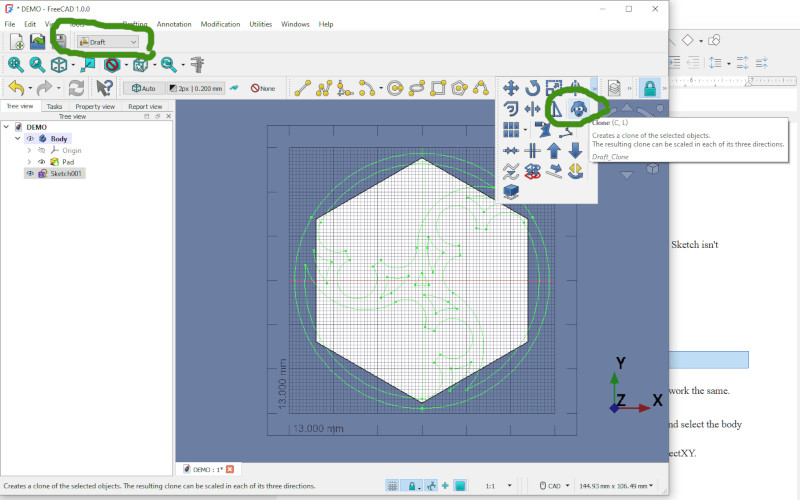
Attach a Clone of the Sketch to a Body
Imported designs are rarely exactly the size I need, and I don’t know a way to resize the Sketch. So I usually make a Draft Clone of the Sketch, which I can then scale to the right size.
Switch to the Draft Workbench.
Select the Sketch, then click the Clone icon (the sheep).
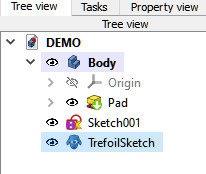
Now that we have a usable Sketch, I like to rename it to something meaningful. In this case I renamed it to “TrefoilSketch”.
Switch to the Part Design Workbench. That’s the Workbench I use the most.
Right-click on the cloned Sketch in the Tree View, and select Move Object to Other Body.
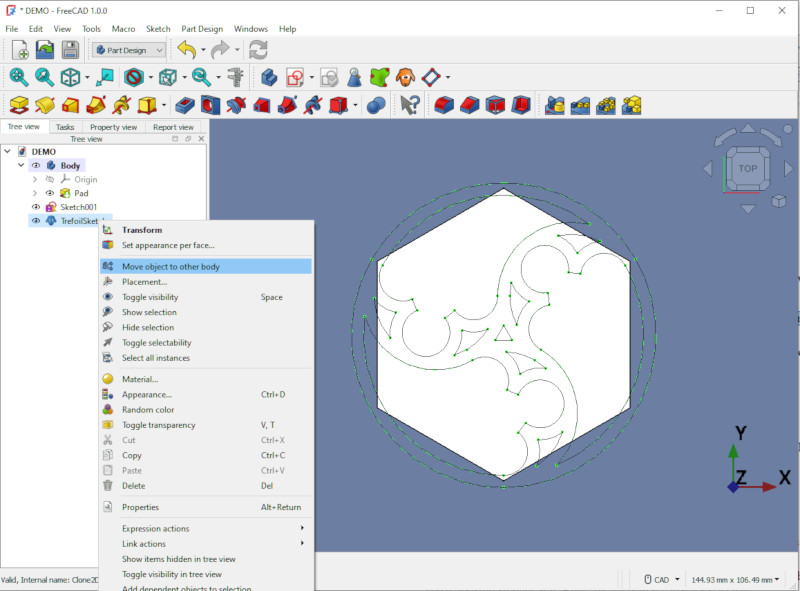
In the resulting dialog, click on the Body you want to move the Sketch to.

Next we’ll Attach the Sketch to that Body.
Select the Sketch, then look at the Property View for that Sketch.
In that Property View, under the Attachment section, find the Map Mode property. It will read “Deactivated”. Click on the Deactivated value, then click on the “…” button that appears.
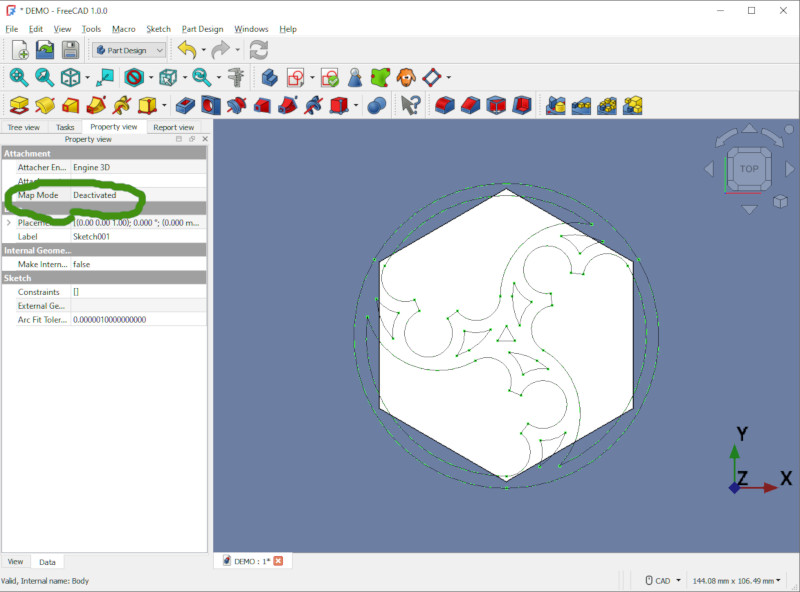
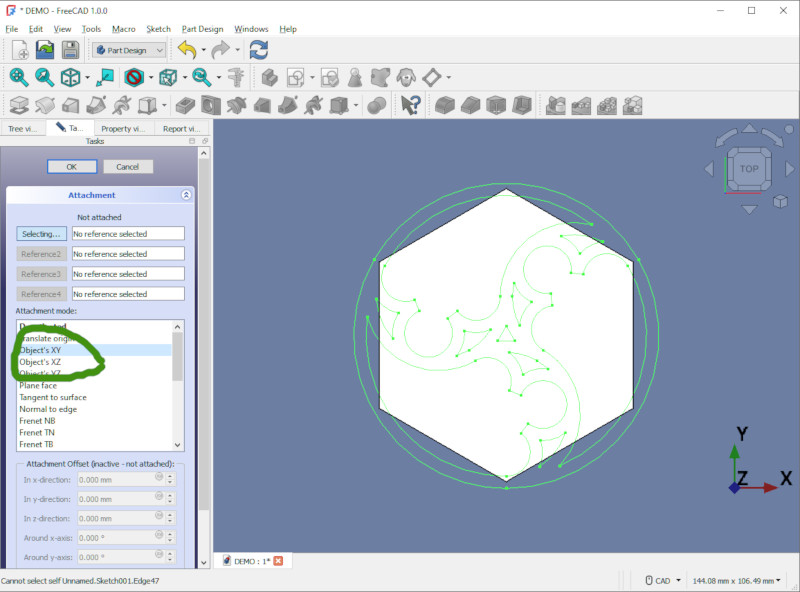
In the resultant dialog, choose how the Sketch will be attached to the Body. I confess I don’t know much about Map Mode, so I generally select “Object’s XY”. Then click OK.
Now our Sketch is (finally!) ready to use like an ordinary Sketch.
Emboss the Design into the Body
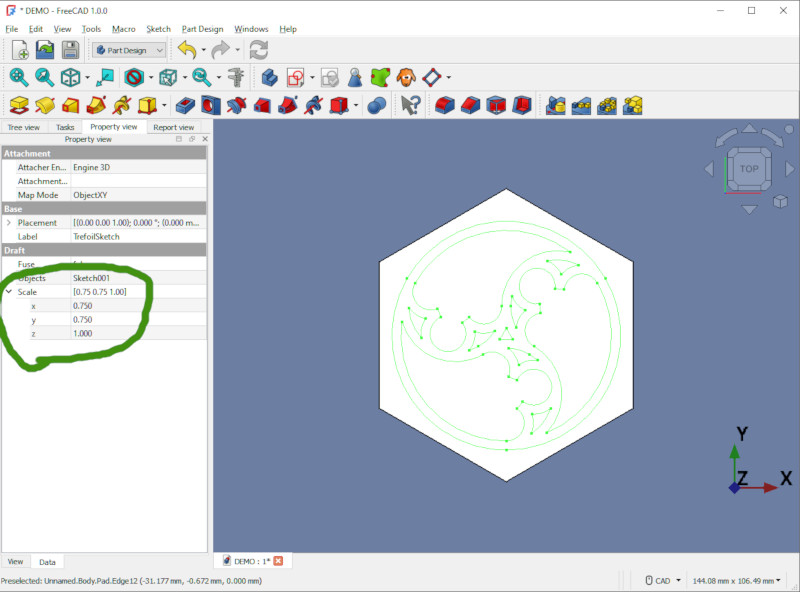
As you can see, the design is too large for the hexagonal block; we need to shrink it, using Scale.
Click on the TrefoilSketch in the Tree View, then open the Property View.
At the bottom of the Property View, under the Draft section, expand the Scale property. Then Adjust the X and Y scale until the Sketch fits nicely on the Body. For this example I used an X and Y scale of 0.75.
Now you can Pad (emboss) or Pocket (engrave) the design onto your Body.
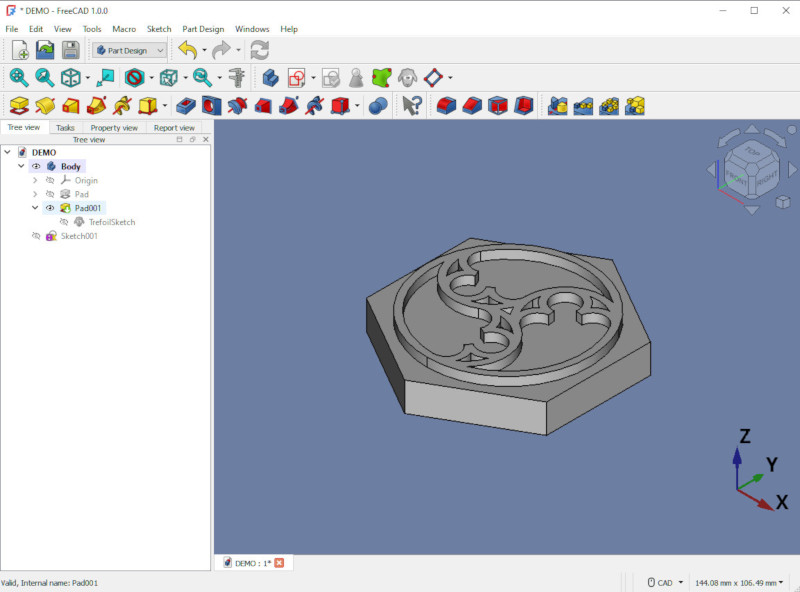
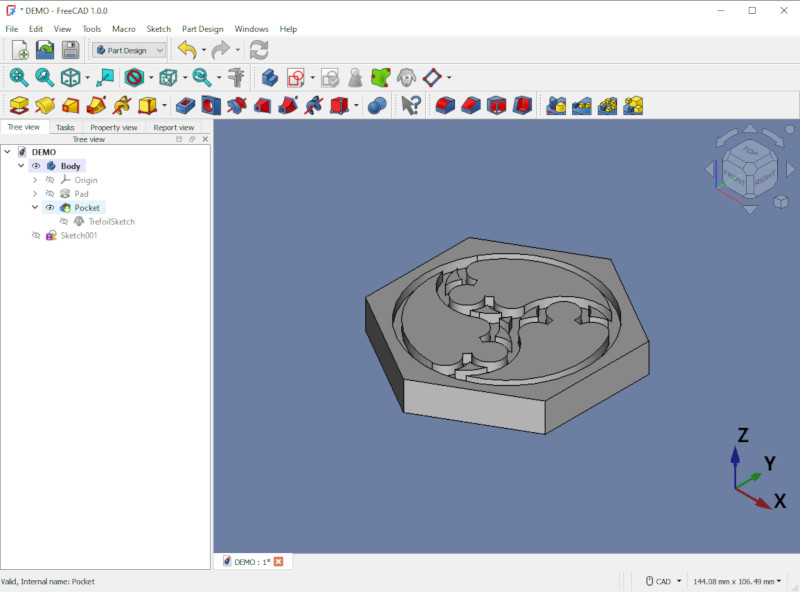
Congratulations!
Have corrections or comments? Join the conversation at my BlueSky post about the Gothic Trefoil design or contact me through the social media links at the left.