A while ago I bought a beat up cuckoo clock on eBay, to practice cuckoo clock cleaning and repair. Its face was missing most of its numerals. In this post, I describe how to use a 3D printed template to glue the numerals on a cuckoo clock’s face.
Preparing the clock
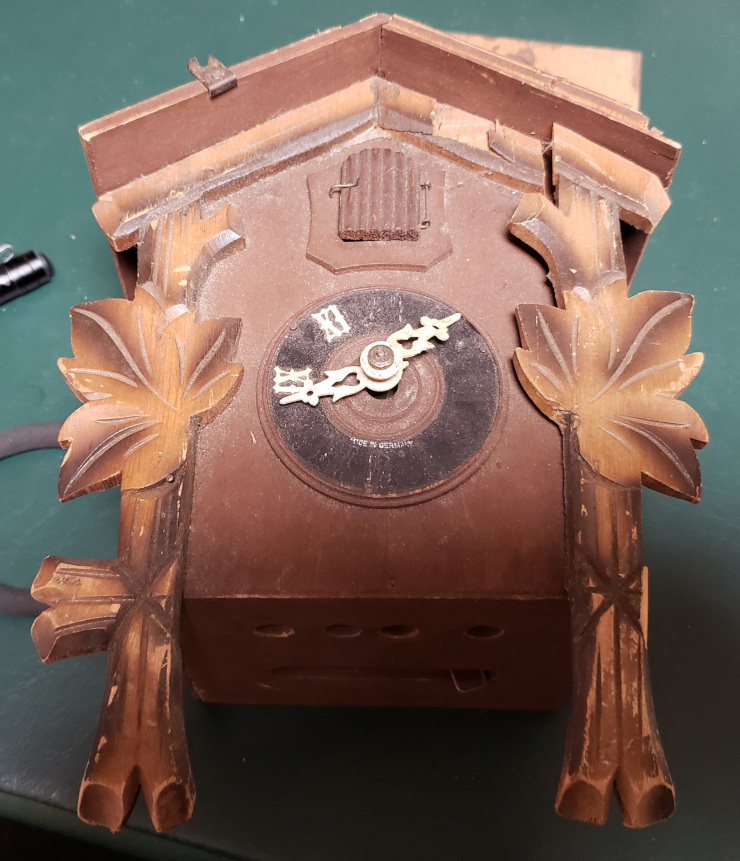
This clock had suffered a lot. As you can see, only the 9 (IX) and 11 (XI) numerals remain on the face, the minute hand is broken, and much of the carving is missing. It’s likely that all this damage happened when the clock fell off the wall – a common fate for cuckoo clocks.
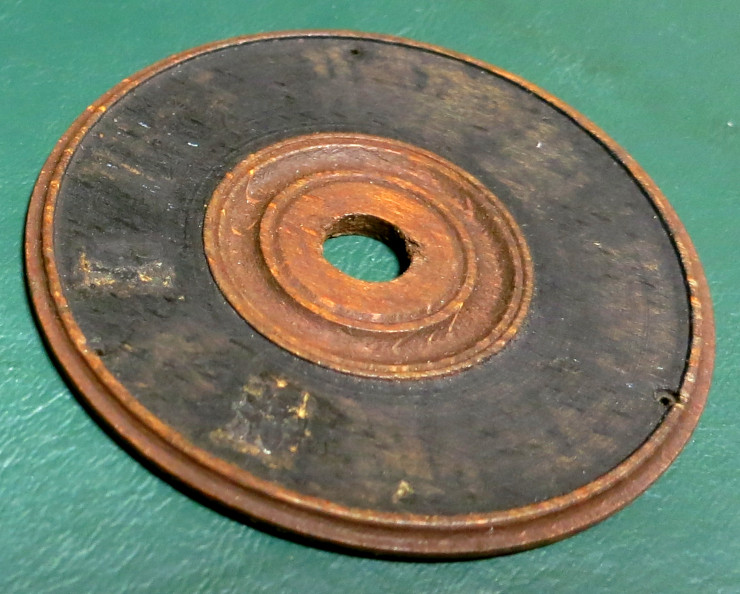
After I removed and cleaned the dial, and popped off the remaining two numerals with a hobby knife, the dial was ready for its new numerals. By the way, take a look at my post on Cleaning the Cuckoo Clock Case and Figures for more information about cleaning – and how cleaning can accidentally remove things like this face’s “Made In Germany” label.
I decided to replace the missing numerals with new, plastic ones. At first blush you may think plastic would be ugly, but it looks very similar to the original celluloid or bone numerals that were part of early cuckoo clock faces.
All I had to do was pick the right size of numerals from the selection of plastic cuckoo clock numerals offered by Timesavers.com. Fortunately I saved the two original numerals from this clock, and measured them at 11 mm tall.
Preparing the numerals
Once the numerals arrived, I was faced with a bit of a puzzle: the set of numerals comes in four identical strips of “VIIIIIX”. It took a bit of scribbling and guessing to decide where to cut the four strips to create the twelve numbers. I didn’t want to separate all the digits and have to glue them back together in the right order.
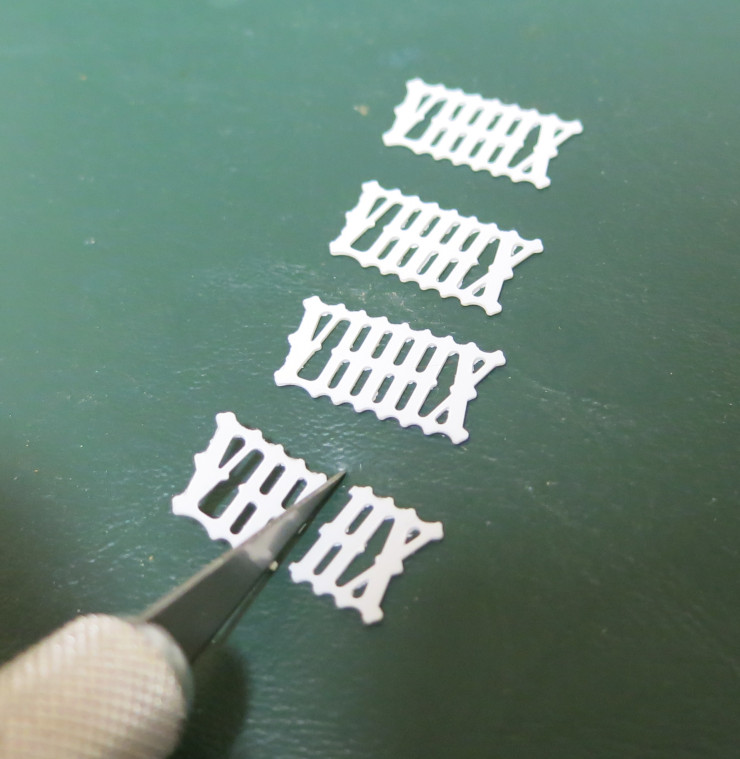
To see how to separate the numbers, let’s look at how the twelve hours on a cuckoo clock are represented in Roman numerals. Roman numerals are a sort of shorthand for tic marks: I represents one, V represents five, and X represents ten. IV or IX means one less than five or ten. So the twelve numbers on a clock are traditionally represented by the sequence I, II, III, IIII, V, VI, VII, VIII, IX, X, XI, XII. Notice that four is represented by IIII rather than IV – that’s a clockmaker’s tradition.
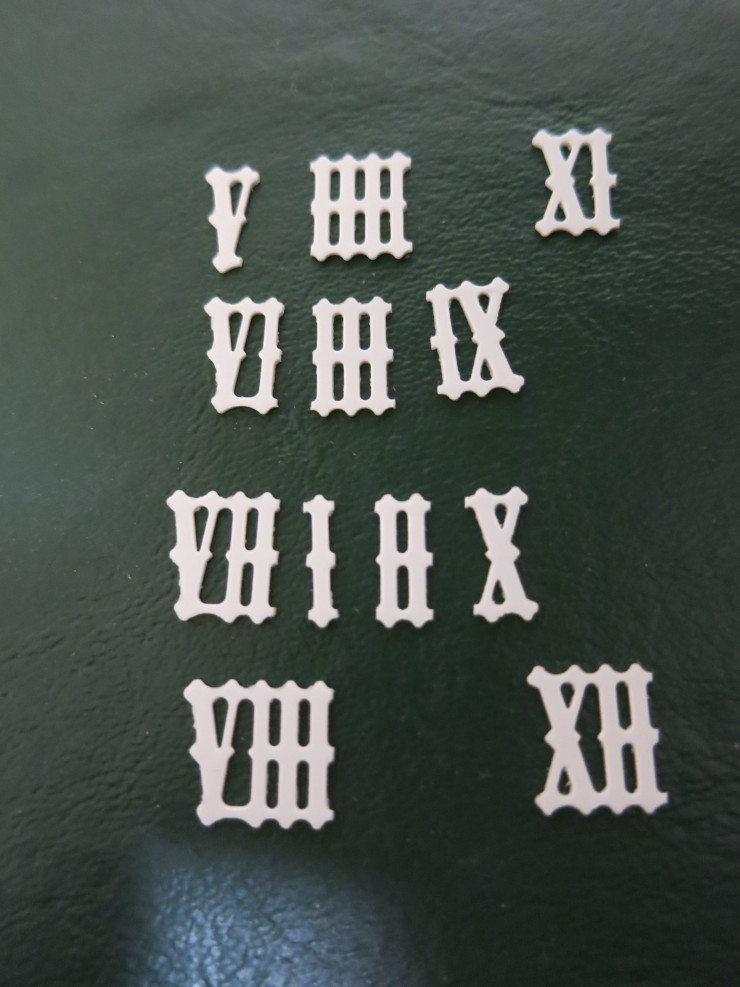
The trick of separating the four sets of numerals is that you can rotate any piece you’ve cut out. For example in the photo above you see IIX to the right of the knife blade. Turning this bit of plastic 180 degrees gives us XII; twelve. Armed with this trick you can separate the numbers…
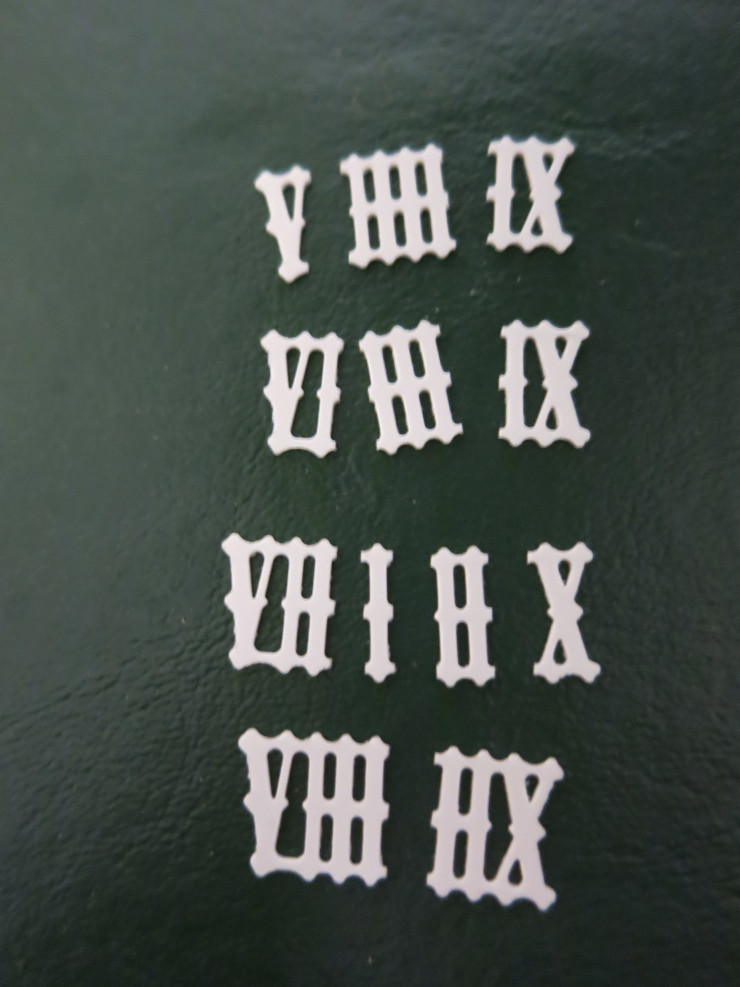
…then turn one of the IX’s and the IIX 180 degrees to give you the numbers one through twelve.
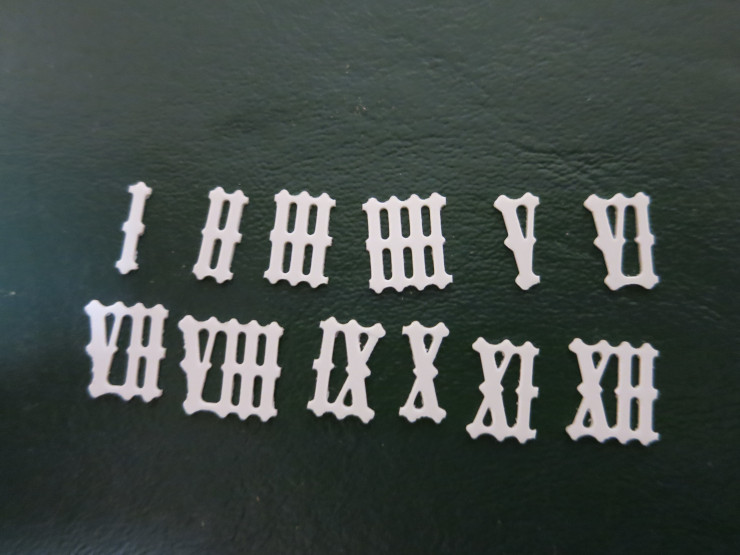
From there you can lay out the numbers in order, to make it easy to glue them in order.
Making the 3D printed template
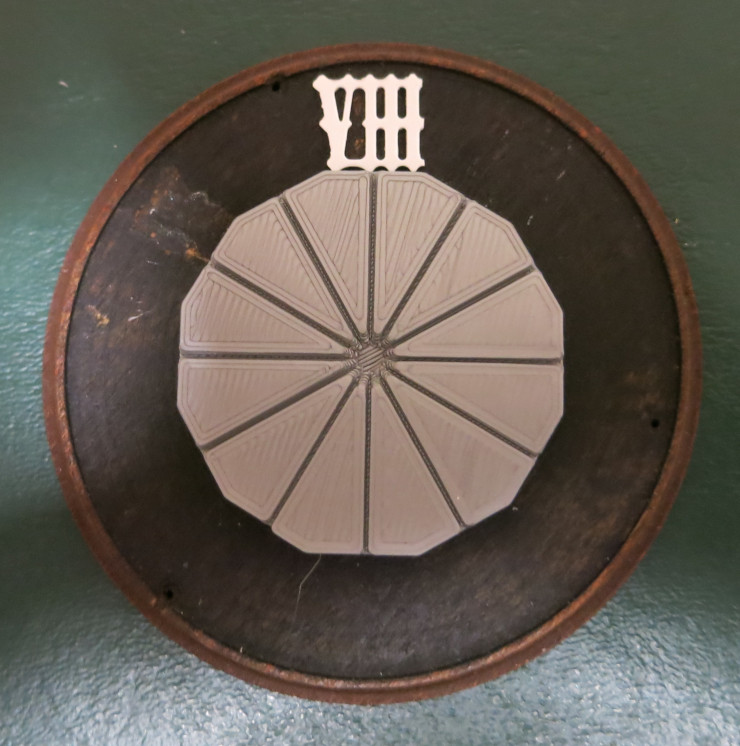
I suppose some clock repairers just lay out the numbers on a cuckoo clock’s face by eye. I instead designed a 3D printed template.
The template is a Regular Dodecagon. Each of its twelve sides is a base line for one of the twelve hours’ numbers. To help center each number left-to-right, there are twelve grooves, that split each of those base lines in half.
The template has a post on its back, designed to fit snugly into the center hole of the cuckoo clock’s dial, to keep the template from turning while you’re working.
You can download and 3D print Cuckoo Clock Numerical Gluing Guide from Cults3D. That listing also includes my FreeCAD design file, so you can easily create a template for any size cuckoo clock dial you like.
Gluing the numbers
To glue the numbers on my cuckoo clock, I used the following tools and supplies:
- The 3D printed template for my 70 mm dial.
- Tweezers, to place each number onto the dial.
- White glue, such as Elmer’s Glue-All. I used this glue instead of Superglue so some future clock repairer can remove the numbers I glued on.
- A small bottle cap, to hold a little bit of glue.
- Wooden toothpicks (cocktail picks), to apply the glue to the numbers.
- Paper towels, to clean up extra glue.
I started with XII and worked counter-clockwise to I, so that I would get practice with the easier, wider numbers before getting to the harder, narrow II and I.
Pick up a number with the tweezers, use a toothpick to dab a little – a very little – glue on its back, then press it into place using the template as a guide. On an NAWCC thread one person recommended “…use about 1/4 the amount [of glue] you want to!”
One tip: the numerals V and X have a front and a back – don’t accidentally flip them over. When looking at the front, the thick stroke goes from upper-left to lower-right, and the thin stroke goes in the opposite direction.
You can watch me using the template in my video, Gluing numbers to a cuckoo clock dial using a 3D printed template.
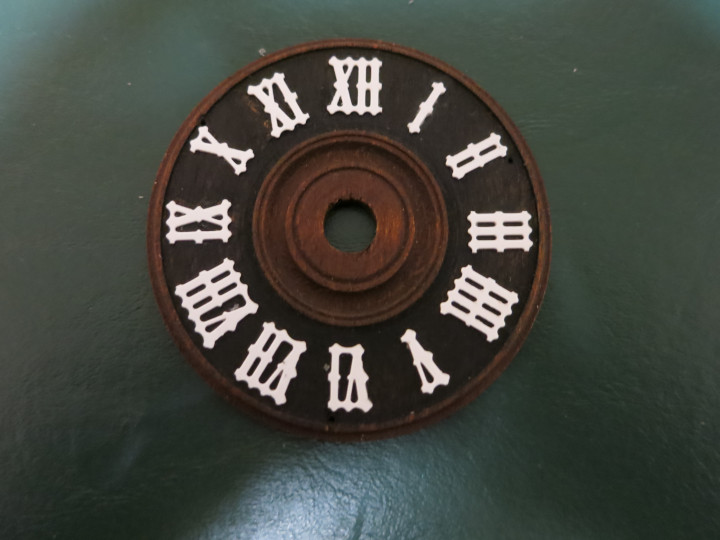
I’m really happy with how my dial turned out!