An older clock has usually spent years in the company of a smoker or near a smokey fireplace, accumulating layers of tar, ash, and who knows what else. A simple dusting or cleaning with a wood polish won’t necessarily remove these layers of smoke, so when it’s time to clean a vintage clock, it doesn’t hurt to clean the case as well.
A disclaimer before we get started: I’m a hobbyist – not a professional; test whatever cleaning process you choose on an inconspicuous part of the clock first. Cleaners that can remove oil and grease often totally remove pencil and ink markings and fragile paint that you may want to keep. The Nawcc.org message boards record sad experiences of hobbyists – and even pro’s – who have accidentally erased dial numerals and makers’ markings, ruining the clocks they were working on.
Now, on to the fun parts!
One of the favorite clock case cleaning compounds among clock repairers on Nawcc.org is Gojo or Goop: a waterless, grease-cutting hand cleaner. Be sure to get one without pumice or other abrasives; pumice would scratch the heck out of your case. Other useful cleaning tools are:
- Gojo or Goop, as I mentioned above
- paper towels
- a gentle toothbrush
- disposable gloves. I like black nitrile gloves because they’re latex free and are often designed for delicate automotive work. Use these gloves to protect your skin from the nicotine, etc. you’re going to clean off the clock.
- cotton swabs for delicate work
- a thin, flexible putty knife, for gently prying the carving away from the case’s box
- a small pry bar, for continuing the prying you started with the putty knife
- needle nose pliers, for pulling nails
- snub nose pliers, for pulling nails
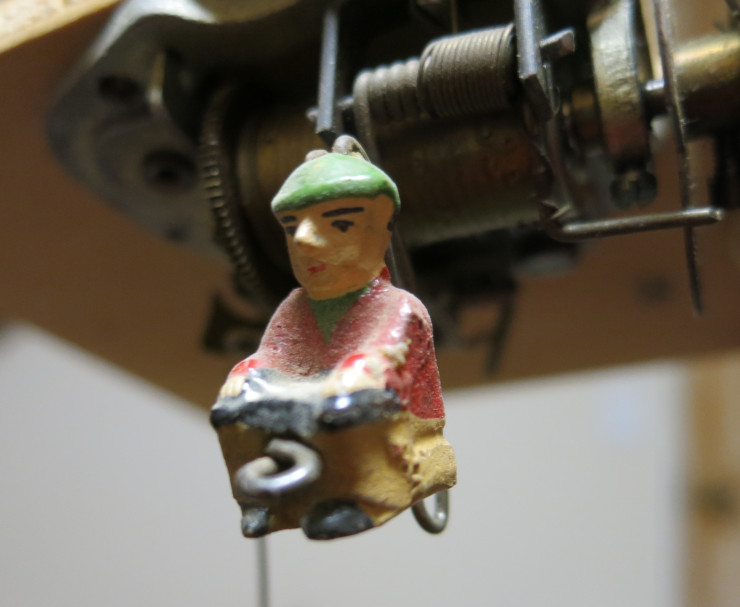
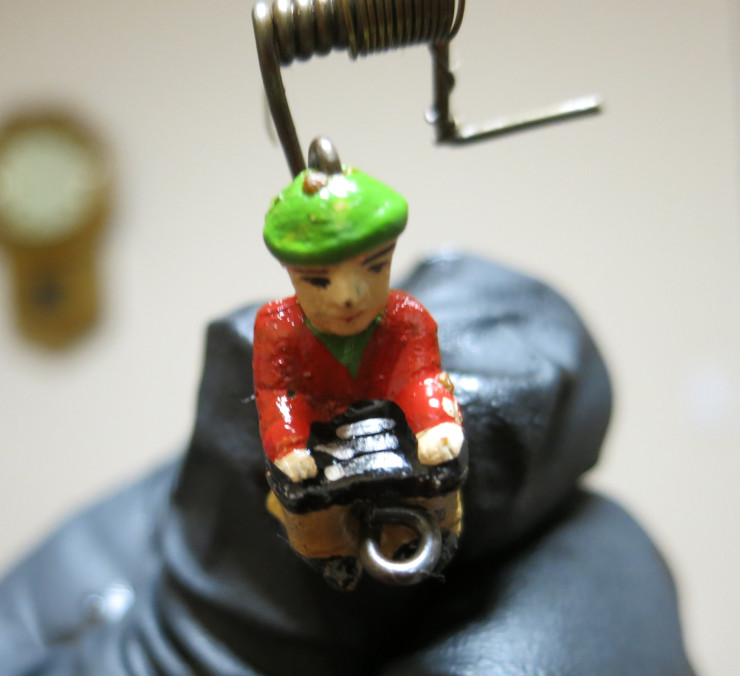
When I cleaned and adjusted the musical movement of the cuckoo clock I’m working on, I also gently cleaned the cuckoo bird and the little zither-playing man with Gojo, cotton swabs, and paper towels. The improvement was amazing, as you can see in these Before and After photos. Before cleaning, I didn’t even know the man played the zither; after cleaning I could see the individual silver-colored stripes representing the zither strings.
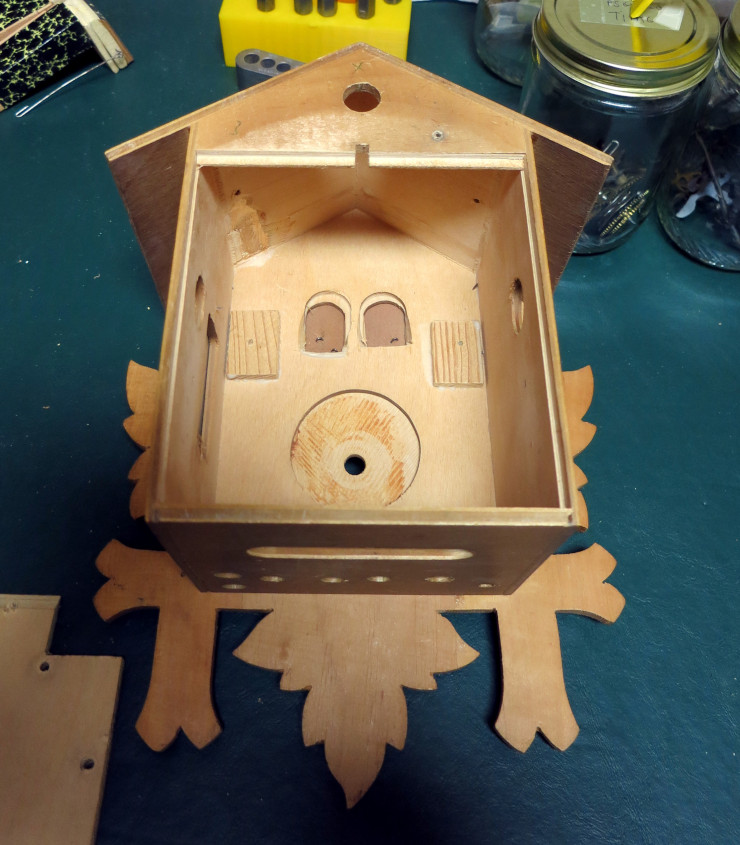
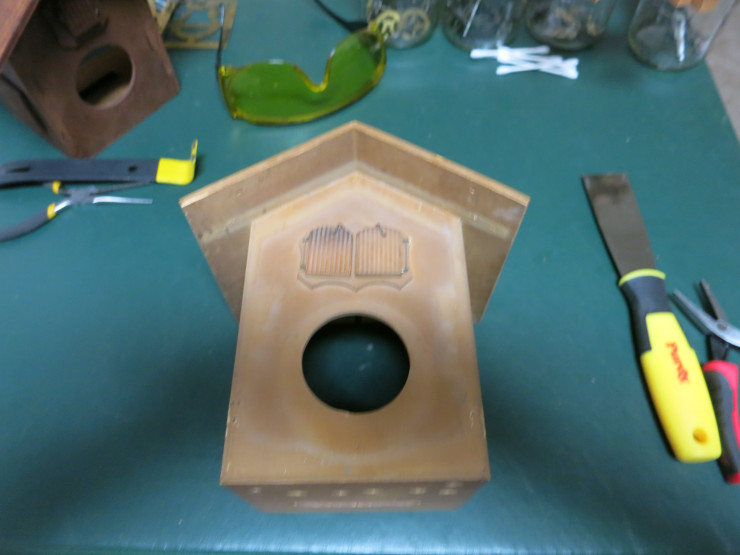
Giving the cuckoo clock case a good cleaning required dismantling it a bit. I started by removing the cuckoo clock movement, bellows, musical movement, etc., leaving an empty case.
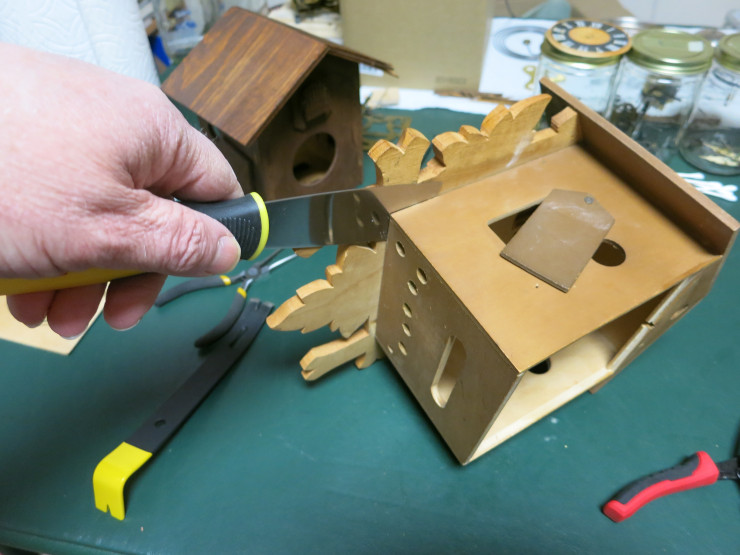
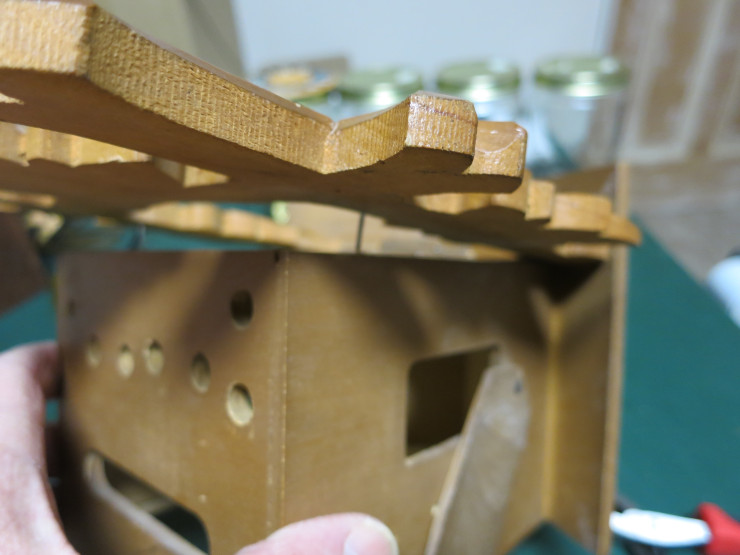
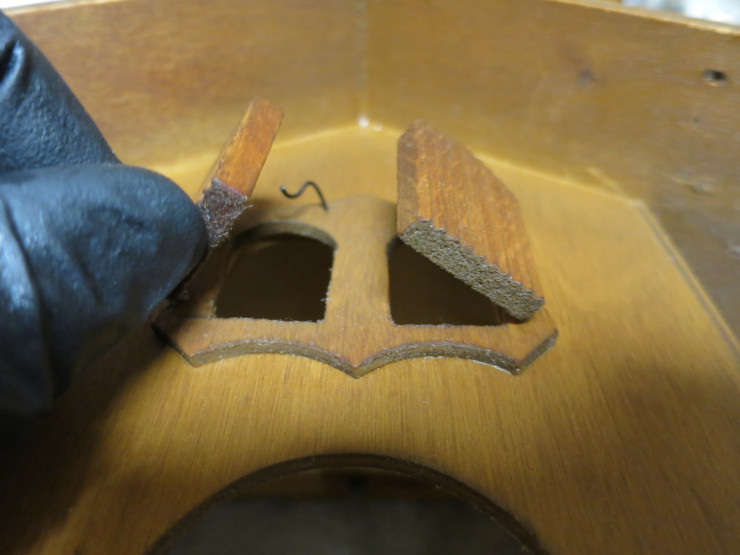
The next step was a bit tricky: prying off the front carving, called the “Surround”. It was tricky because I was worried I might break it. This surround was nailed horizontally, at its bottom, and also vertically, through the roof. I couldn’t just gently pry the surround away from the front of the case little by little. Instead I pried the bottom of the surround away from the case far enough to free both of the bottom nails – risking bending the surround enough to break it – then I pried the top of the surround down away from the roof.
Pry each side the same amount as you go, to minimize twisting that could crack the surround.

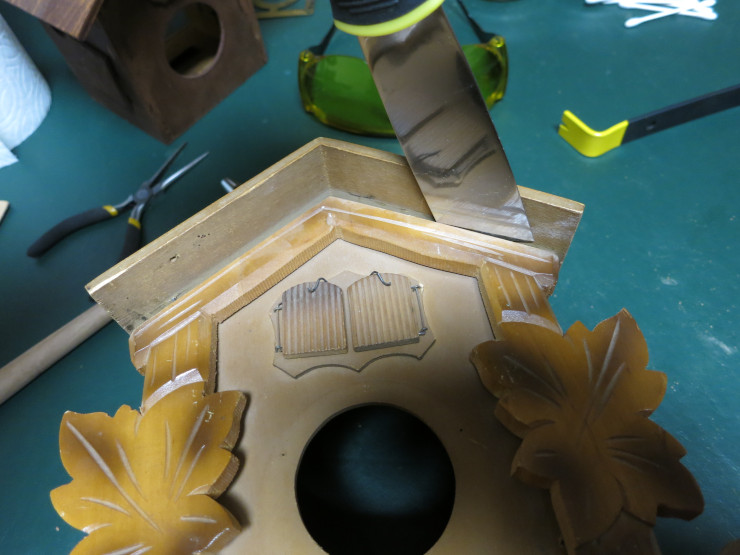
I had some tense moments as I pried the bottom of the surround further and further away from the clock’s front, knowing that it was still nailed in from the roof. If the surround wood was dry or weak, it might have snapped.
Once the bottom nails were free, I could start on the top ones. NOTE: your clock’s surround might be nailed in differently, for example with four nails from the front rather than two from the front and two from the roof. Look for the nails as you start prying, and stop if the surround doesn’t seem to be coming loose.
Now that the surround was off, I was ready to clean the wooden parts of the clock. I left the little front doors in place so I wouldn’t need to reassemble them. On the other hand, I had removed the surround because if I left it in place it would have been hard to get into all the interior crevices of the surround.
By the way, I also removed the pendulum bob – the leaf – from the pendulum stick, and removed the side door.
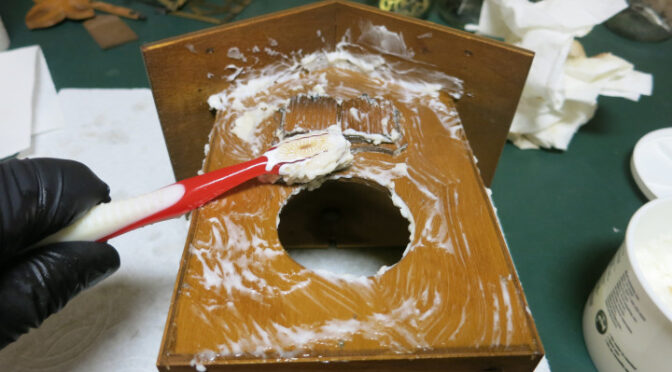
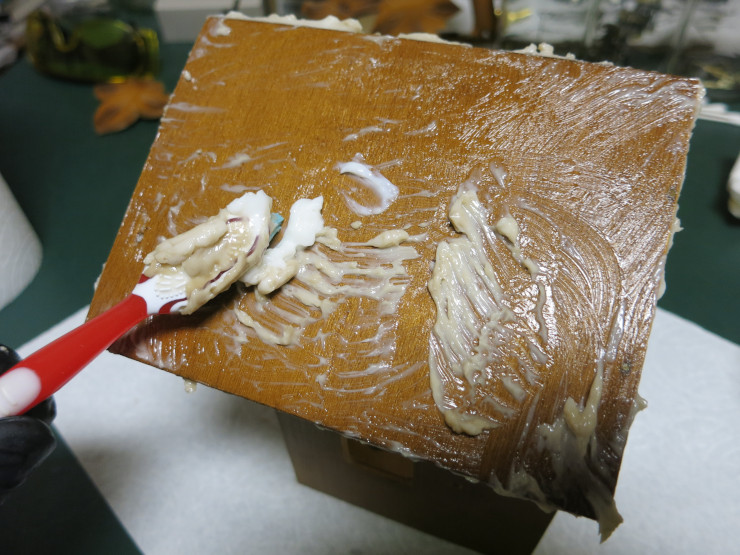
There is a nice video that shows How to Clean An Old Black Mantel Clock Case with Gojo (since taken down), which suggests cleaning in small patches, and cleaning several times. It’s amazing how many layers of dirt and smoke this cleaning can remove. Notice in the photo below how the white Gojo has turned sort of putty colored from the smoke it’s removing – ugh!
I used cotton swabs both to clean the small detailed areas – such as the grooves in carvings – and to remove excess cleaner from holes and grooves.
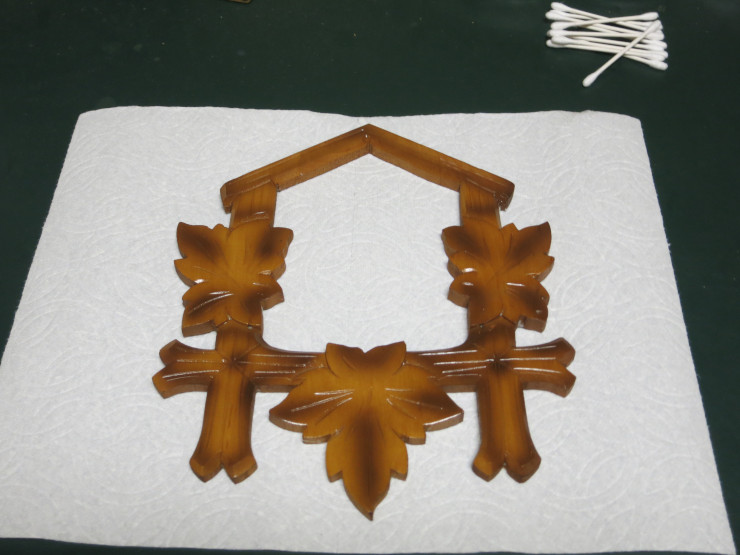
Once the bare case was cleaned, I cleaned the surround, the side door, the pendulum stick, and pendulum bob. I did not clean the back door, because it has a maker’s or seller’s stamp on it that I didn’t want to erase.
Clock faces are tricky things to clean. In cleaning this case, a few things happened that I would have liked to avoid: 1) the black paint of the face may have smeared some – though I’m not sure – darkening the painted numerals. 2) Much of the numerals’ paint had flaked off over the years – you can see all the blue background in the Before photo – cleaning removed more flakes. See the Before and After pictures below.
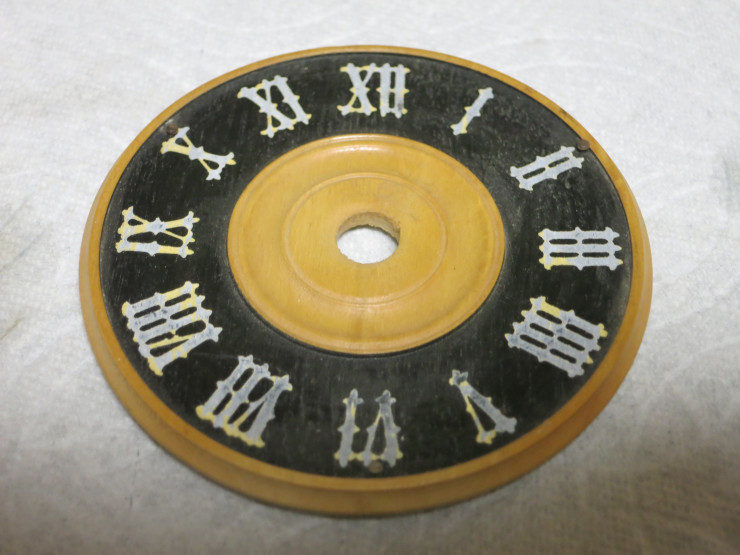
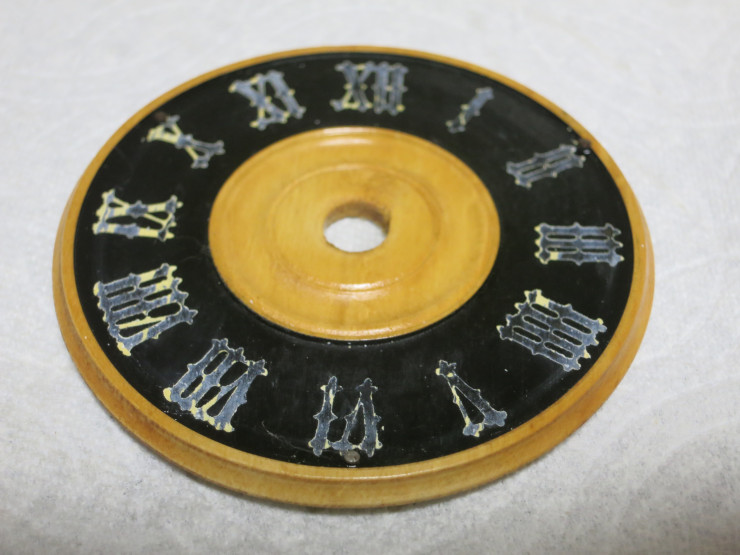
To repair the painted numerals I could either re-paint them – which requires a very steady hand – or I can glue on nice, plastic numerals which will look nice for ages. I’m going to order 12 mm tall replacement numerals from Timesavers.
On the good side, the surround cleaned beautifully. Now all I need to do to the case is reassemble the parts, including the new numerals, and finally preserve the case a bit with a normal wax or wood polish.