While repairing the latest musical cuckoo clock I discovered a problem in the musical movement: a cracked plastic gear. I was at a loss as to how this could be fixed, but once again found the solution from expert posts on the message boards at the NAWCC (National Association of Watch and Clock Collectors). The whole story follows…
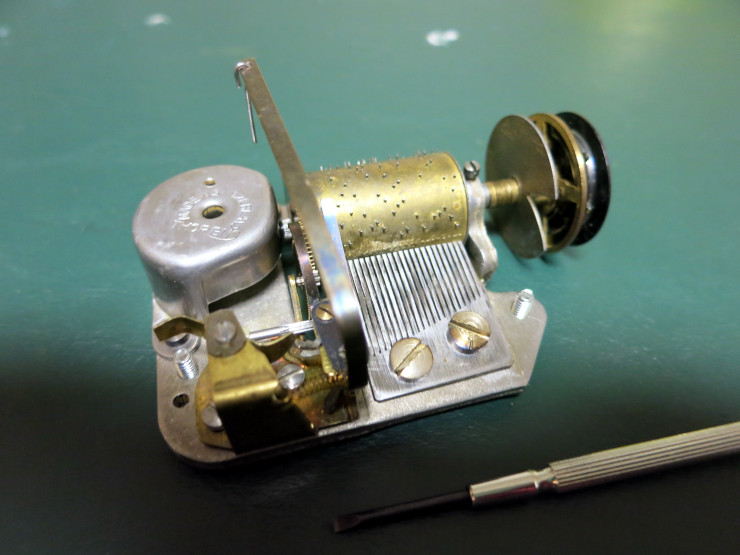
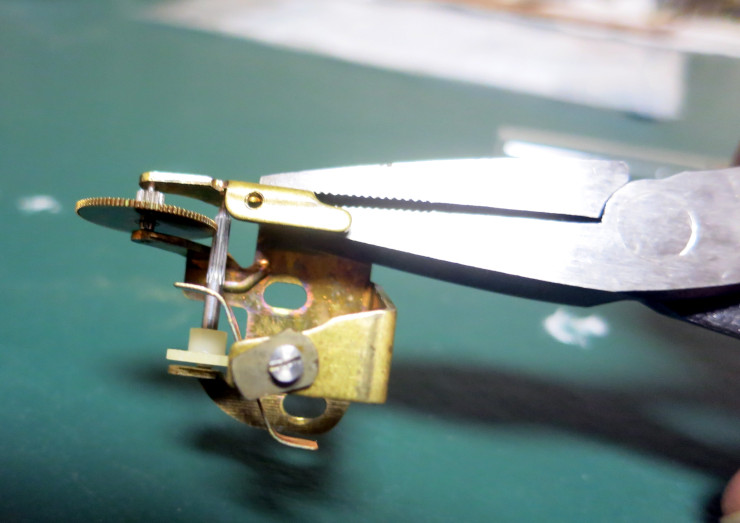
The cracked gear is part of a delicate part of the musical movement called the Governor. It’s the gearbox that lets the musical movement weight unwind at a slow, fixed speed to play the music. In the photo below, the governor is the assembly at the lower-left of the photo, just to the left of the larger metal frame.
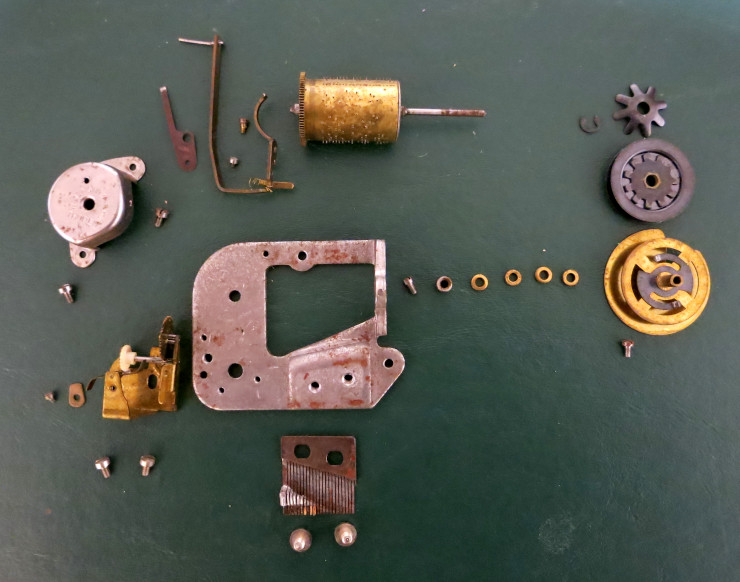
This governor is made up of three gears held in place by a folded brass plate: the fan, the middle gear, and the gear that engages the main gear of the musical barrel. . It’s fairly easy to gently pry the frame apart enough to release the three gears for cleaning.
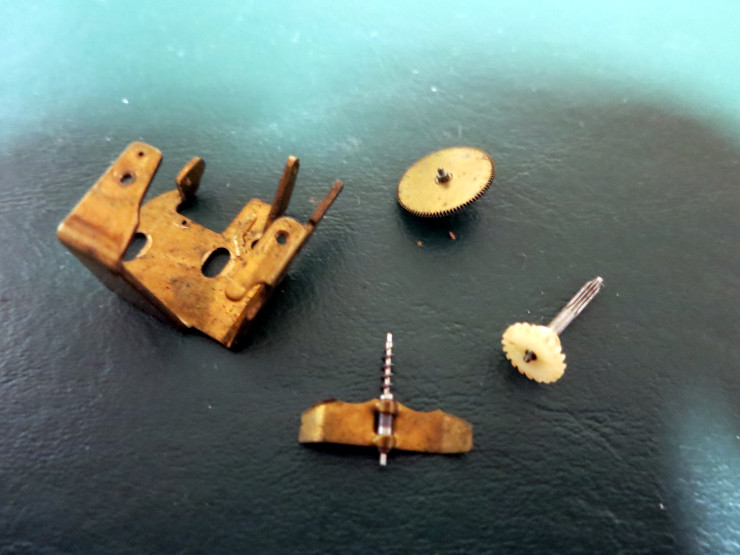
In the photo below, the fan is at the center-bottom, the middle gear at the right, and the last gear in the upper-center. The bent-open frame is to the left.
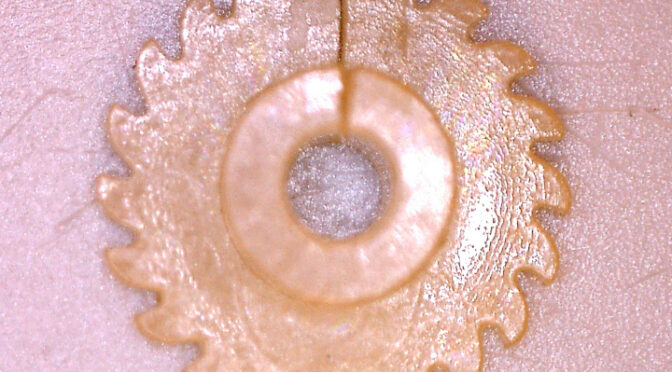
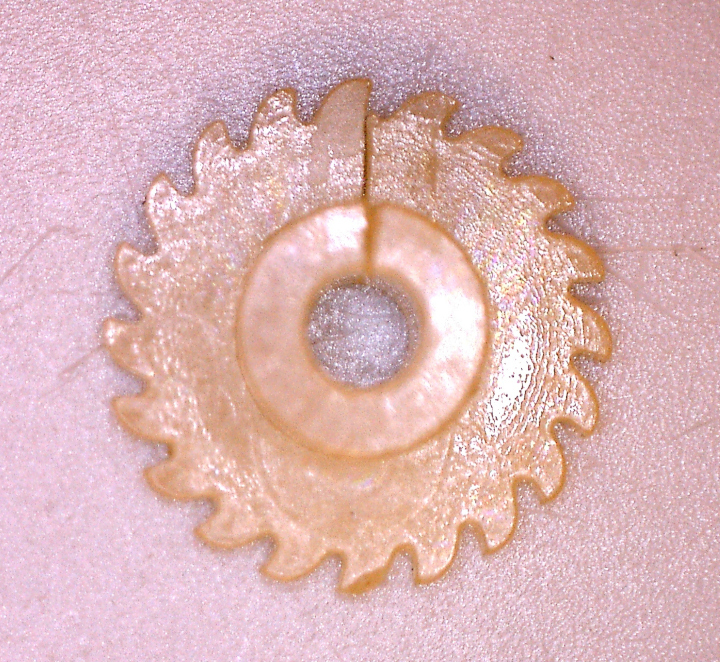
The middle gear is the one with the problem: the gear is plastic, and because of the constant force of the gear’s arbor (its shaft) pressing outward from the gear’s center, the gear has cracked.
By the way, I take microscopic photos with a Celestron 5 MP Handheld Digital Microscope Pro. It points out all those little issues with tiny clock parts.
Because of this crack, whenever the musical movement played the governor made a loud, ticking sound. I was also concerned that the crack might cause the governor to stop running, or worse cause the gear to split in half. I had to repair it.
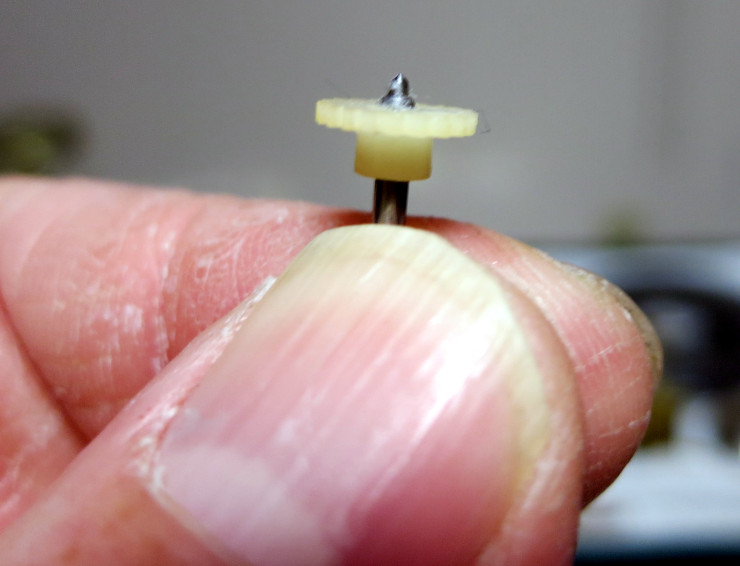
Like I said above, I had no idea how to fix this problem. I’d seen a video of a clock repairer trying to glue a large cracked gear using epoxy, but the job didn’t seem to close the gap of the crack, and this gear seemed far too small to epoxy: the gear is about 8 mm in diameter.
Researching the NAWCC message boards, I found the perfect solution:
- Remove the gear from its arbor (its shaft), first noting its proper position on the shaft.
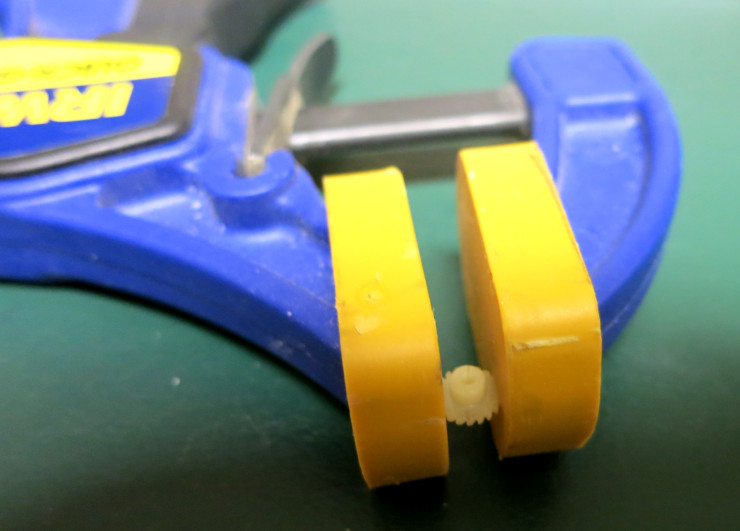
- Wick superglue into the crack.
- Immediately clamp the gear to press the crack closed.
- Let the superglue cure for 24 hours. After that time, you have a repaired gear, but if you press it back on its arbor it will likely crack again, so…
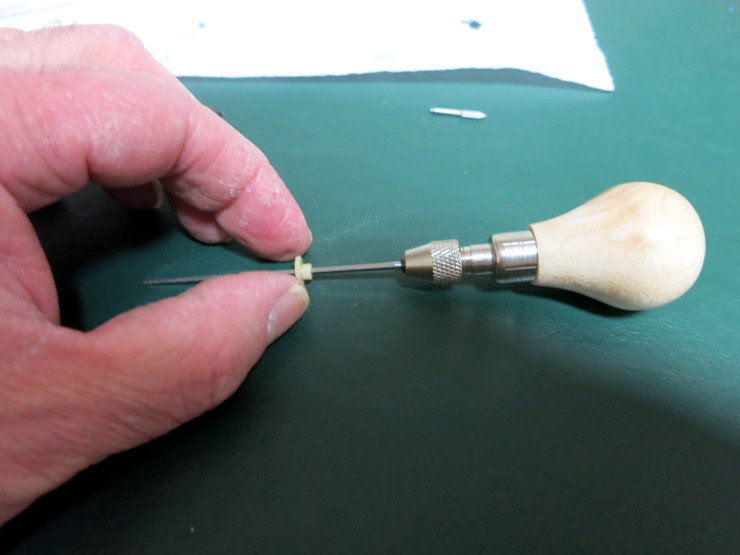
- Using a cutting broach – a common clock repair tool – widen the gear’s central hole so that the gear just snugly – but not tightly – fits on its arbor. That larger hole relieves the pressure that caused the gear to crack in the first place.
- Now the gear will likely slip and slide around on the arbor, so…
- Put superglue into the center of the gear and press the gear into place on its arbor. IMMEDIATELY wipe the excess superglue off of the arbor; otherwise that glue will prevent the arbor from turning freely in its pivot holes.
- Let the superglue cure for 24 hours.
- Re-polish the pivots – the ends of the arbor, that support the gear while it turns – using whatever method you like for polishing clock pivots. Doing this will remove the last of the superglue residue from the ends of the arbor. I like to polish clock pivots using 1500 grit sandpaper, followed by 2500 grit sandpaper, followed by wiping with an alcohol-soaked paper towel.
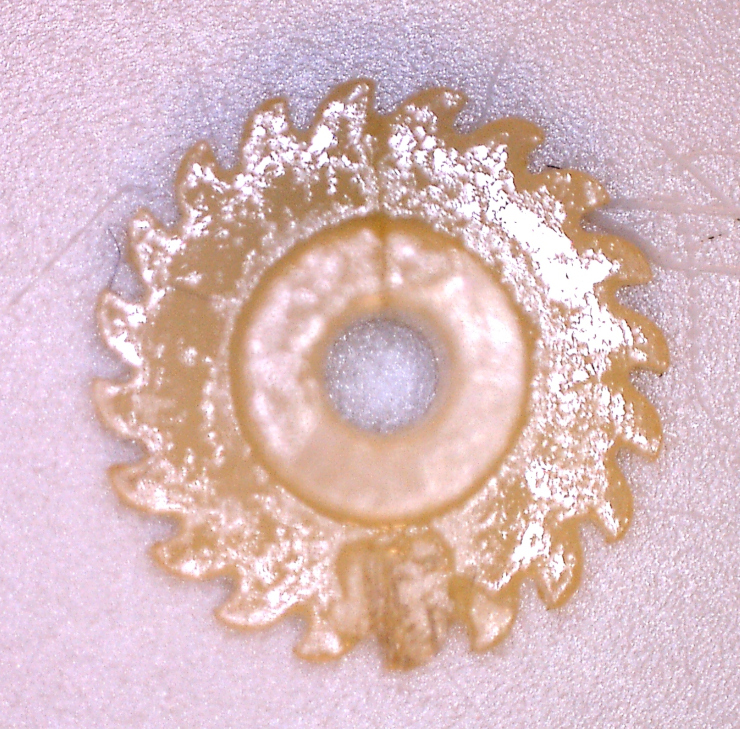
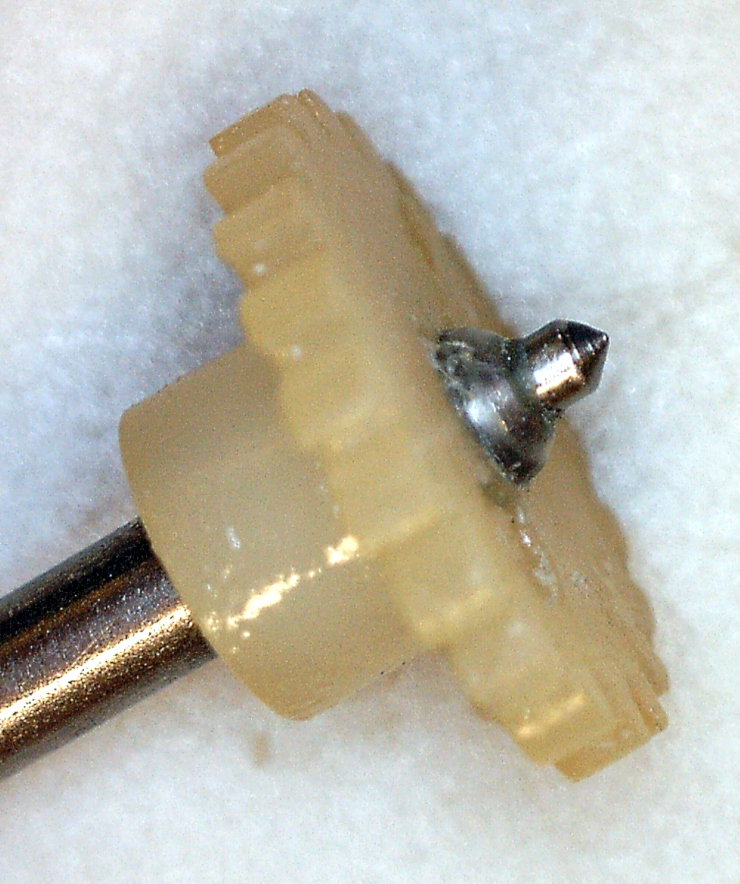
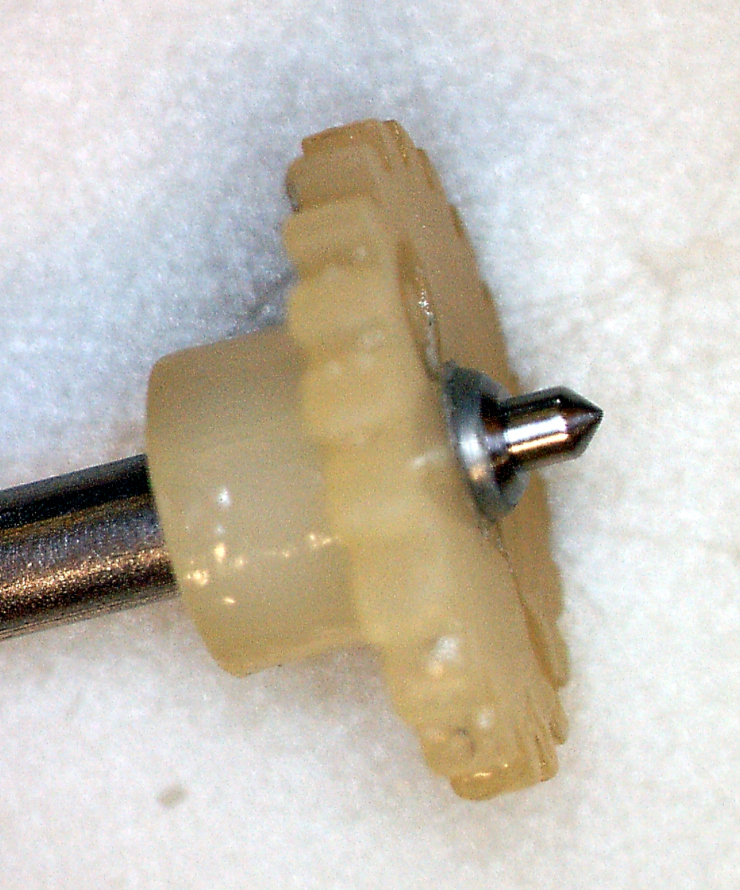
In the above, “before” photo notice the excess superglue crusted on the arbor, and notice the circular grooves in the tip of the arbor. In the “after” photo, below, the superglue is cleared away from the pivot, and the tip of the pivot is mirror smooth.
Now my musical clock is ready to play again!