
Five years ago I wrote a blog on testing the Z Offset on my Lulzbot Mini, Testing Your 3D Printer’s First Layer Height Calibration. Now that I’ve recently recalibrated my Prusa i3 MK3, I’m using a quicker method to set the Z Offset.
The last step of the calibration Wizard on my Prusa printer is the Z Offset calibration. During this process, the printer prompted me to load filament, then it printed a long zig-zag pattern followed by a small, one-layer rectangle. The idea is that during the print, you use the panel knob to dial the Z Offset up or down until the print comes out perfectly.
That’s good as far as it goes, but I found I couldn’t tell much from the long zig-zag line; I was only interested in how the small rectangle turned out. So I decided to switch to another method of setting the Z Offset.
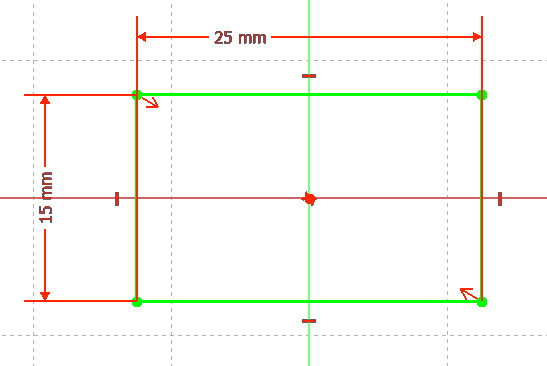
I created a test print in FreeCAD: a 15 mm x 25 mm rectangle, extruded 0.1 mm so the Prusa would print just one layer in 0.1 mm Detail resolution.
I then sliced this rectangle in PrusSlicer and printed it in PLA (PolyLite White PLA).
Once the print was finished, I went to the Prusa panel and selected Main / Settings / Live adjust Z, and wrote the displayed offset on the printed rectangle.
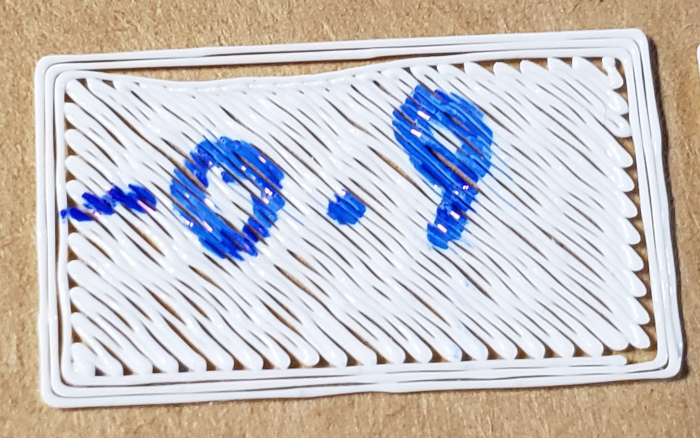
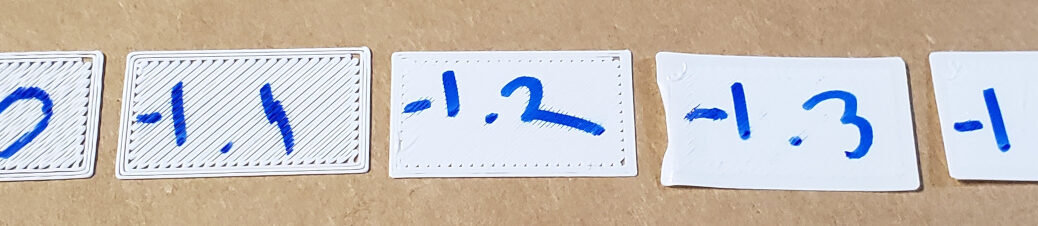
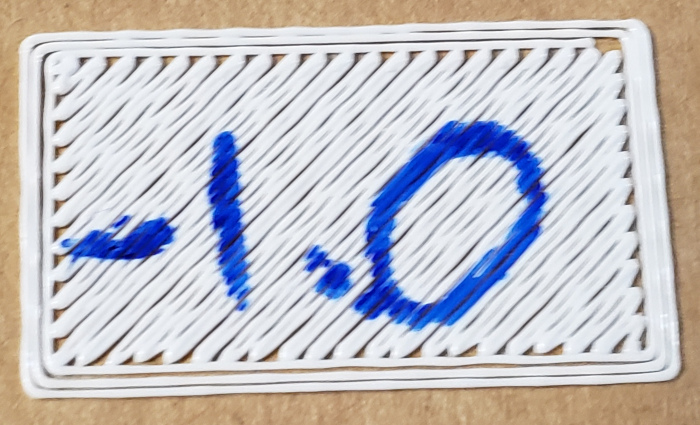
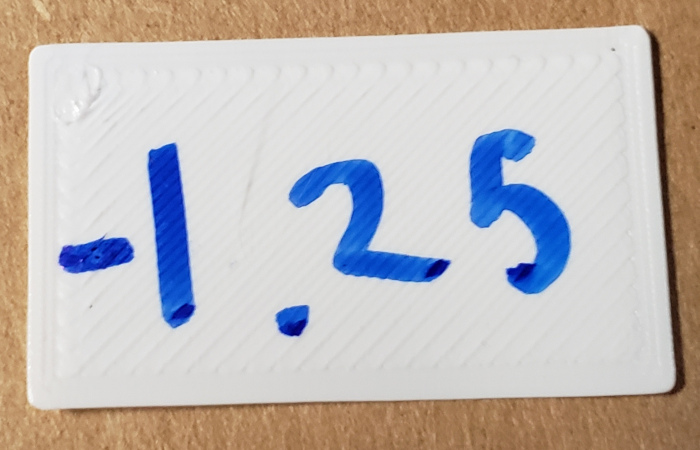
I then decided whether the nozzle was too close to the print bed or too far. In this case, the Z Offset of -0.9 produced a rectangle that didn’t fill completely in, yet didn’t show signs of the filament being dragged by the nozzle, suggesting the nozzle was too high.
So I increased the Z Offset to -1.0 mm and printed the rectangle again.
I repeated this process until the printed rectangle had a good first layer (its only layer): solid, but not warped.
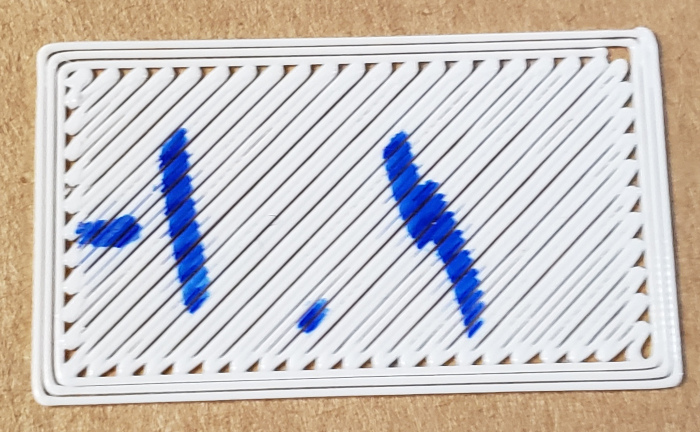
For the detail-oriented, the second (-1.0 mm) print was better than the first, but nowhere near a good first layer, so I tried again after increasing the Z Offset further.
Closer, but still not there. I increased the Z Offset and tried once more.
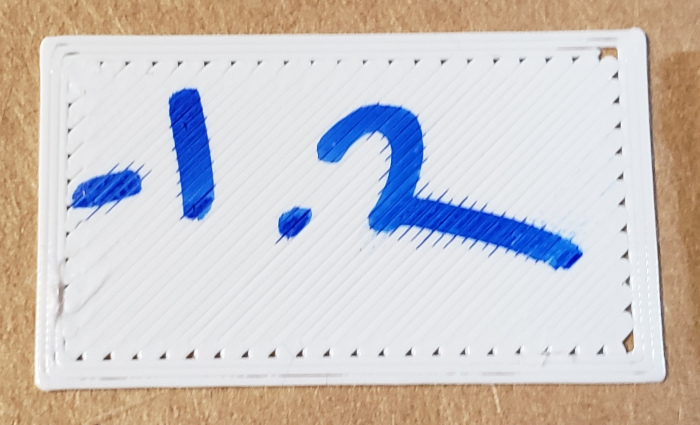
This print looked pretty good, but still had some gaps around the edges, so I tried again.
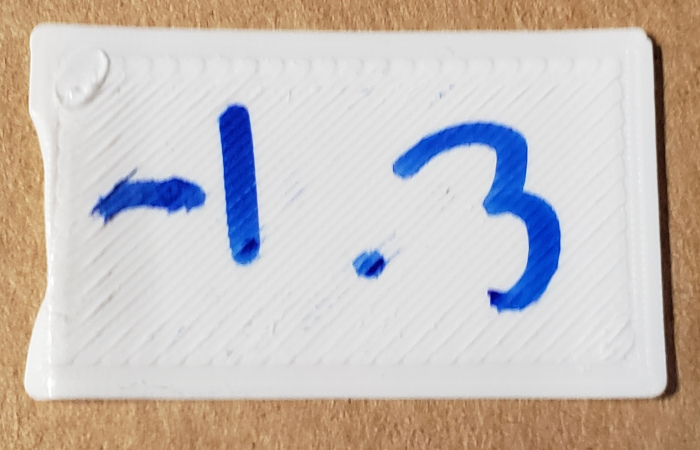
This looked close to a good first layer to me, but the print didn’t come off the printer very easily. That problem suggested to me that the nozzle was at last too low. So I moved the Z Offset in the other direction until I hit a good compromise between a filled-in first layer and a first-layer that would come off the printer without a lot of trouble.
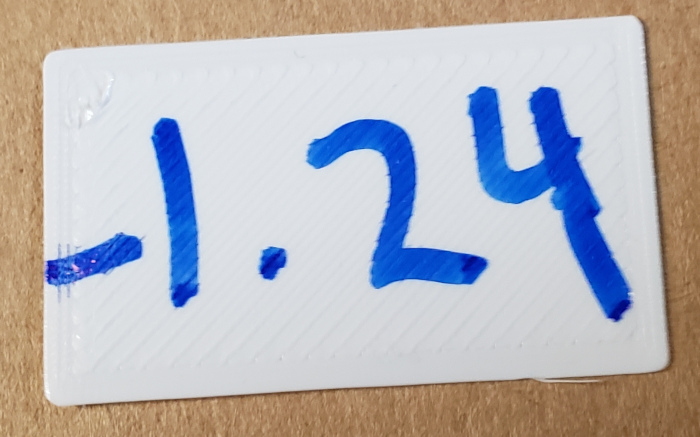
Satisfied with the Z Offset of -1.24, I went on to print a Benchy, then other prints.
By the way, this same technique – of adjusting the Z Offset, then printing a 1-layer rectangle – should work for any printer.