
In my previous post, I replaced the electronics of my several-year-old lunar clock design with modern parts. In this post, I’ve replaced the laser cut parts with 3D printed parts, with particular attention to the clip that holds the photo interrupter in place.
I recently redesigned the laser cut disk of lunar images to be a 3D printable part instead.
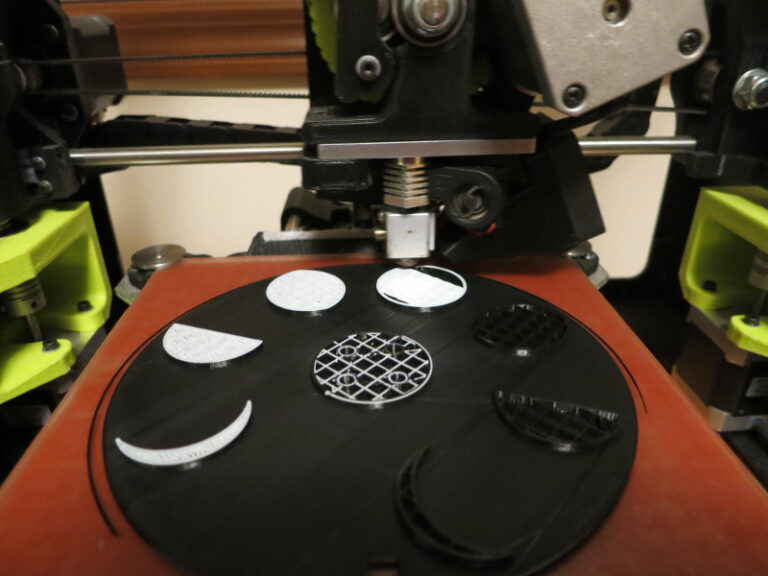
To make a 2-color print with my single-nozzle Lulzbot Mini printer, I started the print with black filament then, once the printer finished the large disk and started printing just the lunar images, I paused the print and loaded the printer with white filament. The result is a nice, black sky with a nicely contrasting white moon hanging in it. The only trick is to make sure to wait until the printer is completely done printing the large disk before you swap the filament – otherwise, you will get some white streaks on your black background.
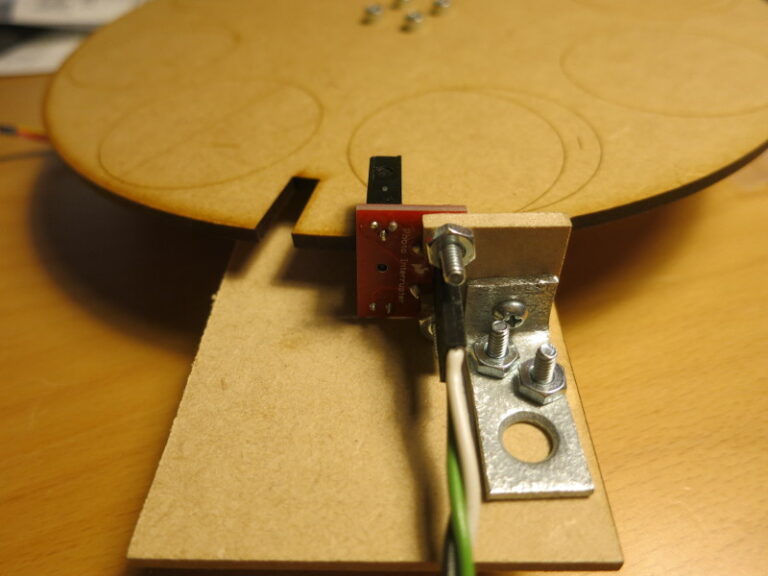
The big challenge recently was how to design a 3D printed clip to hold the photo interrupter. Mounting the photo interrupter to a wooden plate for the laser-cut design was such a pain that I wrote a post about how to do it. Now that I’ve designed the 3D printed clip, it’s just part of the print that holds the stepper motor – so it’s easy to assemble the 3D printed clock parts.
I’m writing a book series about functional 3D printed designs – snapping lids, screw-top lids, hinges, etc. In the process I’ve learned a lot about how to design 3D printed snaps. So it made sense to create a snap-fit clip to hold the photo interrupter.
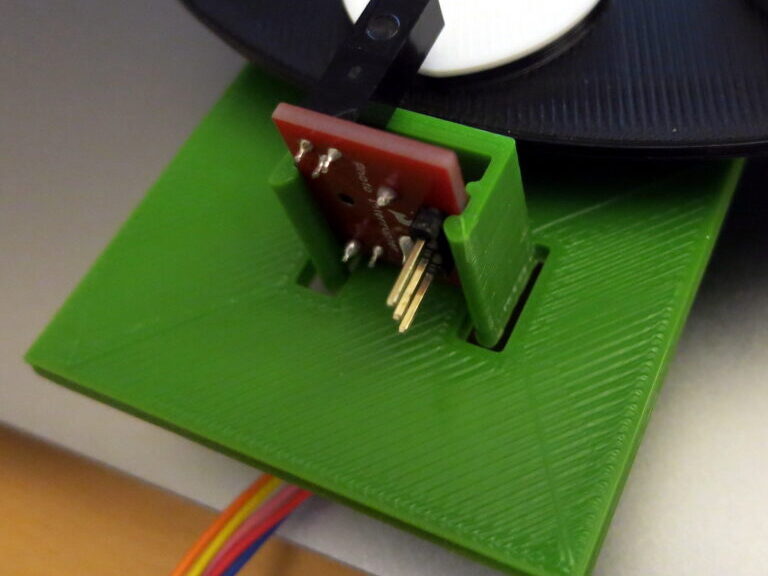
The idea of the clip is that to mount the photo interrupter, I hold it with its two arms facing up, slip one of the arms upward into the house-shaped hole at the top of the clip, then push the photo interrupter upward until its breakout board snaps into the snaps at the bottom of the clip.
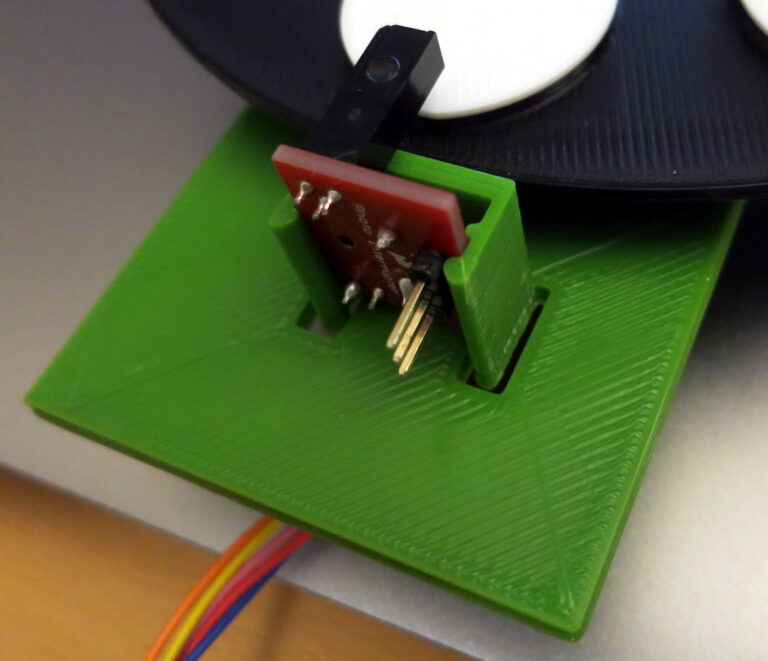
The photo interrupter breakout board is held in place left-to-right by the clip, and it’s kept from slipping out of the clip by the house-shaped hole for one of the photo interrupter arms.
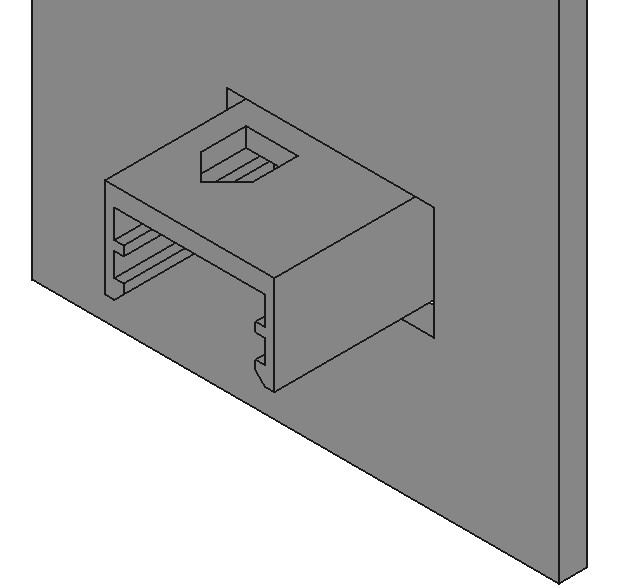
There are three tricks in the design of this clip: 1) the house-shaped hole for the photo interrupter’s lower arm, 2) the design of the snaps, and 3) the holes in the plate below the clip, that allow the clip’s arms to move enough to snap into place around the photo interrupter breakout board.

The hole for the photo interrupter arm would normally be square. Because this is a 3D printed clip, and because I don’t like using extra support material if I can avoid it, the square hole is instead a house-shaped hole. The 45 degree angled sides of the top of the hole print just fine without support, and hold the photo interrupter arm just as well as a square hole would.

The snaps are designed to a) be thin enough to bend open as the board is pushed up into the clip, b) have a stop in the middle to keep the board from moving too far upward, and c) have an angled bottom so that, as the board is pushed into the snaps it pushes the snaps apart.


Finally, there are two holes in the plate holding all this; one for the left snap and one for the right snap. These holes allow the snaps to bend left-to-right to open when the photo interrupter breakout board is pushed in.
The clip is tighter than I’d like – it’s very difficult to open to remove the photo interrupter – but that’s ok because the clock is designed to be snapped together and then left alone from there on.
By the way, I’ve uploaded a video of the clock running: Lunar Clock with 3D Printed holder for stepper motor and opto-interrupter.
Next I plan to do the artwork, designing what the face of the clock will look like.