I haven’t done any clock repair lately because I’m (still) (slowly) working on my clockmaker’s bench. The nearly-last step is to glue a linoleum surface to the bench top, which will probably have to wait until warmer weather.
UPDATE: I finished the bench at about December of 2024, and am working on clock again – yay!
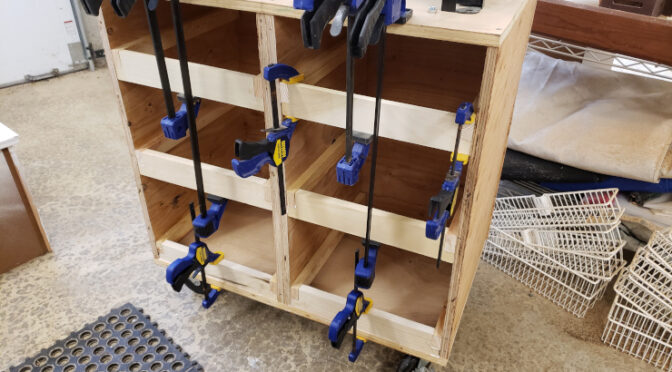
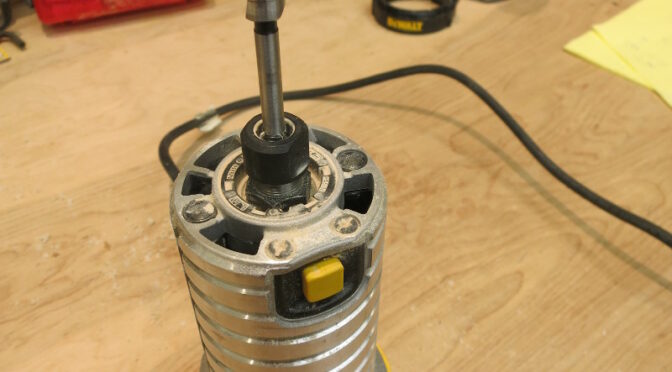
In converting a desk into a clockmaker’s bench, I wound up buying a router and router table to make the drawers. The router table has been taking up space on my workbench ever since.
I decided to make a rolling cabinet to mount the router table to, using scrap plywood and some drawers left over from a bathroom remodel. The project is a good example of a thrown-together wood project, and a few lessons in “measure twice; cut once”.
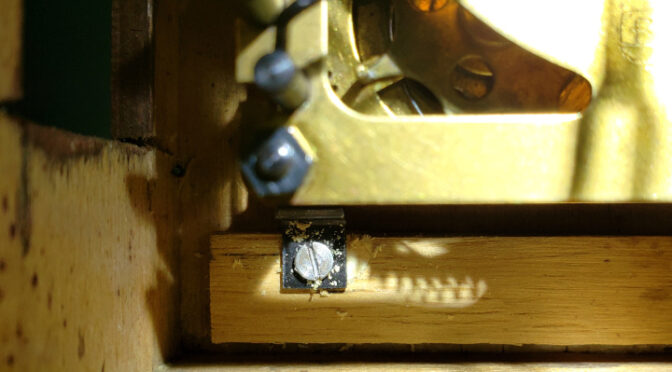
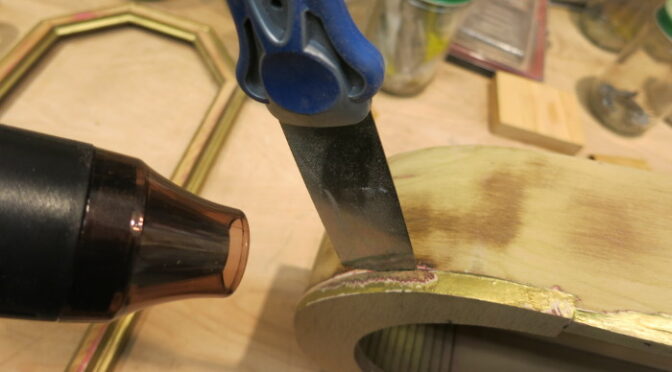
I’m repairing a cuckoo clock that has a commonly-seen problem: one of the screws mounting the movement to the case has stripped its hole. Normally, I’d try filling the hole with a wood filler, but this time I tried something different: “Bushing” the hole with a plug of new wood.
In digging around for clock case repair advice, I found a wonderful book, Extreme Restoration by T.E. Temple, which covers many clock case restoration methods. Its section on repairing stripped nail and wood screw holes in clock cases inspired me to try using a wood plug to patch the stripped hole, because that author has found wood plugs to be an excellent long-term repair.
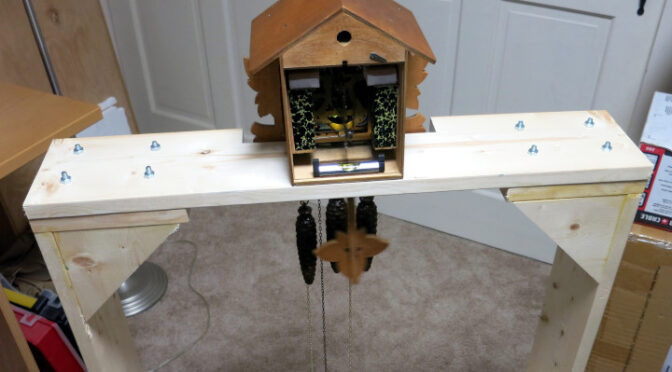
The family cuckoo clock I’m working on is being capricious about when it decides to play the music, so I’ve built a test stand that will let me see what’s going wrong.
After looking through the wide variety of weight-driven clock test stands on NAWCC.org. I decided to build a floor-standing U-frame.
TL;DR: There are links to rough drawings of my completed plans at the end of this post, so you have something to start your own design from.
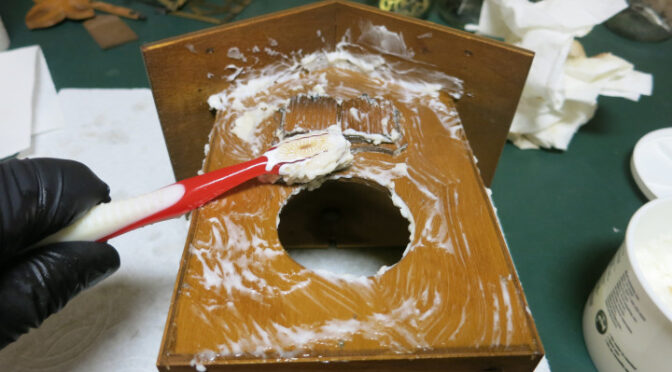
An older clock has usually spent years in the company of a smoker or near a smokey fireplace, accumulating layers of tar, ash, and who knows what else. A simple dusting or cleaning with a wood polish won’t necessarily remove these layers of smoke, so when it’s time to clean a vintage clock, it doesn’t hurt to clean the case as well.
As I said in my previous post about the Ansonia Derby clock, it seems that long ago part of the upper gingerbread broke and the owner sawed off the rest, reducing the upper gingerbread to a simple arch. I’d like to create new gingerbread for this clock. To do that I need to unglue the original, cut remnant and glue my to-be-designed gingerbread in its place.
I find the rose windows of Gothic cathedrals awe-inspiring. From the rigid formalism of Chartres to the flamboyant explosion of Tours, their marriage of geometry, philosophy, and aesthetics with stone and glass is awesome. Built at a time when science and spirit weren’t as divided as today, each window is a statement of the beauty, order, and harmony in the world. Using only a pair of compasses (dividers) and a straight-edge (an unmarked ruler), the Gothic architects created myriad lace-like designs, making stone hang in the air and glass sing.
In my previous post, I started working on the scale. In this post, I finish the woodworking, and painfully re-learn the woodworker’s adage: “Measure twice; cut once”.
I was so excited about the progress I’d made, and so eager to finish the drilling that I carefully measured, drilled the holes for one half of the Load Cell, then counterbored the hole for the first Load Cell nut… then discovered in my haste I’d counterbored the wrong side, and ruined the bottom plate of the scale.
In my previous post, I designed and printed a Centering Guide to line up the top and bottom pieces of the scale. In this post, I finish assembling the scale.
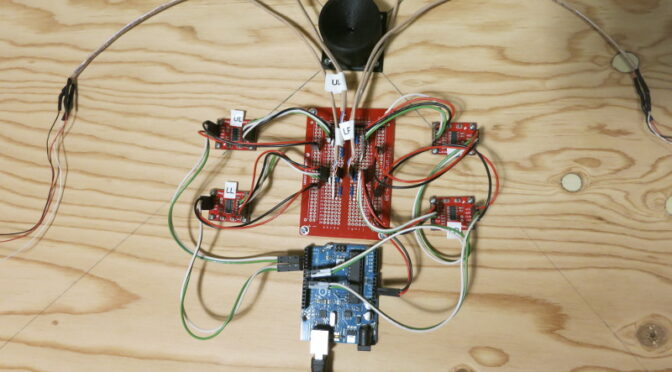
Now that I have the Load Sensor Holders that I designed and printed, I drilled mounting holes in the blocks that will hold the Load Sensors.
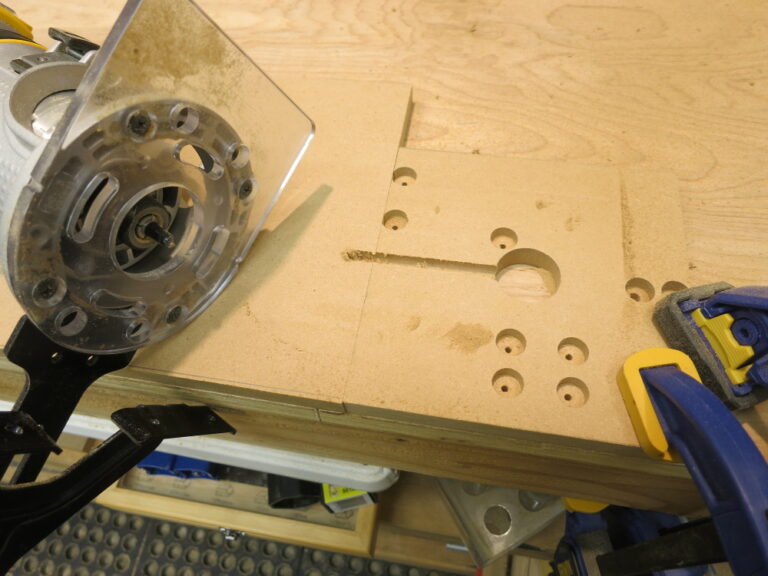
In my previous post, I 3D printed parts to hold down the Load Sensors. In this post, I correct the counterbored holes that keep the nuts from protruding below the bottom of the bottom piece of plywood.
In the woodworking post, I used a router to cut counterbore holes on the bottom side of the bottom piece of plywood. These holes hold the nuts that hold the circuit boards.