
In my previous post, I disassembled my Goodwill, practice clock. In this post, I begin to clean it. The pro’s use an ultrasonic cleaner, but I’m on a budget, so I’m doing it by hand.
Update: I’ve learned a lot since I wrote this blog. See Update at the end of this post.
The unattributed VHS video, Clock Repair for the Beginner, I mentioned earlier shows how to repair a clock on a budget. Instead of using an ultrasonic cleaner, that person does it Old School: he uses an SOS pad (soaped steel wool) and a toothbrush to do the cleaning, then rinses the parts in water, then does a final rinse in alcohol and dries the parts. The steel wool helps remove rust and grit; the soap cuts the grease and oil; the water rinse removes the soap; the alcohol rinse drives the remaining water out; the final dry removes any remaining soap scum or alcohol.
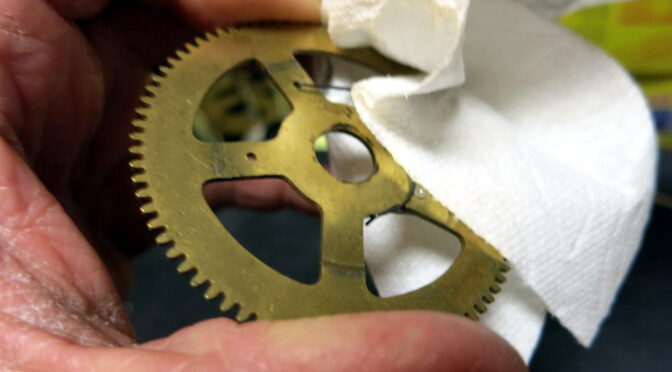
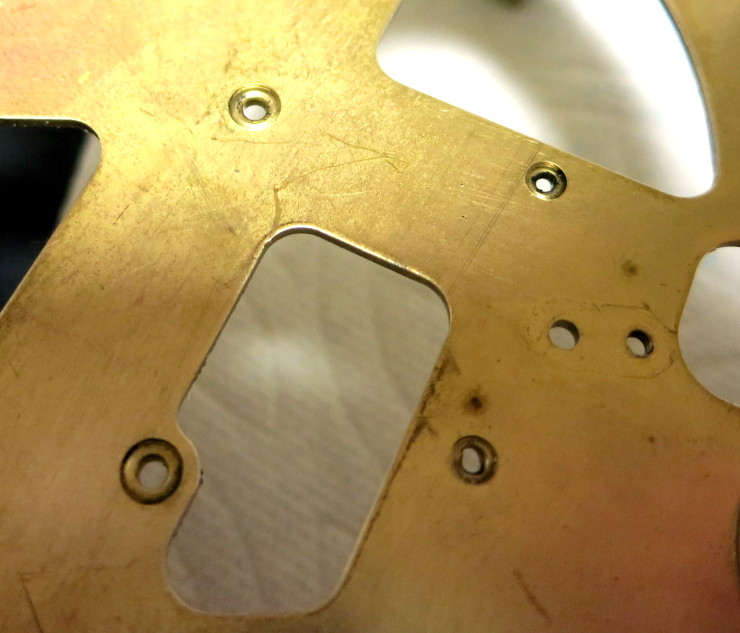
In the picture above you can get an idea of how dirty this clock was: all the holes were gummed up with old oil and dirt. The wheels were also very greasy, and there was a huge amount of dirty oil on the mainsprings. All that dirt can keep the clock from running like it should, and can cause the parts to wear prematurely.
As a first step – unlike in the budget cleaning video – I used toothpicks (cocktail picks) to scrape out old oil, dust, and who knows what else from the pivot holes and the oil sinks: the little indentation around the pivot hole. Then I wiped as much old oil off as I could, using paper towels. Then I was ready for the real cleaning.
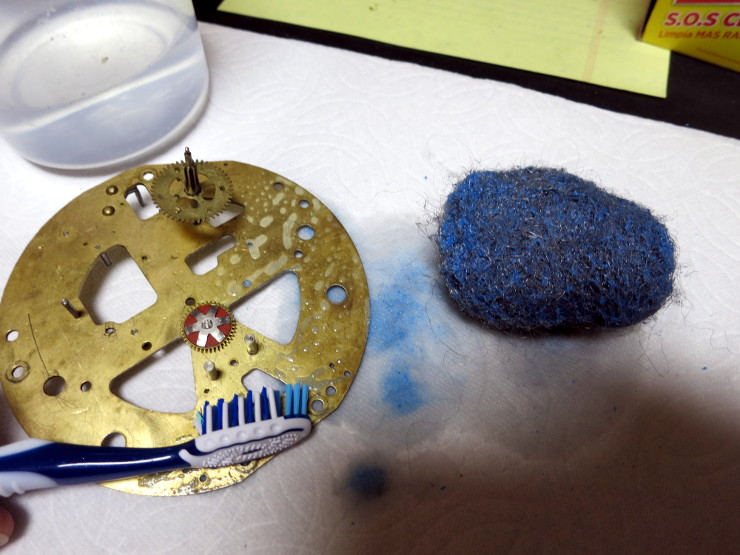
Like the video suggested, I used an SOS pad (soapy steel wool), a toothbrush, and water to break down the old oil and rust.
After the rinsing in water, the alcohol rinse, and the drying, I was pretty disappointed in the results. As you can see below, there isn’t much visible difference between the clean and dirty parts.
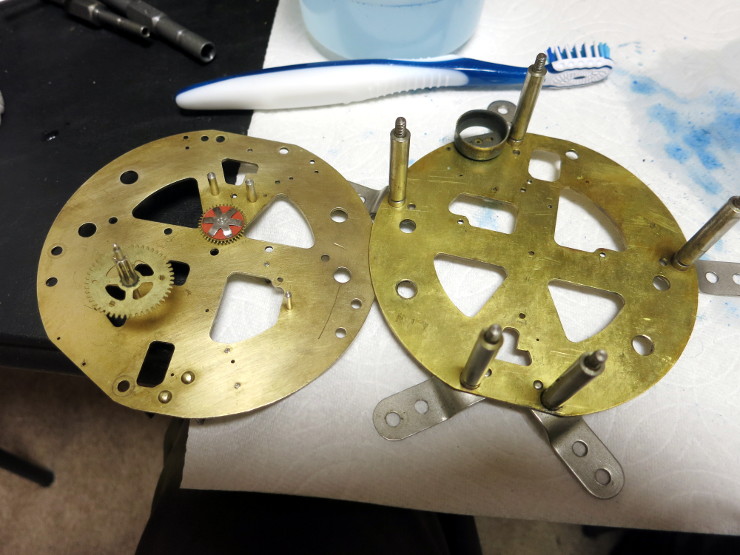
You can also see a lot of remaining oil and gunk (dust, ground brass, and old oil) in the photo below. The steel wool also scraped up the brass quite a bit, which you wouldn’t want to do to a good clock.
So now my plan is to “clean” this clock with the SOS pad, etc., and to buy an ultrasonic cleaner for the next clock. I see I can get a good, “mini” ultrasonic cleaner for just over $100, that should be big enough for the mantel style of clocks I’m interested in repairing (update: it isn’t. See below).
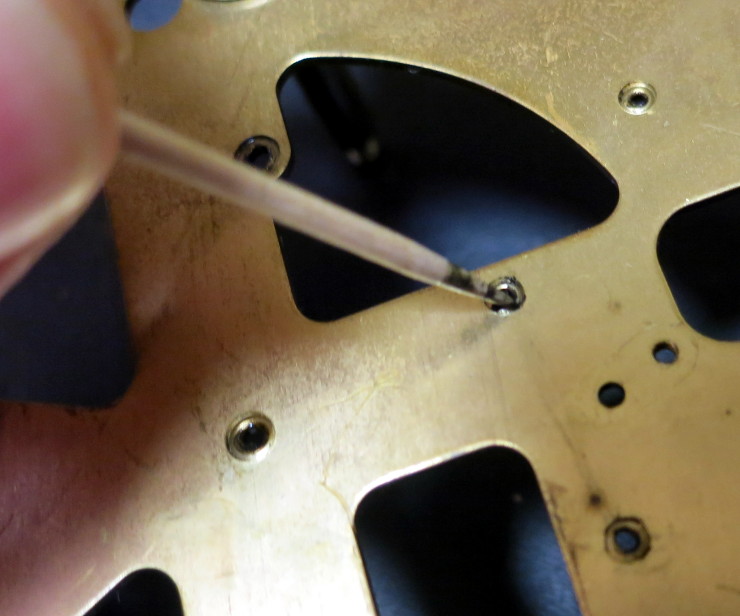
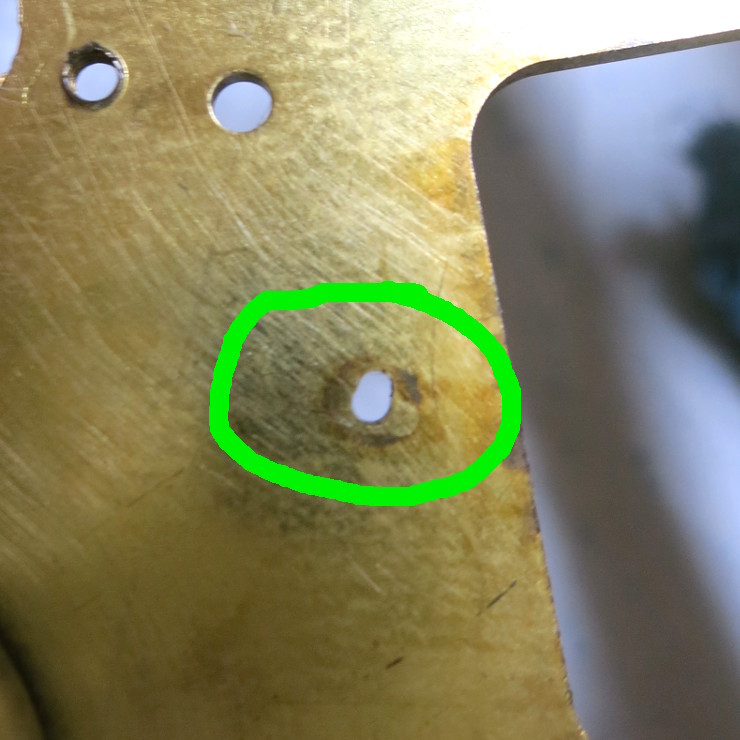
I mentioned above that a dirty clock can wear parts prematurely. Another part of a clock overhaul – which I won’t be doing anytime soon – is “bushing” worn pivot holes. As you can see in the photo below, the circled hole is nowhere near round; over the years, the pivot in this hole pressed against one side of the hole, causing the hole to wear in that direction. Out-of-round holes like this keep the clock’s parts from meshing correctly, which can make the clock stop before it should, or even not run at all.
Bushing a pivot hole involves drilling the hole out so it’s round and centered where it should be again, then pressing in a brass fitting that has a hole the right size for the pivot (the end of the wheel that fits in the hole).
Unfortunately, a decent bushing tool – which is a precision machine – can run $1,000, which is well beyond my Hobby Exploration budget.
In my next post, I finish cleaning the clock and have a look at the remaining dirt.
Update May 2021
I clean clocks very differently now:
- Don’t use SOS pads (steel wool). As I mentioned above, steel wool scratches up the brass. It also catches on small parts, and leaves a fine grid of steel in the wash water – you don’t want to pour that down the drain. Instead I use mild dishwashing liquid and a brass brush.
- The ultrasonic cleaner I bought works great for cuckoo clocks, but is too small for most clocks. I’m considering buying this Rosun cleaner, but I haven’t decided on the size yet. One plus for a small ultrasonic cleaner is that you won’t use as much cleaning fluid for smaller clocks such as cuckoo clocks.
- I’ve seen and read a lot about bushing by hand, and am now convinced I don’t need a $1000 bushing machine. I still need to learn how to do bushing.
- My cleaning process is now:
- Wash parts by hand in dishwashing liquid and water, using a brass brush and gentle toothbrush.
- Transfer the parts into the ultrasonic cleaner as I wash each one, to avoid exposing the wet parts to air.
- Rinse each part in water, to get the cleaning fluids out.
- Wipe each part in paper towels soaked in isopropyl alcohol, to drive out the water (to avoid rust).
- Wipe each part with dry paper towels, to remove the alcohol.
- Peg the pivot holes, etc. with toothpicks (cocktail picks) to remove remaining gunk. I should probably do this step before rinsing the parts.