
I have to confess that sometimes I need a push to make the right design choice.
It’s been a long time – way too long – since I worked on my Lunar Clock project. In the meantime, Sparkfun has introduced new, inexpensive microcontrollers aimed at Internet-of-Things applications. I knew one of those new microcontrollers would be perfect for the Lunar Clock, but I dragged my feet.
Then one day, a Github user pointed out that one of the boards I was using has been obsoleted.
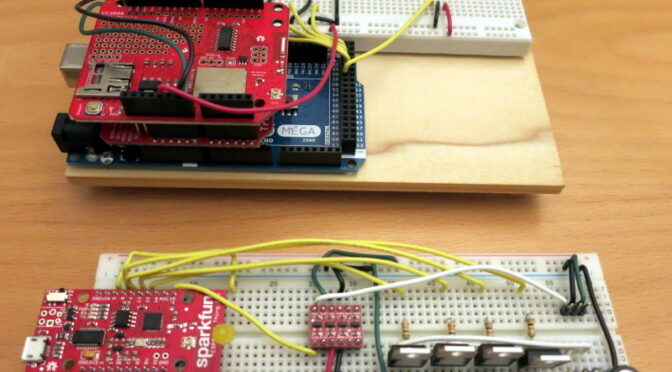
That was the push I needed to update (and cost reduce) the Lunar Clock circuit design. Last night I finished porting the code and circuit from a stack made up of an Arduino Mega, TransmogriShield, and CC33200 WiFi Shield to a new circuit that uses only a Sparkfun ESP8266 Thing Dev board. The photo above shows the stack of old boards (the upper breadboard) and the new circuit (the lower breadboard).
Now that I’ve made the changes, I’m a big fan of the ESP8266 Thing: it’s small and inexpensive, it’s easy to power with either a USB charger or a rechargeable battery, and it nicely integrates a very capable Arduino-mostly-compatible processor with an easily-programmed WiFi circuit. By the way, I’ve heard that AdaFruit’s Huzzah board is similarly wonderful.
I’m delighted that now, early in the 21st century, I can add a WiFi-capable microcontroller to a circuit for well under $20; less than the price of many of the other circuit components. Making the change from Arduino Mega, etc. to ESP8266 shaved about $80 off of the Lunar Clock cost!
The latest Lunar Clock code and Bill of Materials (still in progress) is on my LunarClock repository on Github.
In my next post, I describe the 3D printed clip that holds the photo interrupter much better than my earlier, wooden design.