
I recently bought and assembled a Prusa i3 MK3 kit, and decided to prepare for printing emergencies by printing a full set of replacement parts as soon as the printer was working well.
I’d found, in using my other printer, that even high-quality printed parts do eventually delaminate under stress: after two years, that printer’s X and Y idler supports developed fractures. Because I couldn’t print the replacement parts (and because doing the replacement seemed daunting at the time), I wound up sending that printer to the factory for repairs.
I’ve also seen notes and videos from people recommending a set of replacement parts as a backup, in case you break a part while adjusting or doing maintenance on your printer. Having replacement parts on hand is also a good preparation for helping a 3D printing friend when their printer breaks.
What you need
- Your well-calibrated printer. In particular, make sure your first layer is solid, and the size of PLA prints is accurate.
- More than 550 grams of PETG; that’s about 1 and 1/5 pounds. NOTE: the extruder parts must be printed in black for the sensors to work properly. You can use whatever color you like for the other parts. If you buy filament by the pound or half-Kilogram, you can buy one of black and one of sparkling blue, or your favorite color. I printed everything in MatterHackers’ Black Pro Series PETG, because it’s received good marks for strength, is made relatively near me, and has a high dimensional accuracy. Don’t buy cheap filament for these important parts.
- Windex® Original or similar. PETG requires gluestick or Windex to keep from tearing your print bed up. Some people use gluestick, but I find Windex a lot easier to clean up, and doesn’t leave a nasty residue on the parts. Windex Original is sometimes labeled “Original with Ammonia-D”.
- Isopropol alcohol. I use 70% isopropol alcohol wipes; others report better results with straight 91% isopropol alcohol poured on a paper towel.
- A spatula, for removing small parts from the print bed. I’ll explain below. I happen to use a 4 3/4 Inch Straight Spatula because it flexes nicely and is small enough to handle well.
- A very small hammer, for tapping the spatula’s handle. I’ll explain below. I use this 2 oz Ball-pein Hammer.
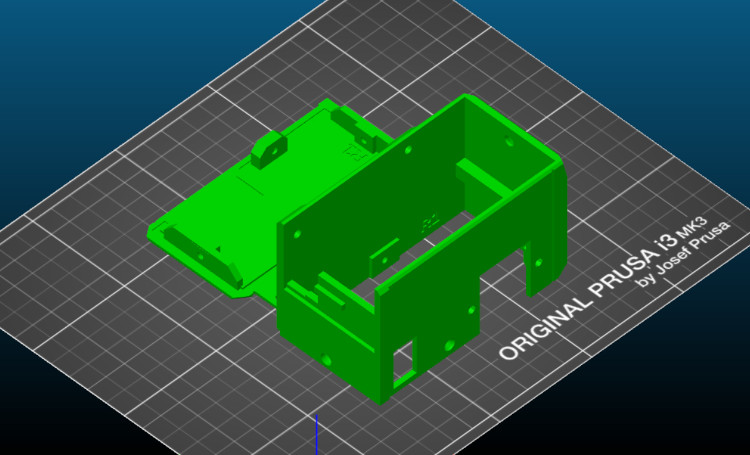
- The file of the parts from Prusa’s 3D Printable Parts page: click on the STL button next to the model name of your printer, then expand the downloaded .zip file. The .STL files you will use will be in the expanded folder, under Original-Prusa-i3-MK3/Printed-Parts/stl. As of this writing, there are 32 parts.
Perform the following steps for each .stl file
To avoid running out of filament during a long print, you may want to print the files in decreasing order of file size, printing the big parts while you still have a lot of filament on the reel.
- Slice the .stl file in your favorite slicer. I like Slic3r PE (Prusa Edition) because it knows the settings for my printer. For Slic3r PE, I use the following settings for my Prusa i3 MK3:
- Print Settings: 0.15mm Optimal MK3
- Filament: Generic PET
- Printer: Original Prusa i3 MK3
- Fill density: 20%
- No support, raft, or brim.
- If the print bed has any residue on it, clean the bed with isopropol alcohol. If the bed doesn’t have residue, avoid putting isopropol alcohol on it; PETG releases best on a bed that has only Windex on it.
- If you put alcohol on the print bed, wait for it to dry before the next step.
- Spray a generous amount of Windex on a paper towel, and wipe the bed. Wipe the whole bed rather than just the part you expect the filament to print on. I’ve been surprised several times by bits or strands of PETG landing well outside the part print outline.
- Before loading or unloading the filament, preheat the nozzle to 240 degrees C instead of the Prusa’s PET preheat setting of 230, and wait about 5 minutes after the nozzle has come to temperature before loading or unloading the filament. This higher temperature and wait time seemed to prevent extruder clogs and jammed filament during loading or unloading.
- Print the .gcode file that your slicer created, either by putting that file on your printer’s SD card or, my favorite, by printing from OctoPrint running on a Raspberry Pi 3 connected to my printer.
- Once the print is complete, set the bed temperature to 45 degrees C and wait for it to come to that temperature before removing the parts. Large parts in particular can damage parts of the print bed if you try to remove them at lower temperatures.
- Flex the bed to remove the part.
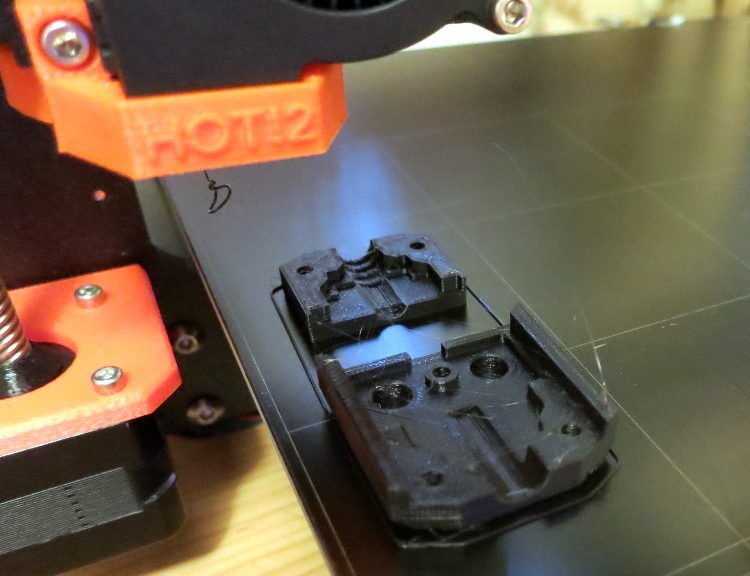
- If flexing doesn’t make the part come loose, use the spatula and small hammer to gently tap it loose, as shown in my demonstration video. Don’t pry the part loose, because you might tear the part, leaving layers on the print bed.
- Clean the hairs off the print by – briefly – using a heat gun. PETG prints tend to have a lot of slender strands all over the part. Using a heat gun is a lot faster and easier than trying to pick the hairs off with tweezers. Don’t keep the heat on the part very long, or the part will melt.
The following files each contain one copy of a part that you need to print multiple copies of. You can easily print multiple copies in Slic3r by choosing Object / Set Number of Copies:
- y-rod-holder.stl, 4 copies
- z-screw-cover.stl, 2 copies
When you’ve printed all the PETG parts you want, flush the nozzle with PLA:
- Load PLA until the PETG is flushed out of the nozzle.
- Preheat the nozzle to 240 degrees C
- Unload the PLA
Finally, bag all the small parts together so they don’t hide in the corners of the box, then put all the parts in a box labeled “Spare Prusa Parts”, and relax knowing that if some part of your printer breaks you can easily repair it.
Heat-Set Inserts
When the time does come to replace a printed part in your printer, you may want to take a look at my post about Adding Heat-Set Inserts to Your 3D Printed Parts.
Details
Printing the set of parts took almost 70 hours of print time, and (as I said above) about 550 grams of filament.
My spreadsheet of time and filament per part shows you which parts took the most (8.5 hours) and least (8 minutes) time. The times, grams, and even the number of parts will change as Prusa improves their printers.
References
- Prusa’s Printable Parts page describes the proper filament type, color, and slicer settings. It recommends a layer height of 0.2 mm, but I’m assuming that’s a suggestion rather than a requirement. I use the 0.15 mm Optimal setting in Slic3r PE.
- Prusa’s Material Guide gives general information about PETG, and says to use Windex on the print bed.
- Prusa’s Print Surface Preparation guide describes generally how to clean the print bed.
- This discussion provides a cautionary tale about properly preparing the print bed for PETG, and contains comments by several people that Windex works for them.
- SCJohnson’s Windex Original Ingredients page can help you search for products similar to Windex.