
I used to think that 3D Printer extruder tension – how much pressure the extruder hobbed gear exerts on the filament to move it forward – was a pretty forgiving thing. At one extreme, there’s “so loose the filament doesn’t feed” and on the other, there’s “so tight the extruder motor binds”. I thought everything in between was ok.
My assumption was confirmed each time I read advice on how to tune a misbehaving printer: people rarely mentioned extruder tension.
My recent fight to fix a bad print taught me that incorrect extruder tension can make a huge difference in your print quality after all.
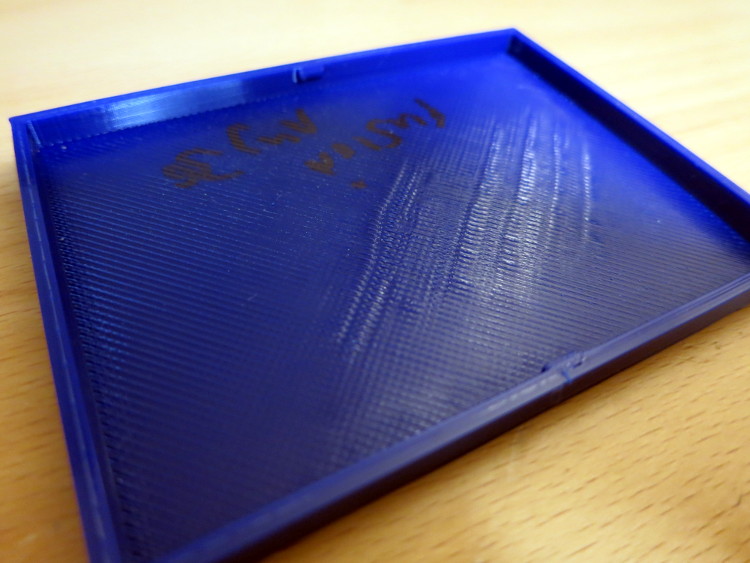
It all started when my Lulzbot Mini printer came back from factory repair. I printed a few boxes, but found the lids wouldn’t fit the bases. …and I saw strange, mountain-ridge-like waves in the prints.
I read up on printer problems and decided the problem was the Z Offset: that the filament wasn’t being pressed into the print bed enough, causing loose layers. My post about my testing Z Offset ends with a picture of even stranger ripples all over the test print’s first layer.
I was temporarily stumped. Was the problem loose belts? …bent Z screws? …variations in filament diameter?
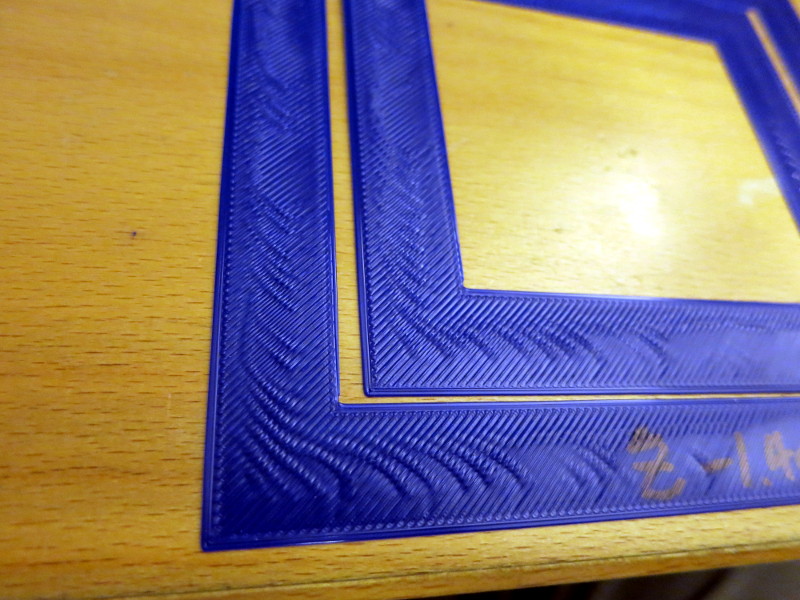
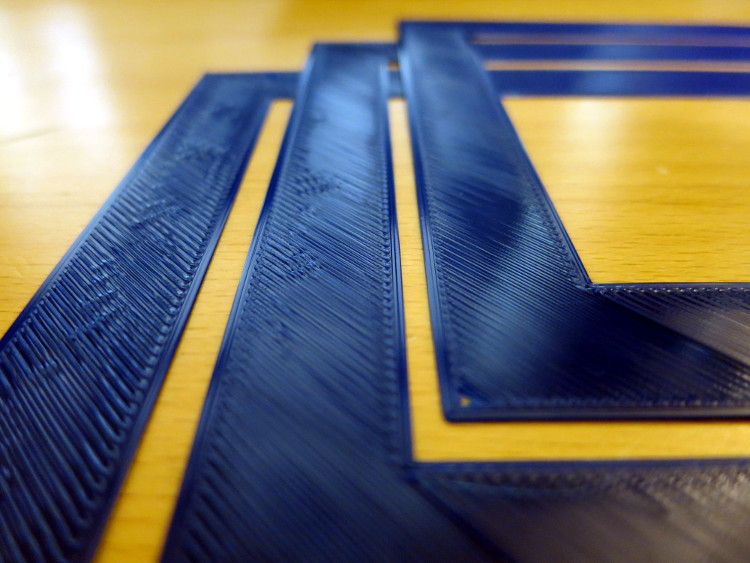
On a hunch I started experimenting with extruder tension which, surprisingly, paid off. The photo below shows the same one-layer test print, with three different settings of the extruder tension: the left one is (obviously) too loose; the middle one shows the ripples I’d seen, and the right one is the Goldilocks tension of juuuuuust right. The surprise was that ripples appeared when the extruder tension was too tight and when it was too loose. That is, if you turn the tension adjustment too much each time you test the tension, you may miss that Goldilocks sweet spot.
How to find – and keep – the right extruder tension
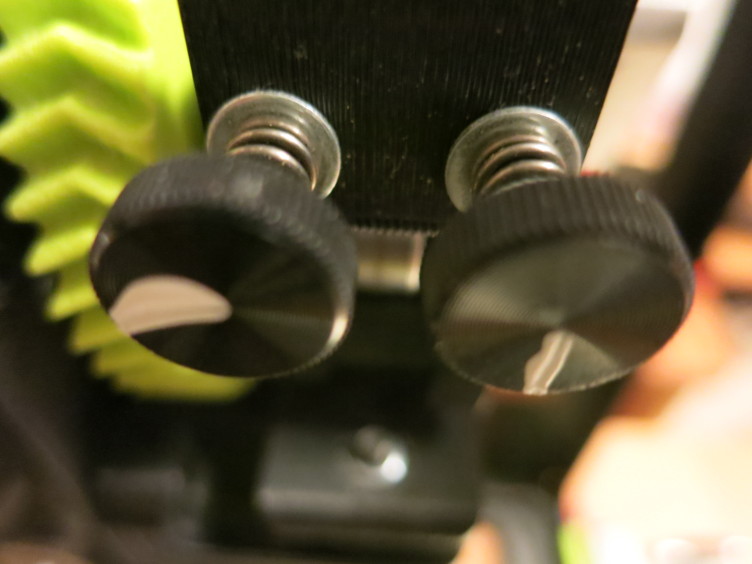
On my Lulzbot Mini, extruder tension is controlled by two screws, which adjust how much the extruder idler bearing presses the filament against the hobbed gear – the gear that digs into the filament to push it forward.
It seems obvious that I wanted both screws set to the same length, but beyond that I wasn’t sure quite how to find that sweet spot.

I began by painting marks on the otherwise-uniform heads of the screws, so I could tell the difference between, say, a half turn and a full turn, and I could later see if the screws had unscrewed a little during printing.
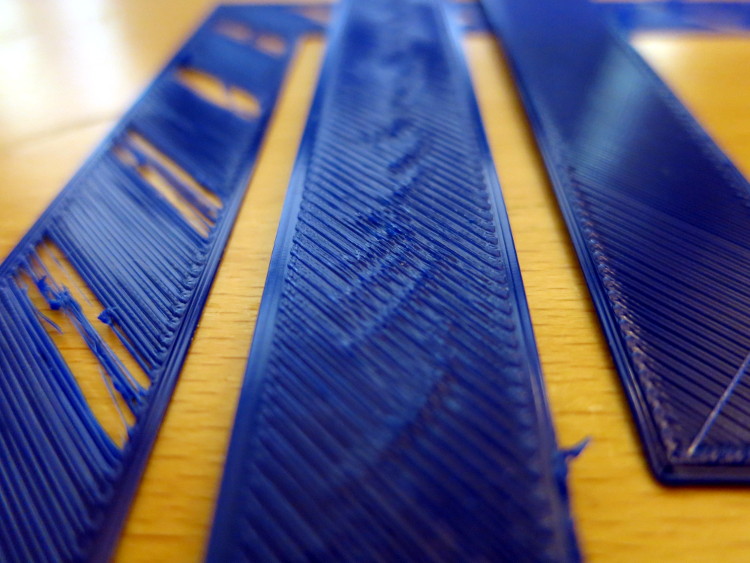
I had heard that you should loosen these screws until the filament no longer moves forward, then tighten them until the filament just starts to extrude. Doing that produced even worse ripples, and gaps in the first layer that showed the filament sometimes wasn’t moving forward at all. So that minimal tension setting clearly wasn’t right.
Next I started tightening the screws in tandem, one turn at a time, re-printing my one-layer test print, and comparing the result to the previous print.
First, the gaps disappeared; then I saw fewer and fewer ripples until… the ripples came back. Ouch.
At first I thought I’d loosened the screws instead of tightening them, but a few more experiments showed that wasn’t the case. So I started tightening and loosening the screws in ever-smaller increments, looking for the tension that would get rid of the ripples as much as possible.
After an afternoon (!) of experimenting, I finally landed on a screw tightness that produced only a few little puckers in the first layer; tightening or loosening the screws from that setting by as little as 1/2 turn produced ripples.
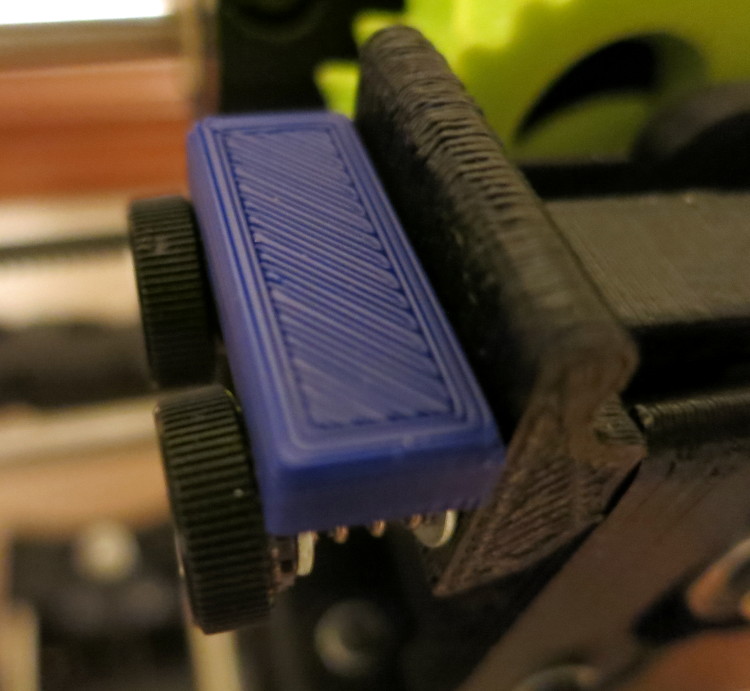
Because the screws can move around as I load and unload filament, I printed a little block I can use to restore the correct tension: Once I’d found the right tension I measured the distance from the idler release face to the bottom of the screw heads, and created a block of that width, in FreeCAD. Whenever I want to check the extruder tension, I drop the block in and tighten the screws until the block doesn’t move (then remove the block). By the way, on my printer, using PLA, the right setting seems to be 10.5 mm; your printer will probably need a different tension setting.
In case different filaments require different tensions, I can print a different block for each filament, so I can quickly set the perfect extruder tension for the filament.
By the way, now that those mountain-ridge-like ripples are gone, my printed boxes fit together perfectly!