
It’s time again for me to replace a couple 3D printed pieces of my Lulzbot Mini printer, so I’ve captured the details here of melting heat-set inserts into PETG 3D printed parts.
This post is a companion to my post on Printing Replacement Parts for Your Prusa 3D Printer, but it’s applicable to any heat-set inserts. It’s also a condensation of my video I learn how to insert Heat-set Inserts for 3D printed parts.
Safety Warning: You’re responsible for your own safety. You’ll be working with hot parts and tools that can seriously burn you or others, or set fire to things around you.
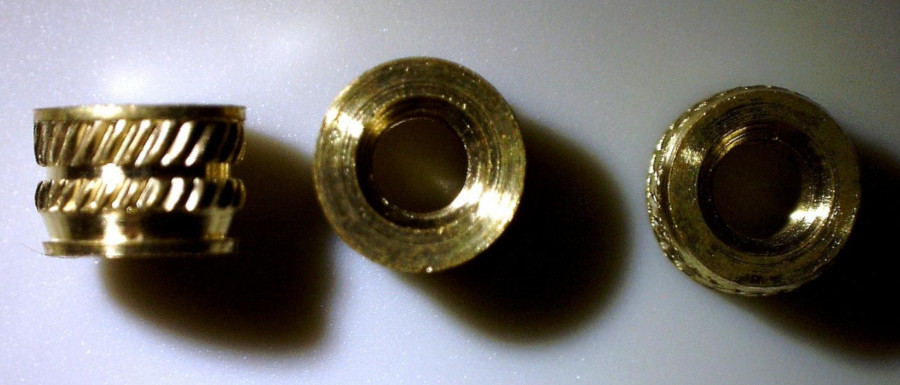
The heat-set inserts I’m using for this particular project are described in the Lulzbot Mini BOM (Bill of Materials) as M3 x 0.50 mm Thread Size, 3.800 mm. Notice that they are tapered: the top (soldering-iron side) is larger than the bottom (plastic insertion side).
Some people use a regular soldering iron tip for heat-set inserts, but I prefer using a tip that was made for the task, such as the Virtjoule Heat-Set Insert Tips for my Hakko soldering iron.
A large pair of tweezers are helpful for moving and holding the hot heat-set insert.
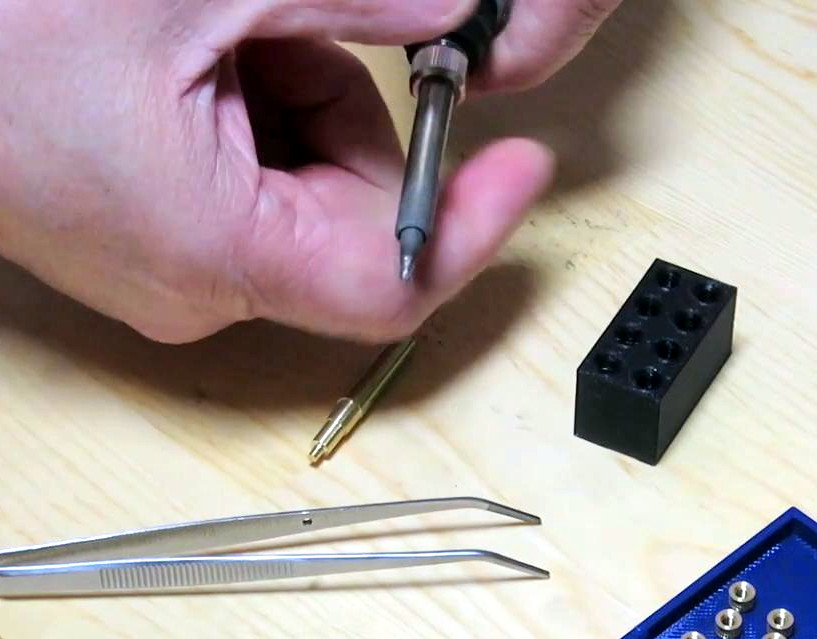
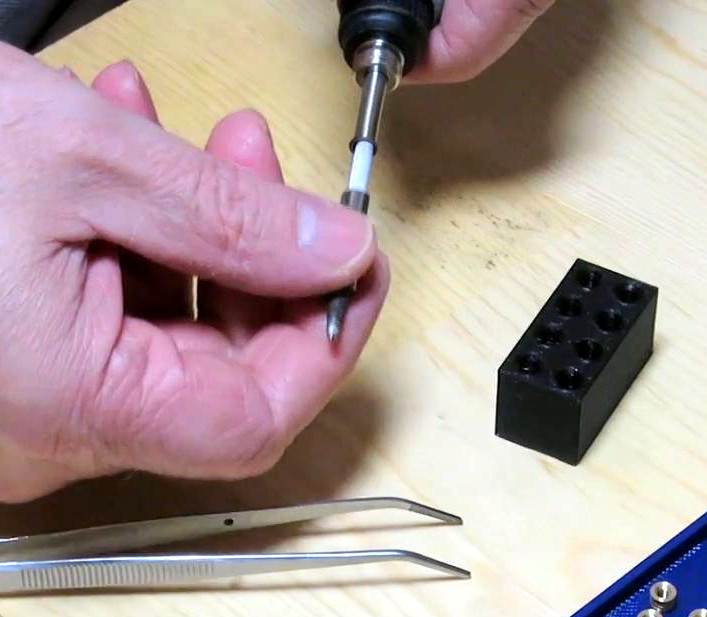
Attaching the heat-set insert tip to the soldering iron is easy:
- Make sure the soldering iron is cold
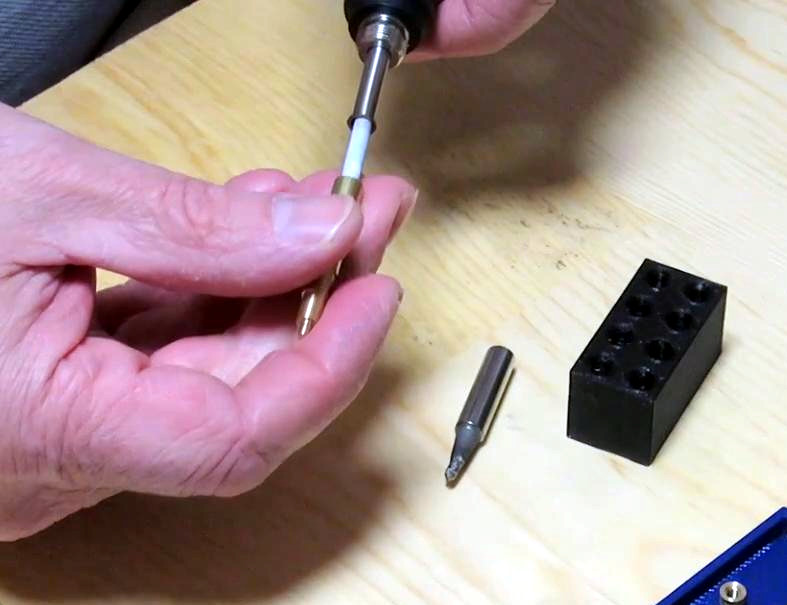
- Unscrew the soldering iron’s tip holder
- Slide out the soldering iron tip
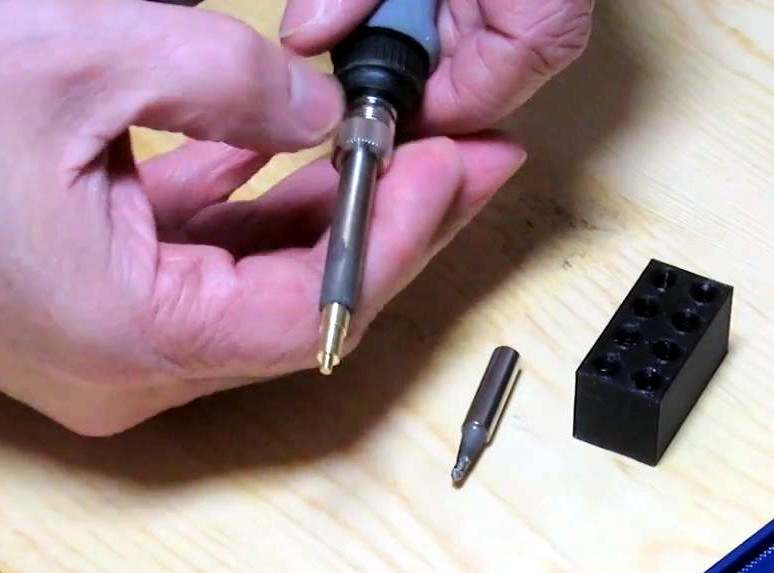
- Slide in the heat-set insertion tip
- Screw on the tip holder
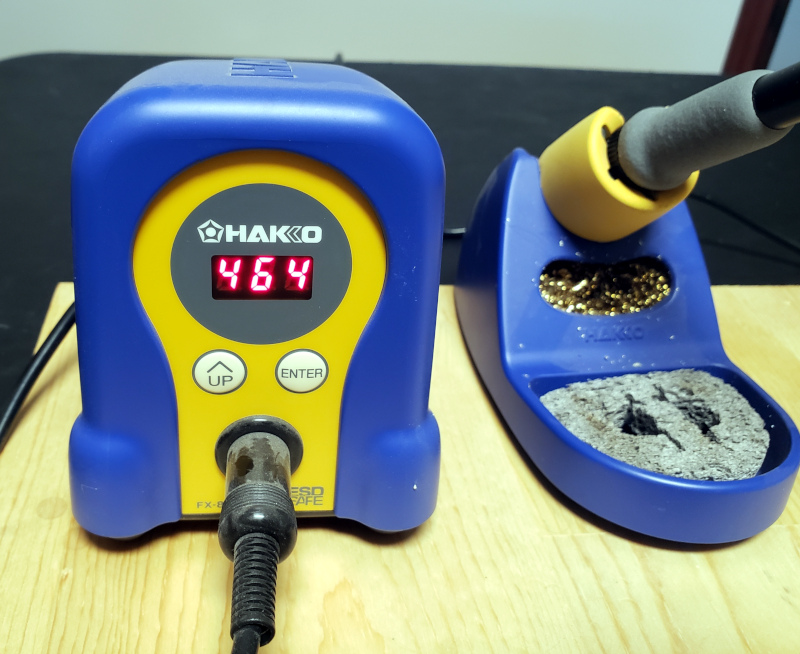
Once you’ve attached the tip to the soldering iron, heat the iron to a little below the extrusion temperature of the plastic you’re inserting into. For the PETG part I’m using, I set the soldering iron to 240° C (464° F). You want the plastic to melt, but slowly enough for you to control the direction and depth of the heat-set insert.
I use a thick wooden board as a work surface, to keep from burning anything.
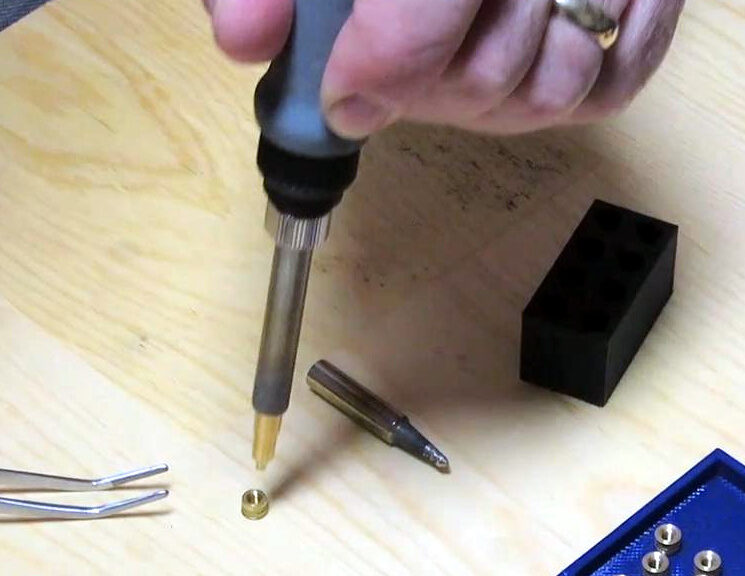
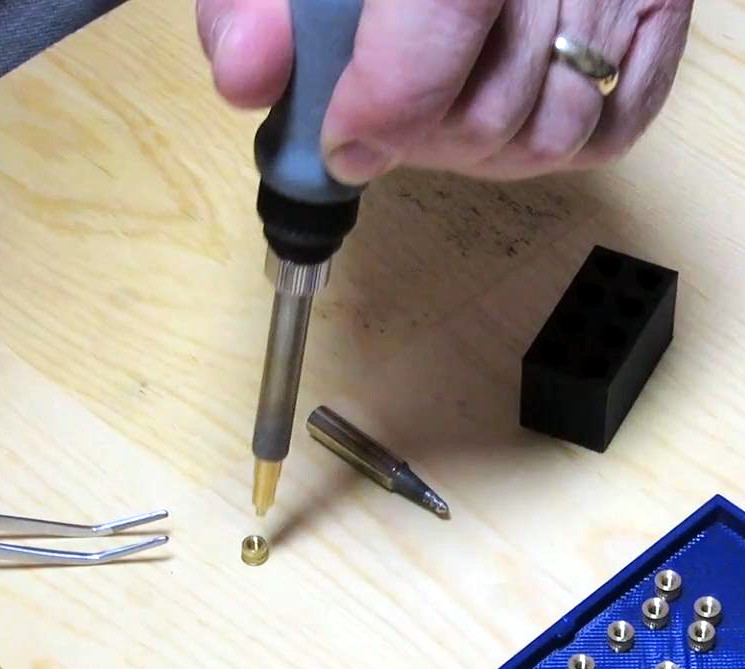
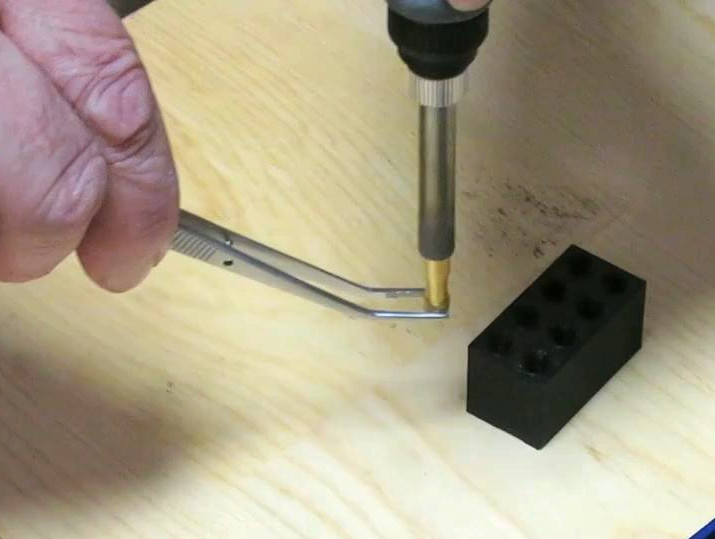
Place the heat-set insert right-side up – that is, with the larger end up – on the wooden board, then push the soldering iron into that heat-set insert.
Wait a short time for the insert to warm to temperature. I don’t have good advice as to how long to wait. Some people don’t wait at all before moving the heat-set insert to the hole.
Using the large tweezers, keep the heat-set insert on the soldering iron tip while you move the insert and the iron to the hole you want to press the insert into.
Keeping the solering iron upright – that is, perpendicular to the hole – genty press the insert with the soldering iron as the insert melts into the plastic. Remove the soldering iron as soon as the insert becomes flush with the plastic’s face (the top of the hole).
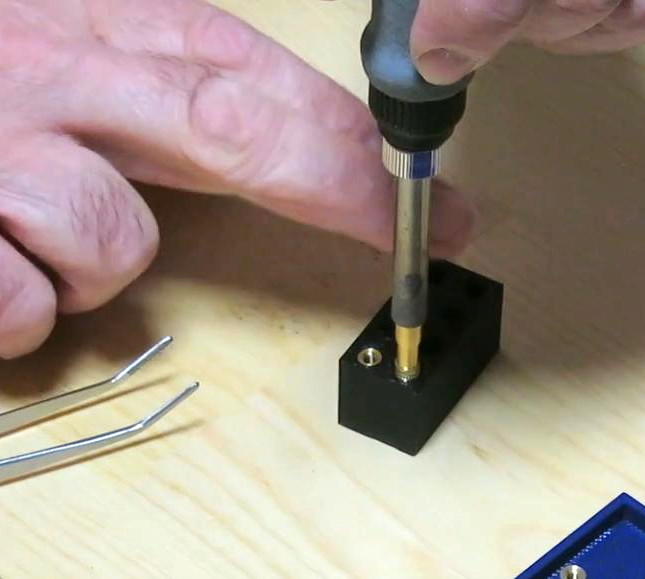
A pro tip: Check the insert’s height visually. Don’t check the height by sliding your finger over it…it’s really hot! (don’t ask me how I know)
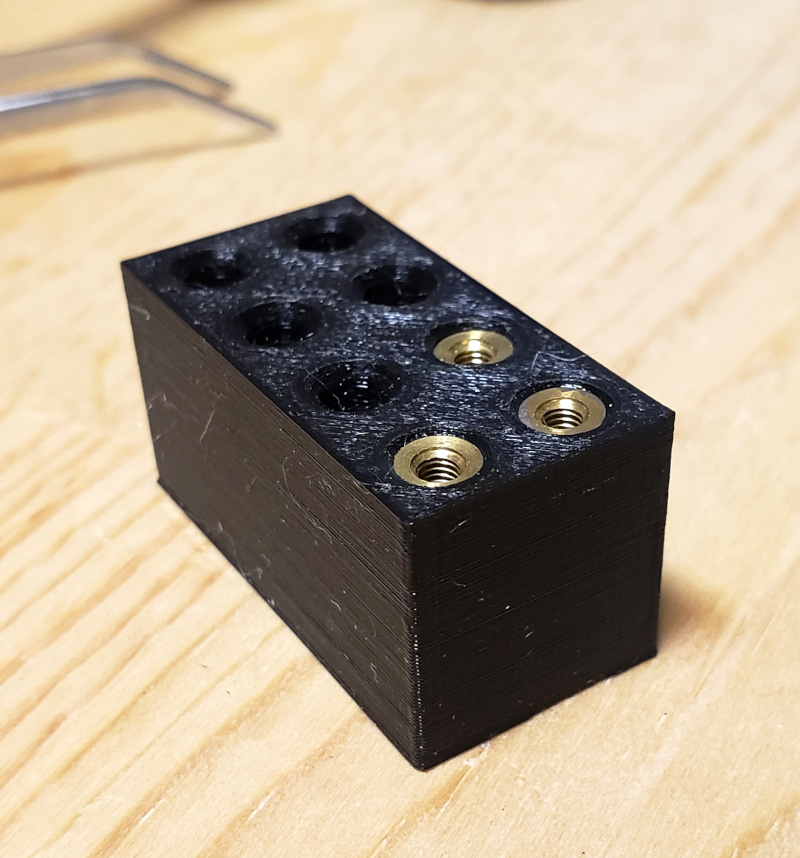
And that’s it. Let the insert cool and you’re ready to attach the part to your printer.
References
- Lulzbot’s Tips and Tricks page on inserting heat inserts: https://lulzbot.com/learn/tips-and-tricks-heat-set-inserts
- MatterHacker’s page on heat inserts, which has more info about the parts to use: https://www.matterhackers.com/articles/fasteners-for-3d-printing
- Virtjoule heat-set insert installation tips are available on Amazon: https://www.amazon.com/Virtjoule-Heat-Insert-Tips-Sizes/dp/B08B17VQLD
- The Lulzbot heat-set inserts, M3 x 0.50 mm Thread Size, 3.800 mm, I’m using here are available from McMaster-Carr: https://www.mcmaster.com/94180a331 as are the screws, M3 x 0.5 mm Thread, 6 mm Long, https://www.mcmaster.com/91290a111 and washers, M3 Screw Size, 3.2 mm ID, 7 mm OD, https://www.mcmaster.com/98269a420.
- My video, I learn how to insert Heat-set Inserts for 3D printed parts: https://youtu.be/yZXz131e7fs
- My other heat-set insert video, Installing heat-set inserts for 3D printed drawer pull knobs, might be useful: https://youtu.be/mgcgukodNNc
- My post, Printing Replacement Parts for Your Prusa 3D Printer, has tips on printing in PETG: https://bluepapertech.com/3d-printing/printing-replacement-parts-for-your-prusa-3d-printer/