
Having just spent 24 hours, spread over 4 days, assembling a Prusa I3 MK3 Kit, here are my notes to help you assemble your own kit.
Allow Plenty of Time: Although I spent 24 hours assembling the kit, others have successfully spent far less time. I’d allow a full weekend, with some spillover into the week, to assemble your kit. Much of the assembly involves very tedious work, so be sure to take breaks. The extruder assembly, in particular, took far more time (hours) and much more patience than I expected.
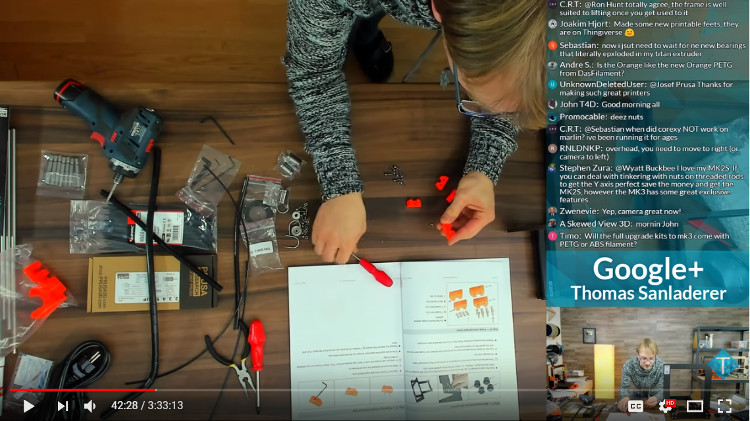
Prepare: I watched Tom Sanladerer’s excellent pair of videos (part 1 and part 2) recorded from his over-8-hour live stream unboxing and assembly of the kit. Although it was a big investment of time, it let me know whether I was up to the challenge of assembling the kit, and showed some of the tricky parts of the assembly (and there are tricky parts).
Use the Online Manual: As I started reading the (detailed) paper assembly manual, I realized it was out of date: I was missing the flathead screwdriver it showed. I was lucky: finding that difference made me go to the online manual, which is up to date, but more importantly contains helpful comments from other customers and Prusa support people. Without those comments, I probably would have given up, or at least broken some parts, several times during the assembly process.
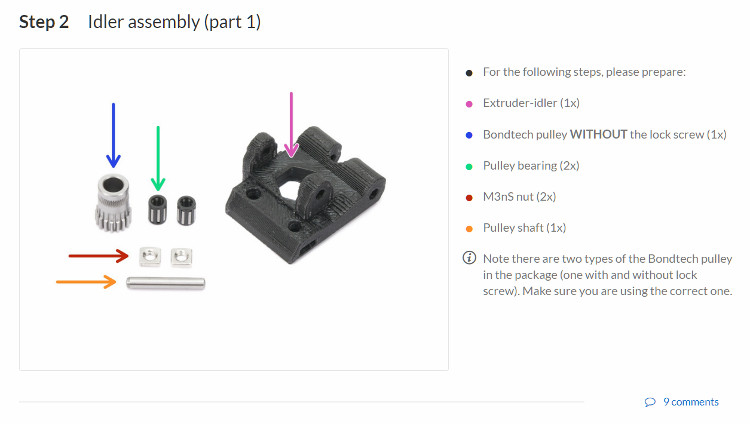
Read Users’ Comments Before Performing Each Step: The users’ comments in the online manual point out mistakes that are easy to make, and can break your kit or cause calibration errors later. I wish I’d read those comments before I over-tightened an idler pulley housing.
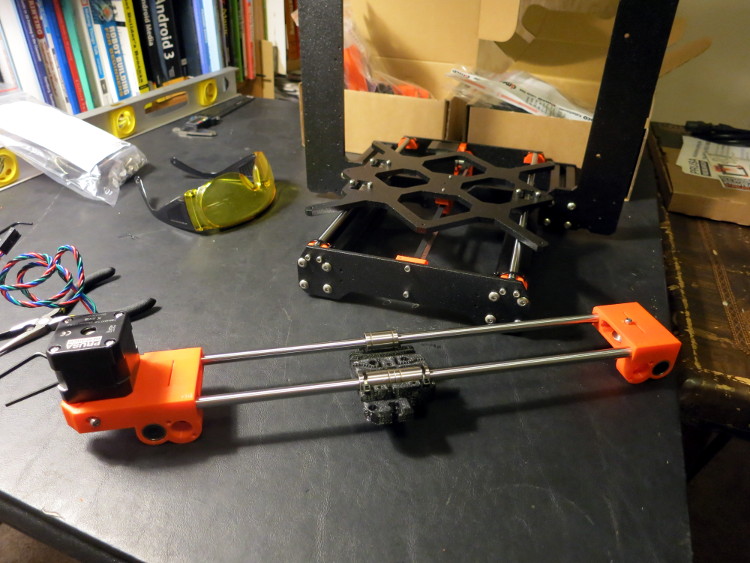
Be methodical: This kit is less like an Ikea table kit and more like a detailed wooden model of the USS Constitution with all its rigging. It’s a project that requires a lot of patience, double-checking that you’re using the right parts and in the right place, and a good bit of ingenuity when things don’t go according to plan.
Use Extra Tools: Although you can assemble the kit using only the tools it comes with, I found a couple extra tools a big time- and frustration-saver:
- A hobby Knife (X-Acto knife). Many of the parts need a little cleanup to clear tiny blobs of plastic that get in the way of the metal parts. I found several holes for nuts that needed a bit of cleaning before the nut would seat properly. From the comments, I learned that people who didn’t clear that extra plastic often over-tightened the nut and broke the plastic part.
- Safety glasses to keep flying shards of plastic out of your eyes.
- A hand drill and small-diameter bits to clean holes in press-fit joints. I found using channel-lock (Vise-Grip) pliers to hold a drill bit worked well enough. I found two press-fit joints that I needed to clean/expand slightly to make the parts fit.
- A digital caliper – like you’ll use to design 3D printed parts – is handy for those occasions when you aren’t quite sure whether you have the right length screw.
- A model maker’s magnifying headset with led lights would come in handy when looking for flaws in plastic holes. I’m very nearsighted, so I got along without such a headset, but it’s on my wish list for maintaining my printer.
Learn Techniques for Fastening Plastic Parts:
There are a few ‘tips and tricks’ that are useful in almost every step, because printed plastic parts aren’t as accurate as the injection-moulded parts you’re used to.
- Visually check the hole for plastic blobs, strings and overhangs before putting the nut in it. If you don’t check the hole first, the nut can become jammed in the wrong position.
- Use a spare screw to hold the nut in its hole until you need it. Many people complained about nuts, especially small, Nyloc nuts, falling out of the plastic parts before they were screwed into place. The spare parts bag has plenty of spare screws you can use to temporarily hold nuts in place.
- To lay a nut into its hole, screw it onto the end of a spare screw and use the screw as a handle to position the nut. This technique saved me, with my large fingers, a lot of frustration trying to place tiny nuts in tiny holes.
- Use the smallest Allen wrench to line up the nut and hole. This technique is useful for a square nut that slides sideways into its hole. The Allen wrench lets you line up the nut so you can then push the screw into the nut and tighten the screw. If you don’t use the Allen wrench, it can be difficult to know where the nut is and why the screw can’t thread into the nut.
- To seat a nut down into its hole, use a longer-than-necessary screw to capture the nut and pull it into its hole. Then unscrew the too-long screw and replace it with the correct screw. I found several nuts, especially in the extruder assembly, that I just couldn’t thread with the specified-length screw, until I used a longer screw to pull the nut into place.
- Get a feel for how much pressure a plastic part can stand, and when to be gentle when tightening a screw – I wish I had better advice than “try it out”. I found many screws required more torque than I was comfortable with. In one case I was tightening a screw and heard the dreaded ‘pop’ of the part cracking. Also, be aware of whether the screw is cutting into plastic (self-tapping), screwing into a nut, or screwing down to hold another part in place (such as the filament sensor). Screwing into a nut can require a lot of torque, but self-tapping joints can easily strip with what seems like only a slight amount of torque.
Print spare parts before you need them: The beauty of a 3D printed 3D printer is that you can print your own replacement parts. I recommend that as soon as your printer is assembled and calibrated to your satisfaction, start printing PETG replacement parts. Either that, or cultivate a friendship with someone else who has a Prusa I3 MK3 – which is a good idea anyway!
