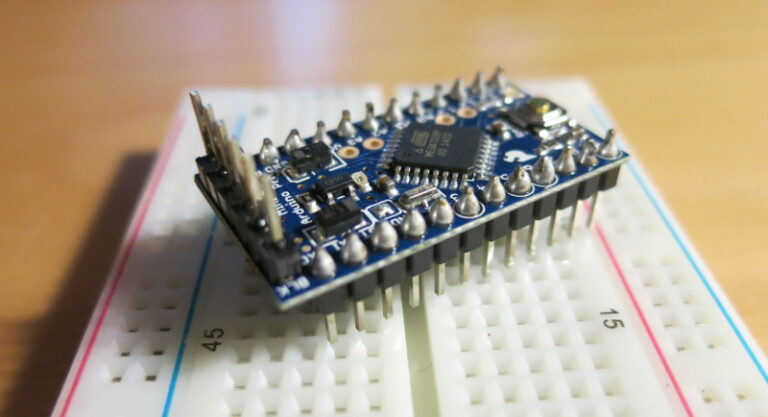
I recently decided to try out the Sparkfun Arduino Pro Mini 5V board. It has almost all the I/O that an Arduino Uno has, in a much smaller board. It comes without connectors, so you can solder in whatever style connector you need. For my uses, I needed to solder on male headers that allow it to plug into a breadboard.
So I tried out a new way of soldering male header pins onto a board. First I snapped off two 12-long headers from a strip of break-away male headers. Then I plugged those headers into a breadboard and laid the Arduino Pro Mini board over them. To keep the flux and solder spatter from getting into the breadboard holes, I put a piece of paper over the unused parts of the breadboard.
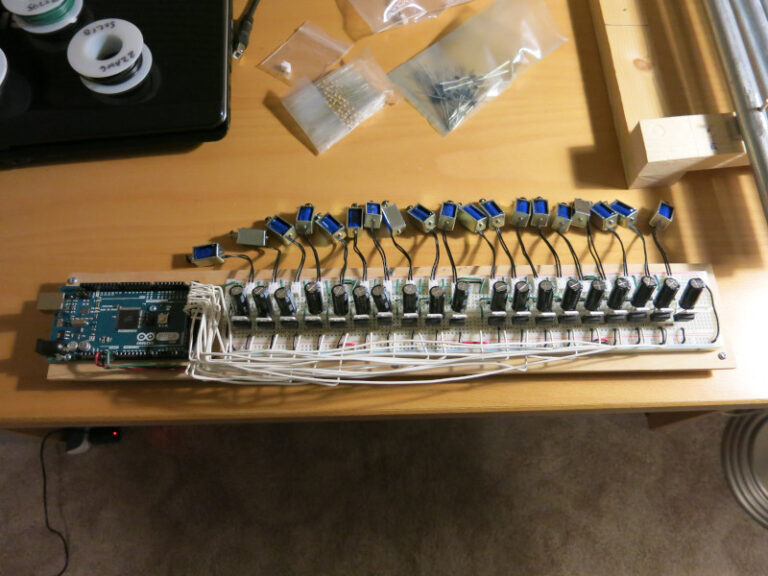
Earlier, I described how to build a frame for the glockenspiel. In this post, I cover the circuit that will strike each chime.
I’ve successfully tested the glockenspiel control circuit. It’s an Arduino Mega 2560, a Sparkfun Wifi Shield, and 19 repetitions of a simple solenoid control circuit.
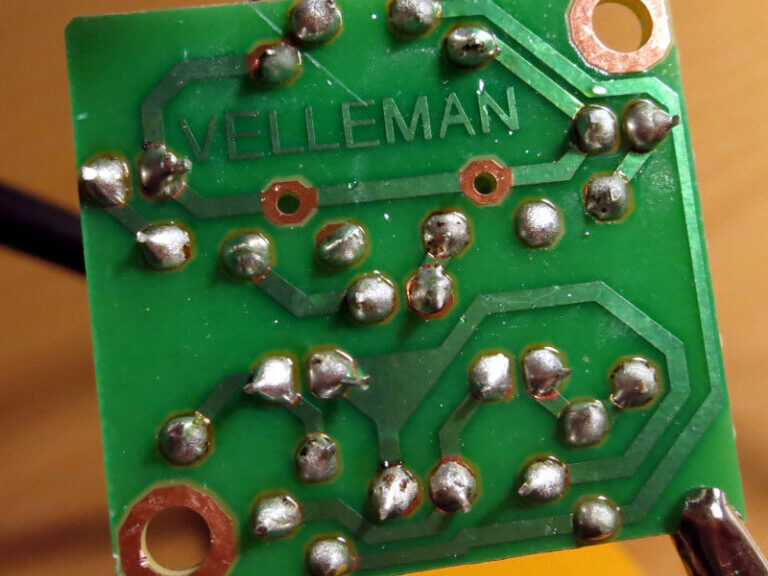
I’ve successfully assembled my second soldering kit: The Velleman MK130 ‘3D’ Christmas Tree. It’s a set of blinking LEDs that sit atop a 9V battery… or you can add some long wires and hang it as a Christmas ornament.
At any rate, it was good practice for soldering, and the result is kinda cute. See my YouTube Video of the Kit for the whole experience.
Since I’ve been doing Arduino work, I’ve accumulated a few board and Shield kits that I need to put together. I haven’t soldered since college, so I decided to brush up on my rusty skills by buying one of those little electronics project kits: a Velleman MK102 Flashing LEDs kit.