
In my previous post, I crashed and burned with a glockenspiel frame that slipped while gluing. This post covers the version two, working frame.
Ok, it’s not robotic yet, but I now have a manually-playable, octave-and-a-fourth glockenspiel made from 1/2″ EMT conduit.
If you want to know about cutting the chimes, see my earlier post on measuring and tuning the chimes.
This is my second try at making the frame for the chimes. You can read about the Epic Fail first attempt in my earlier post. The trick was figuring out how to make a wooden frame precisely-aligned enough that the chimes fit.
Here’s my tale of this second, successful attempt, phrased as “How to build a glockenspiel frame”
Suppose your glockenspiel will have 19 chimes (like mine) spaced 1″ apart, with a 1″ space at the top and bottom, then a 1.5″ piece of wood at the top and bottom, giving a total height of 24″.
Start by screwing together a 24″ square frame from overlapping pieces, where the sides are just for lining up marks; the top and bottom pieces will remain. Add a small triangle at each corner, to keep the frame square. Add a center piece of wood whose side (not center) marks the center of the frame. Later you will use this piece to line up the center marks of all the chimes.

Next, mark evenly-spaced 1″ marks that – when transferred to the angled parts of the frame – will show where each pipe goes. (I later found I should have marked 1/2″ spaces as well.)
Next you’ll add the angled parts of the frame:
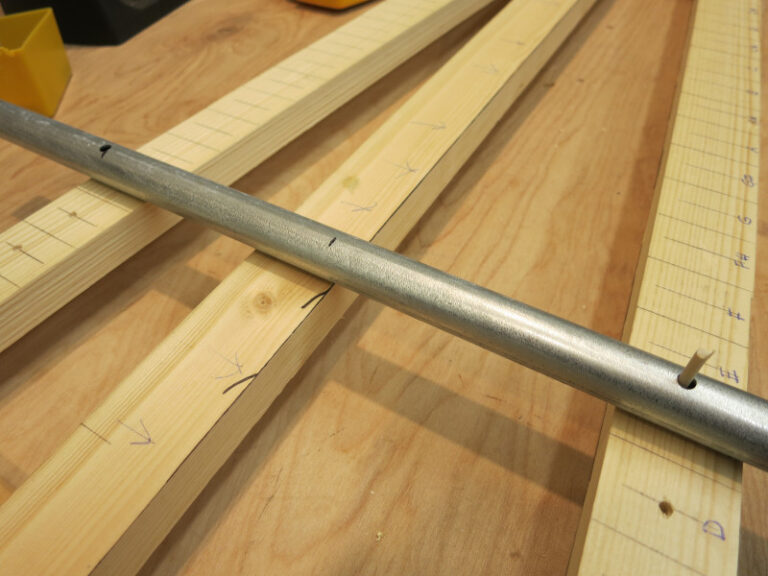
- On the longest pipe and the shortest pipe, measure the distance from the pipe center to the pipe node (one of the holes in the pipe)
- Mark the longest pipe distance on the top piece of the frame, and the shortest pipe distance on the bottom piece. It’s a little more complex than that, but you get the idea: place the pieces so that all the pegs will fit on them.
- Mark the centerline of two 1.5″ wide pieces of wood.
- Line up the centers of the two pieces of wood with the marks on the top and bottom pieces. Mark where the two pieces of wood extend past the top and bottom parts.
- Cut off the extended parts of those pieces of wood, then replace them on their marks.
- Glue and clamp the two pieces of wood to the top and bottom parts of the frame, making sure they are still aligned with their marks.
- While the glue is drying, use the 1″-spaced marks on the side pieces to mark 1″-spaced marks on the two pieces that you’re gluing. Then similarly mark 1/2″ marks (ok, I should have originally marked 1/2″ marks on the side pieces). These 1/2″ marks will line up with the holes in each chime.
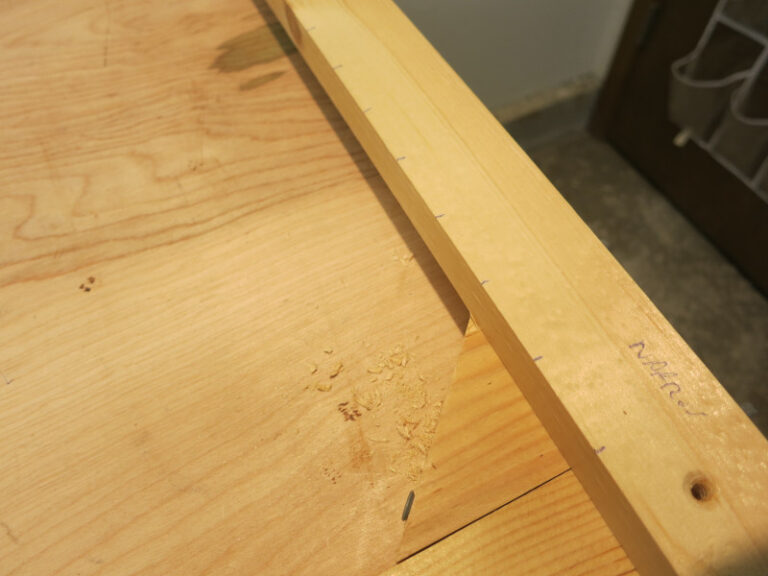
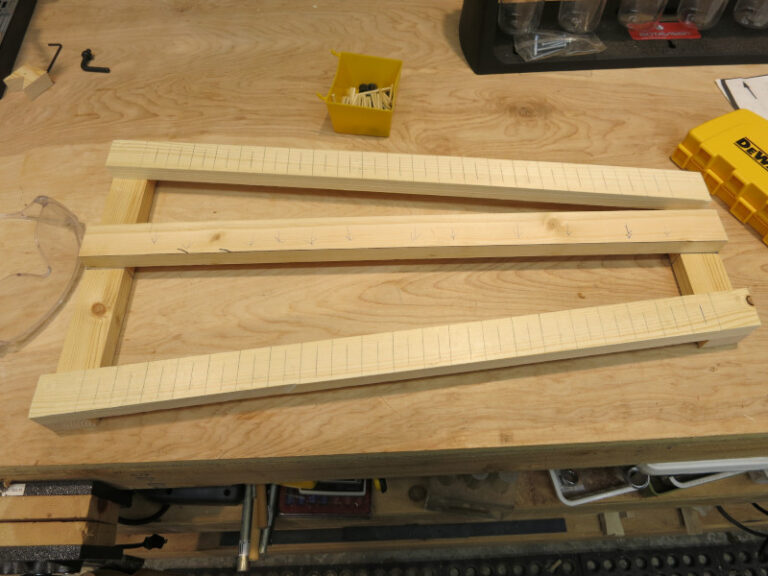
The result should look a lot like the photo below:

Once the glue is dry, unscrew the outer parts of the original frame, and cut the over-long remaining pieces, leaving you with what will be the final frame, with an extra piece running down the middle.
Next comes the tricky part: drilling the holes for the pegs that will hold each chime. The pegs need to fit precisely into the holes of the chimes so that the chimes will wiggle. Since the chime holes are 3/16″ and the pegs are 1/8″, there isn’t a lot of room for error. This is the point I messed up in the first attempt at a frame.
To make sure the pegs are lined up, here’s how to add the peg holes for one chime:
- Place the chime so that its holes are aligned with the 1/2″ centerline on the frame, and so that the lengthwise center of the chime is aligned with the long center piece edge that’s running down the middle of the frame.
- Hold the chime tightly in place while you use a drill with a 3/16″ bit to drill a shallow pilot hole for the left peg of the chime. Don’t drill the right side hole yet. Instead of drilling, you could use a very thin pencil to mark where the left hole will go.
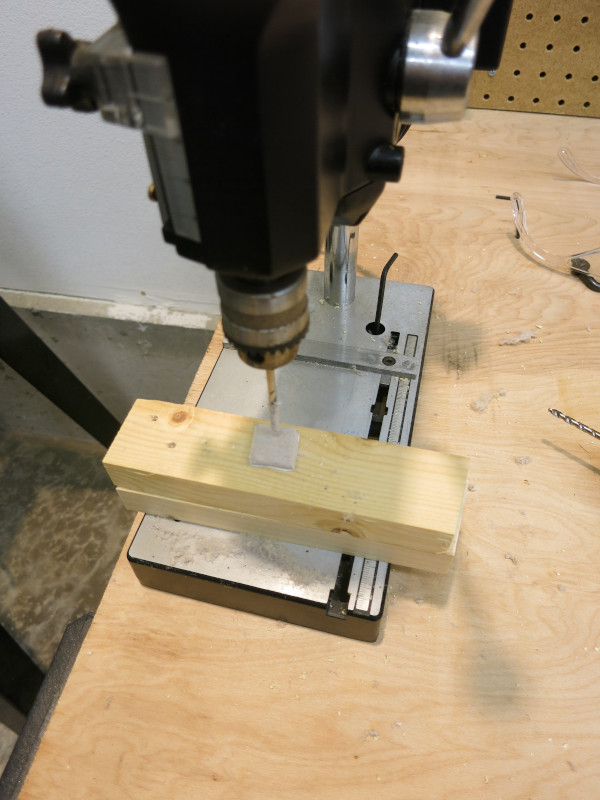
- Using a drill press (I have something like a Microlux micro drill press) with a 1/8″ bit, drill the left peg hole.
- Cut a 1.5″ piece of 1/8″ dowel; this is one peg. Insert this peg into the hole (but not all the way yet – you want to be able to pull the peg out soon).
- Place the chime on the left peg, and line up the right hole of the chime with the 1/2″ line. Center the left hole on the left peg, so there’s wiggle room.
- Mark the right hole in the same way you did the left (with a hand drill or pencil).
- Drill the right peg hole and insert a second peg.
- Place the chime on the left and right pegs. Double check that it is still a little loose. If not, you have to putty up the right hole and try again (luckily I didn’t have to do this).
- Remove the pegs and chime, and go on to the next chime.
Now unscrew and remove that center piece. You don’t need it now that you’ve drilled all the peg holes.
Meanwhile, it’s time to cut the felt pads that will surround each peg. These pads keep the chimes from rattling on the wood.
- Buy a set of felt pads with adhesive on the bottom; something like these Waxman pads.
- Cut the felt pads into 3/4″ squares.
- Punch a 1/8″ hole in the center of each square. I drilled the holes, which really gummed up the drill bit.
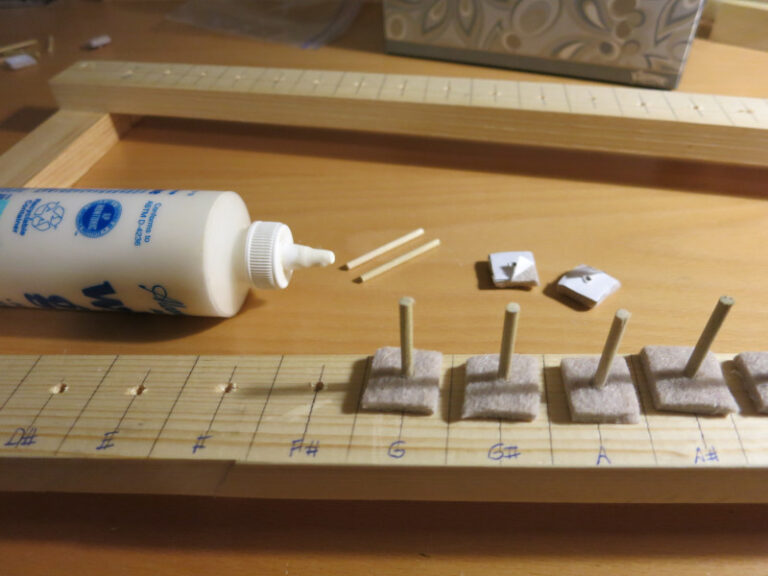
Now it’s time to glue everything together. For each peg:
- Put a small amount of wood glue on the peg
- Press the peg into its hole. Gently tap it home with a hammer.
- Clean off the excess glue
- Pick up a square of felt and peel off the adhesive backing
- Slide the felt over the peg and press it down onto the frame.
Once all the pegs and felt are in place, put the chimes on the pegs.
Your glockenspiel is complete! You can play it by hand with drumsticks, or you can do what I plan to do and add Arduino-controlled solenoids to play the chimes automatically.
See a video of me trying out my glockenspiel.

Next, I turn my attention to the circuit that will play the chimes.