
Now that the glockenspiel plays a number of Christmas carols, it’s time to put it in a box.
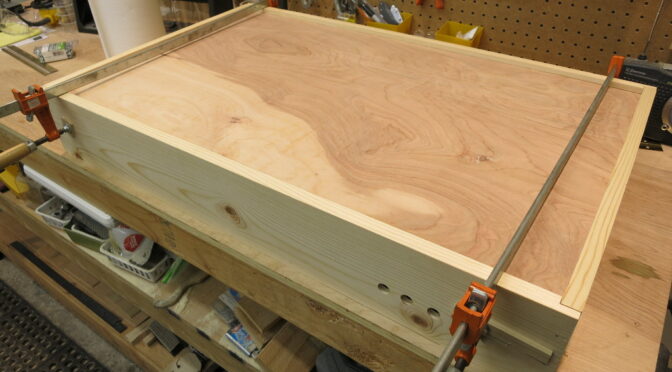
After a pile of routing I’m now nailing and gluing the Robotic Glockenspiel box together. Since this is a first prototype (the flat chime harp is too large to be practical), I’ve made the box sides from 3/4″ x 6″ “white wood” (fir or pine) instead of hardwoods, and made no attempt to conceal the nails.
The base and top of the box are 1/2″ plywood with a nice veneer; the sides are fir/pine. The base is held in place by 1/2″ wide and 3/8″ deep dado joints in each side; the ends are connected via rabbet joints. I’ve routed holes in the front for the 5 buttons that will control the glockenspiel, and scroll-sawn holes in the back to plug in power and usb cables. I also used a flush trim router bit to make all the sides the same height (for some reason one of the boards I bought was about 1/16″ wider than the other).
I’d hoped to plug/unplug the SD card from the back, but found the thickness of the box walls would require a huge hole to get to the SD card. So instead I cut a small hole, then decided to plug/unplug the SD card from the inside.
I plan to connect the lid via a 30″ piano hinge from Lowes. I’ve routed out an indentation in the back of the box so the hinge will be flush with the top of the box.
Since this weekend is the end of my end-of-year vacation, progress on the glockenspiel will likely be a lot slower from now on.
The next step is to drill all the mounting holes, put a clear finish on the box, then mount the chimes and circuit inside the box. I plan to figure out the lid later.