
As multiple woodworkers have mentioned, a drill press as-is is poorly suited to doing woodworking: the cast iron table can transfer grease to the wood; the table is small; the table has limited places to fasten clamps to hold the wood down.
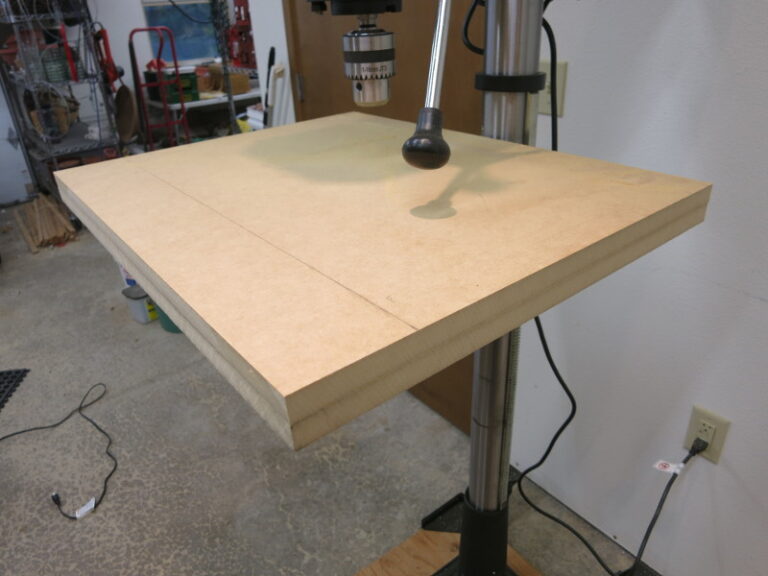
So here I am making a drill press table.
I started with a sketch based on the Woodworkers Guild of America’s Shop-Made Drill Press Table Plans, with an offset waste plug circle from Ronald Walters’ Drill Press Table design. I’ll narrate the project as a “how to” from here on.
First, cut two rectangles of 3/4″ MDF, a tiny bit over18″ deep and about 24″ wide. They don’t have to be exactly alike, because you’ll use a trim router to make them match exactly later. Note: I mistakenly made my table 19″ deep, then later (see below) found my T-rails are only 18″ deep.
Here’s an old woodworker’s trick: once you’ve decided how the two pieces will line up, scratch a couple diagonal marks along one edge. Later these lines will let you put those two pieces back together again with the right faces against each other. You can see how if the proper faces aren’t matched later, the two parts of the diagonal line won’t line up.
To maximize the space between the fence and the drill bit, we want the table to wrap around the drill press column a little. Measure how far back you want the table to go. I measured 3/4″ (vs. 1″) to keep the table from running into the rack on the side of the column. This is a good time to double-check that your drill press crank will clear your new table.
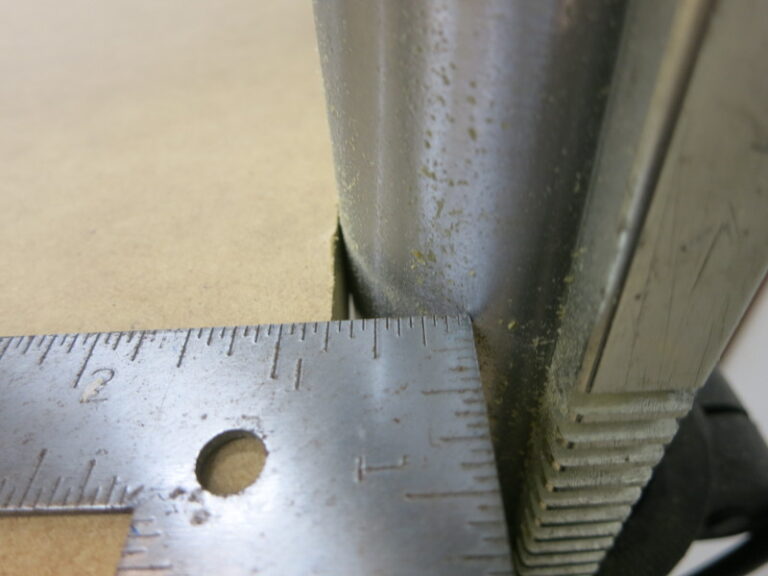
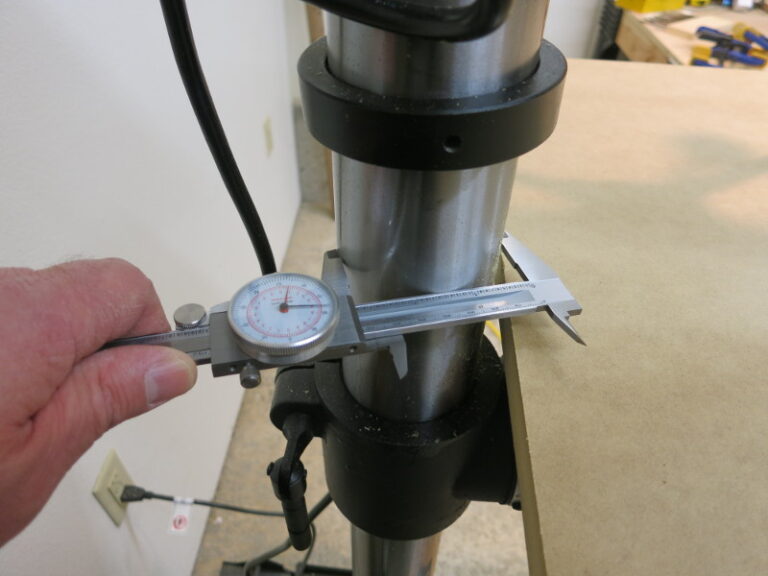
Then measure the diameter of the column. I measured about 2.9″, which I rounded up to 3″ so my cut won’t have to be very accurate.
Next, use a pair of compasses to draw a partial circle of the measured diameter (3″) that intrudes into the table by the measured amount (3/4″). You’ll need a scrap of the same wood as the table is made of, because the center of the arc is off the edge of the table.
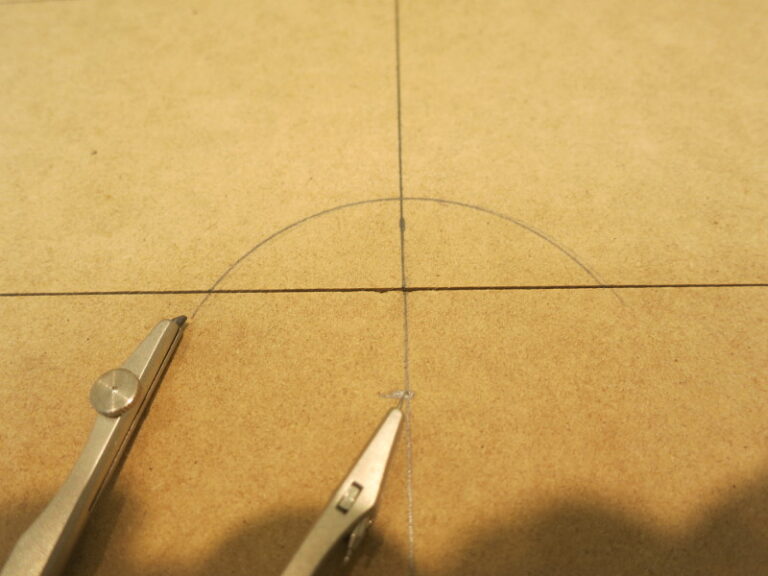
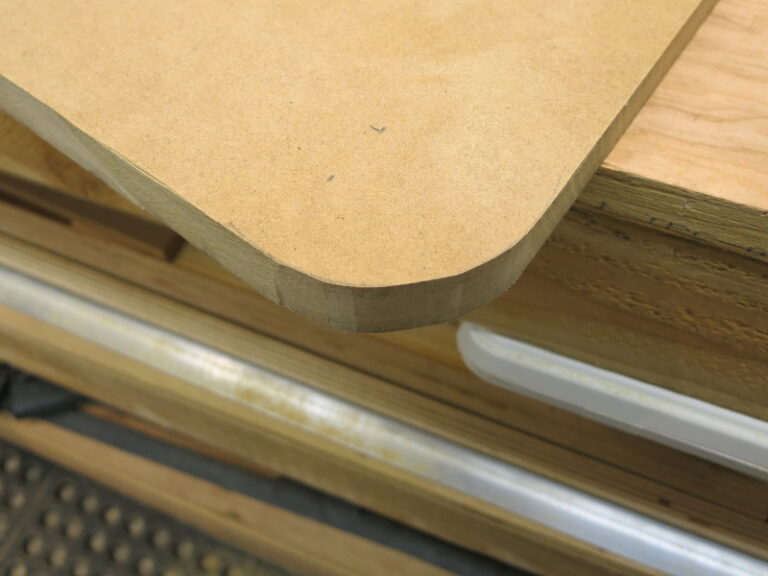
The front corners of the table will be rounded so you won’t bump into them as you use the table. While you have the compasses out, set them to the radius of the rounded corners you’re going to create (I used 1 1/2″) and draw the two rounded corners.
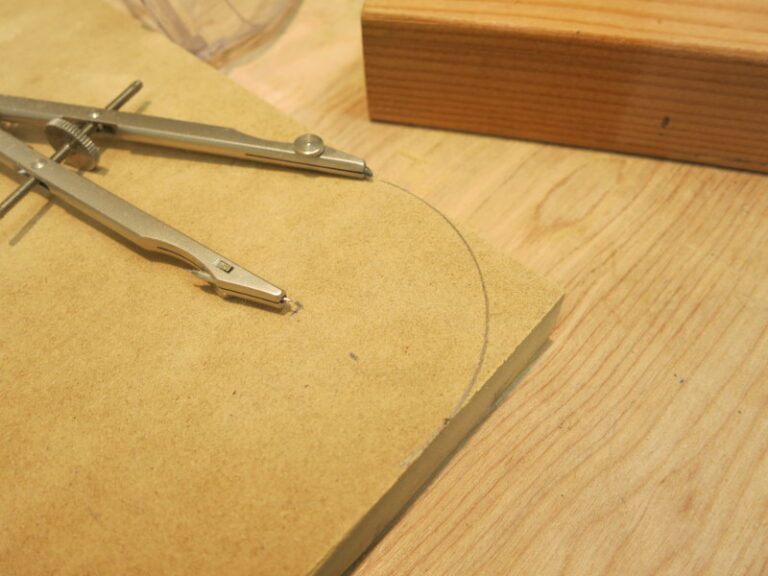
Cut out the column semicircle and the rounded corners using either a scroll saw or a band saw, or even a router.
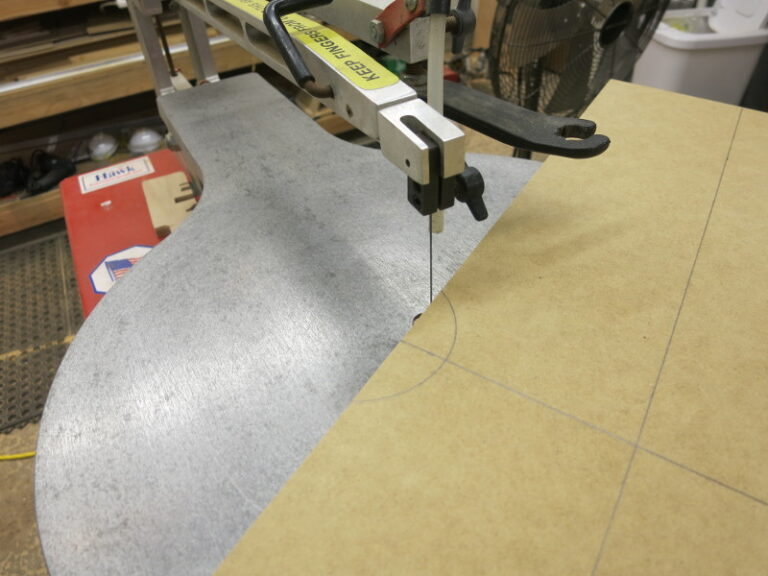
Even slightly sloppy results look ok.
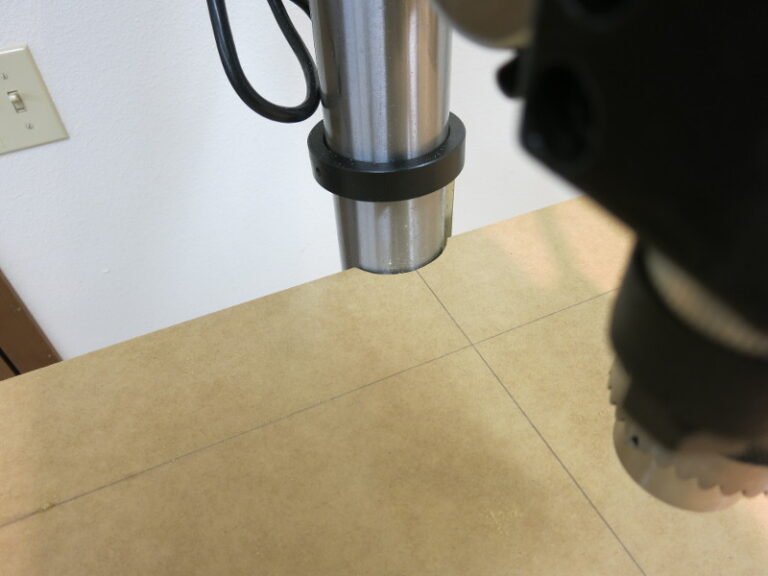
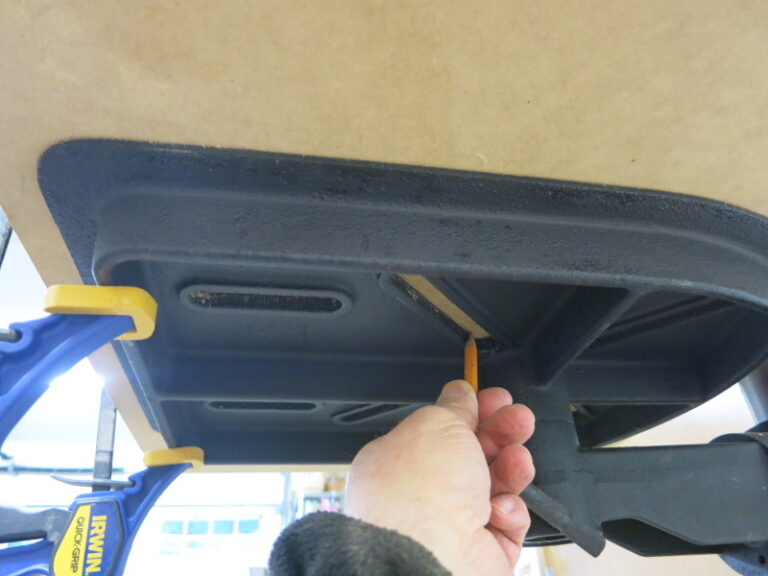
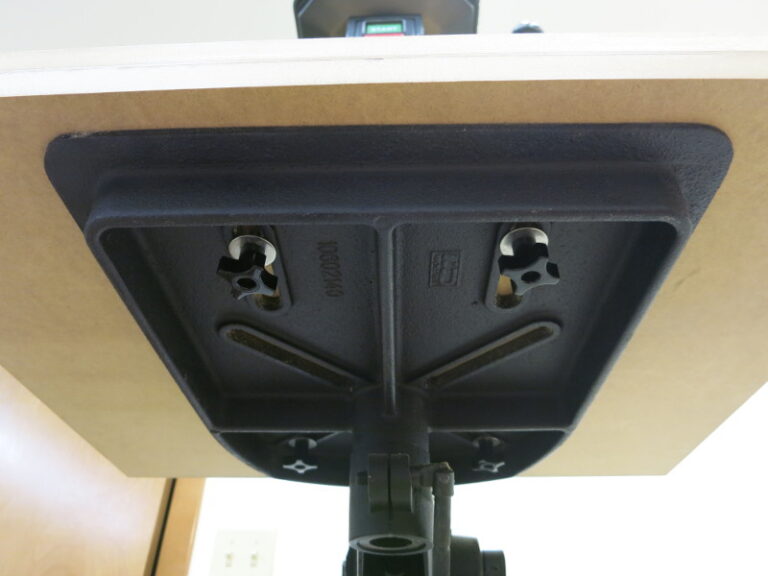
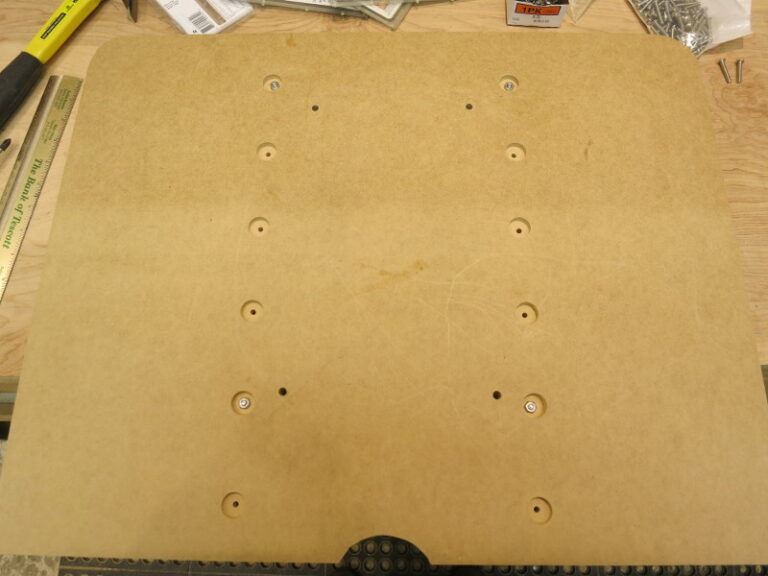
Position the one cut table piece on the drill press. Once you’re happy with how it’s placed, clamp it to the drill press iron table and use a pencil to draw the outlines of the iron table slots. You’re later going to countersink some bolts with knobs to clamp the finished wooden table to the metal drill press table through these slots.
Now flip the wooden table over, mark some likely places for 4 bolts to hold down the table, and drill 1/8″ pilot holes. We drill pilot holes because we will countersink the bolts, and will need pilot holes to make everything line up. I clamped the two parts of the table together and drilled the pilot holes through both, which wasn’t the best idea (see shifting during gluing, below).
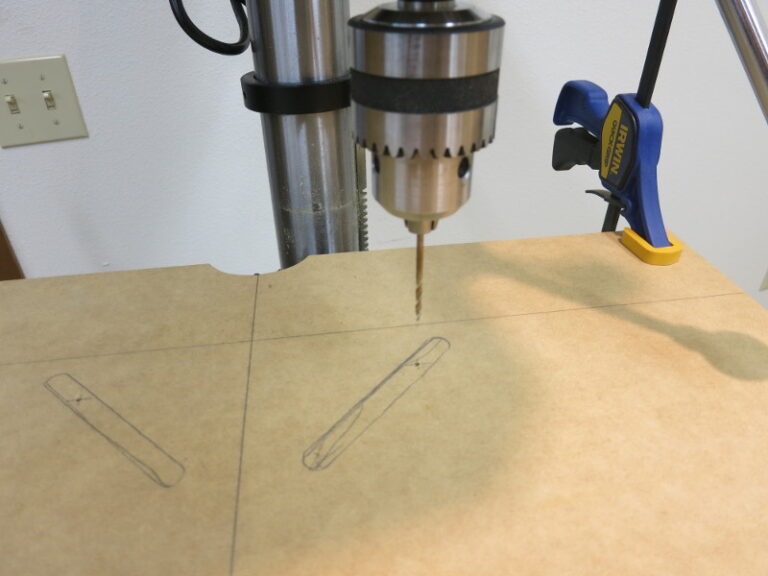
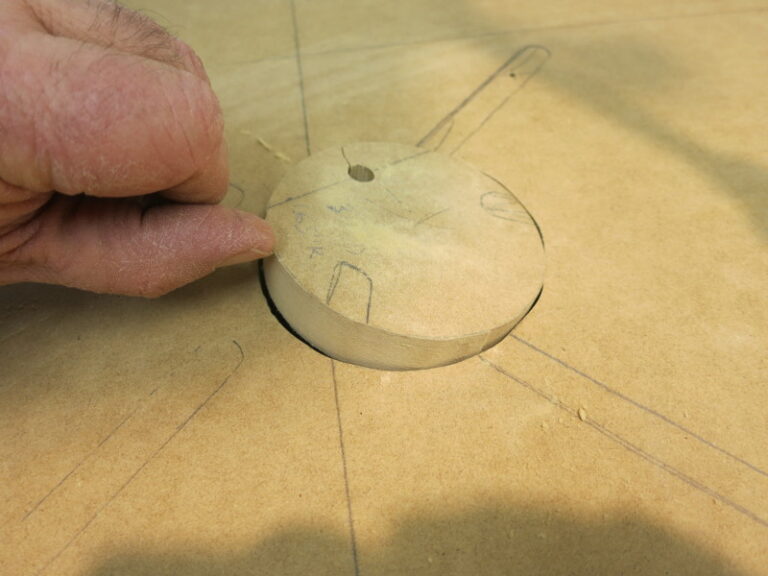
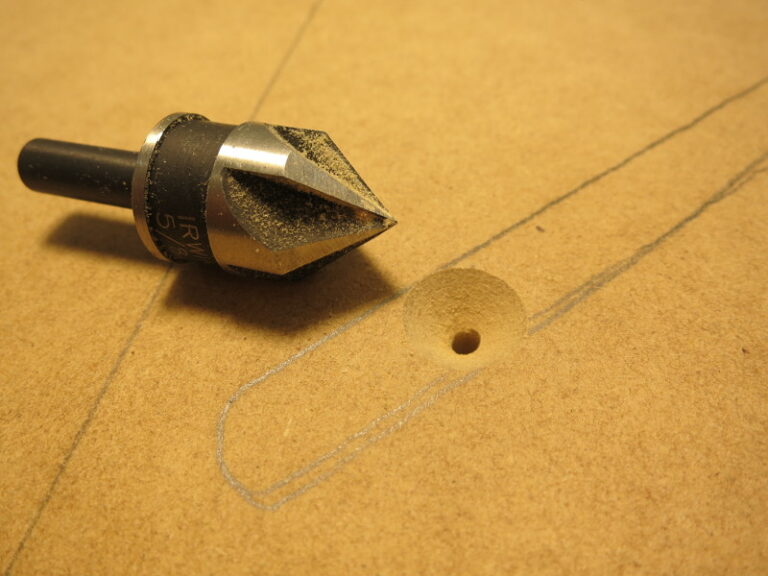
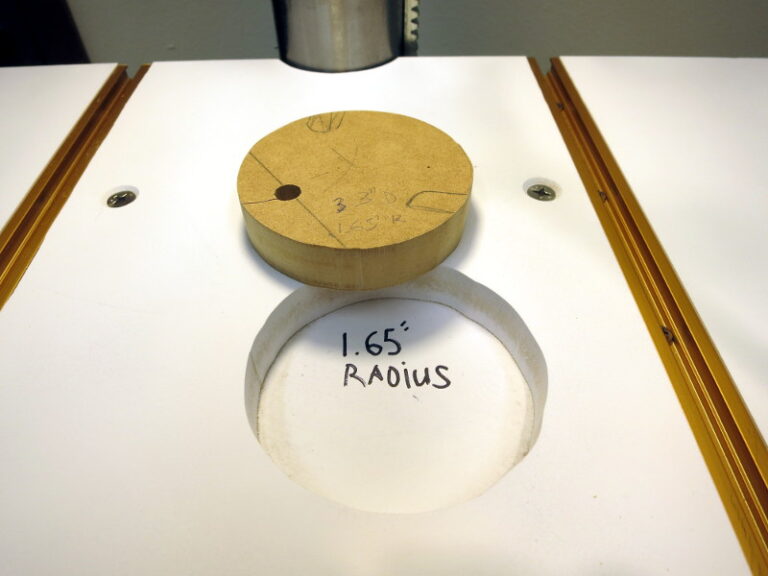
Next we’ll make the waste plug in the center. This waste plug will act as a protection to keep from tearing out the wood you’re drilling and to lessen the chance that you’ll accidentally drill a hole in your table. Set the compasses to 1 1/2″ radius and draw a circle off-center of where the drill will be (but encompassing the largest drill bit size) – this will allow you to rotate the waste plug, using one plug for many cuts. You could cut this hole with a router or maybe a hole saw.
By the way, save the disk you cut out. That disk is your first waste plug.
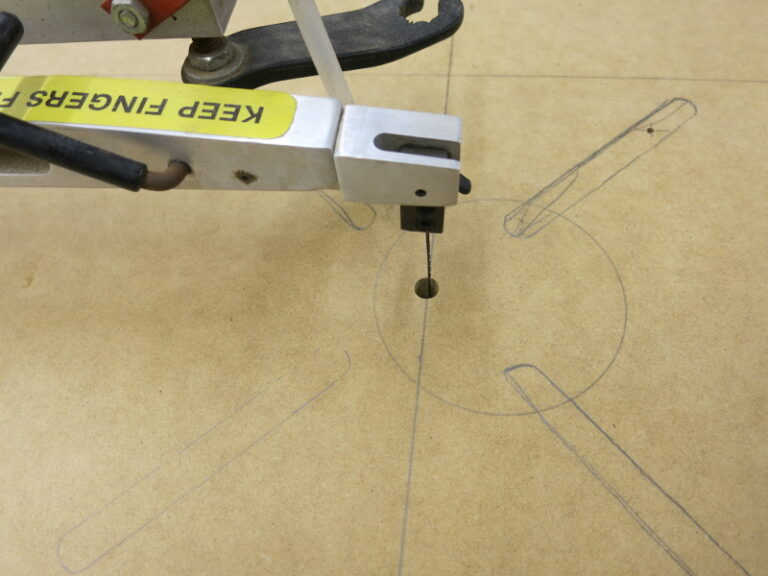
Choose a circle slightly smaller than the hole you just cut. I chose 1.65″ radius. Cut the disk you just made so it’s a circle of that radius (use the compasses). Note: I just noticed that 1.65″ is unlikely, when I cut a 3″ diameter circle – I think I mis-measured either the hole radius or the plug radius.
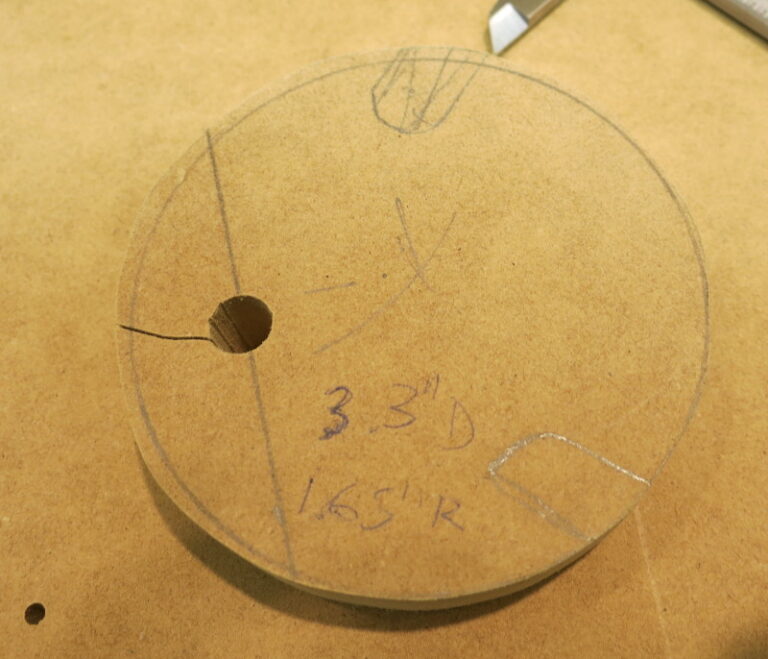
Note the size of this plug, because you’re going to need to cut several of these in the years you use the drill press. I plan to write the radius on the table or plug. By the way, this disk is a little smaller than the hole you made so that you can pull the plug out with your fingernail.
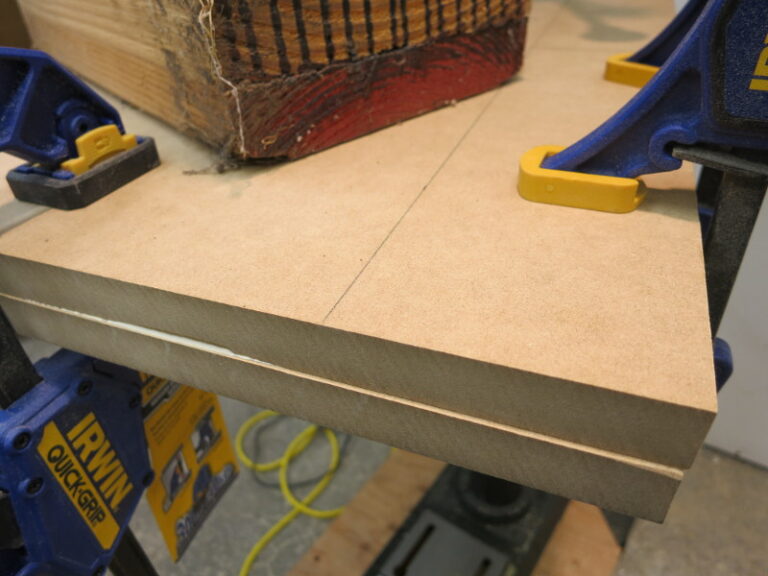
Next we’ll glue the two table pieces together. Remember the diagonal lines we drew to keep the pieces lined up? Re-align the proper faces of the two pieces by lining up those marks again.
Once that’s done, open the two pieces like a book. Sand the inner face of each piece with very rough sandpaper, to make the glue sink in better. Clean the resulting sawdust off with a damp paper towel. Then put a generous amount of glue on one of the two pieces.
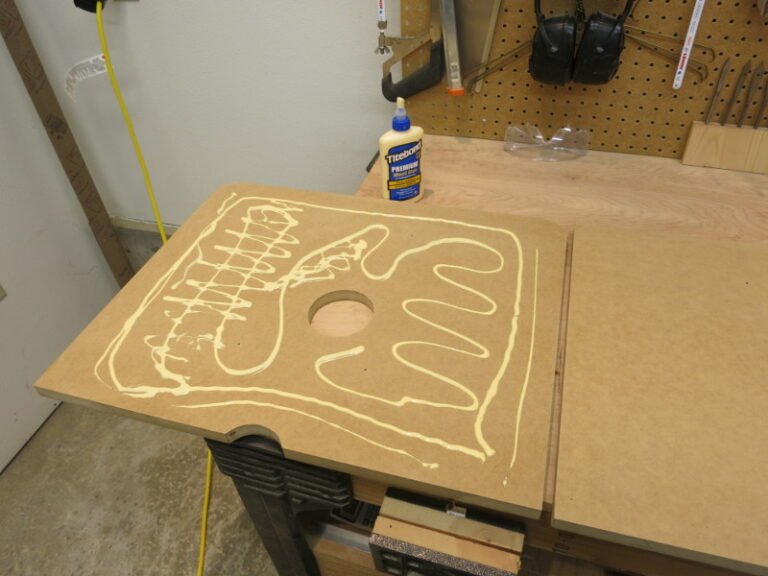
Then fold the pieces back together, align them, and clamp them. I put small rods (pieces of coathanger) into the pilot holes to keep the pieces aligned, but then I made the mistake of removing those rods before I put all the clamps on – the pieces slid a little bit. That sliding will make the pieces a little misaligned, but I can fix that with a router later. I probably should have bolted the pieces as I glued them, but the bolts hadn’t arrived yet.
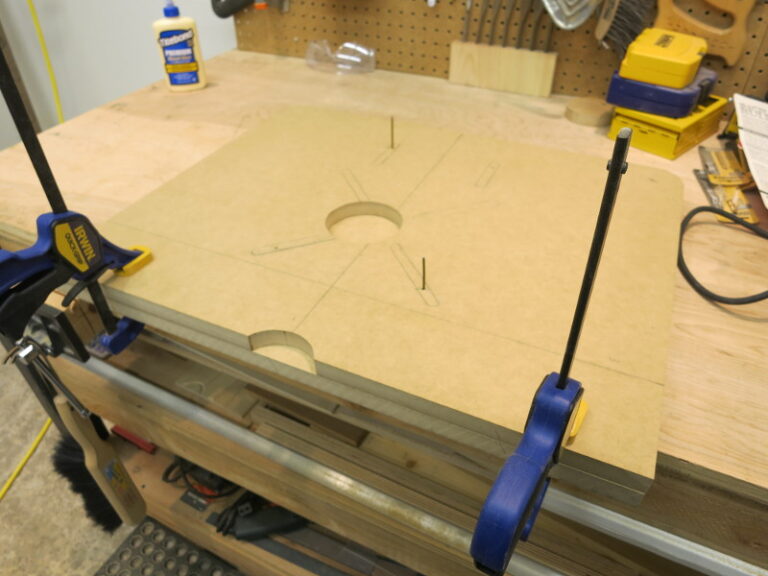
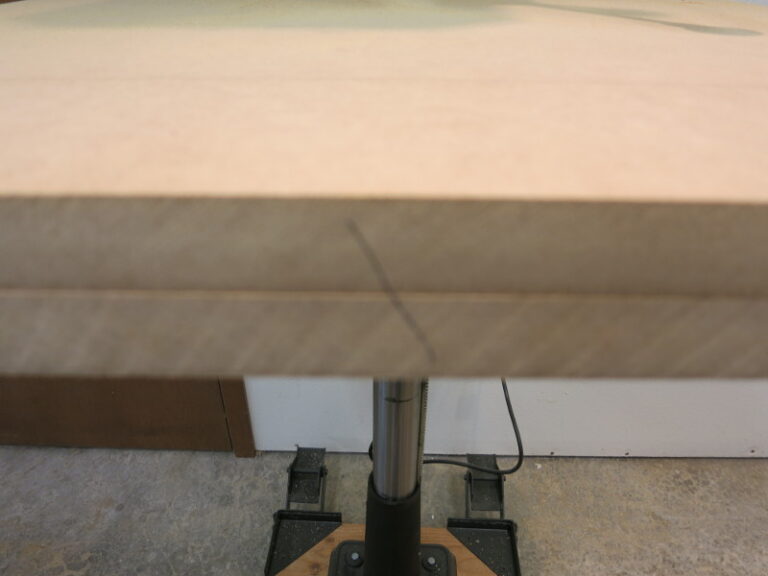
You can clearly see how the two pieces have slipped during gluing. I’ll need to fix that with a router.
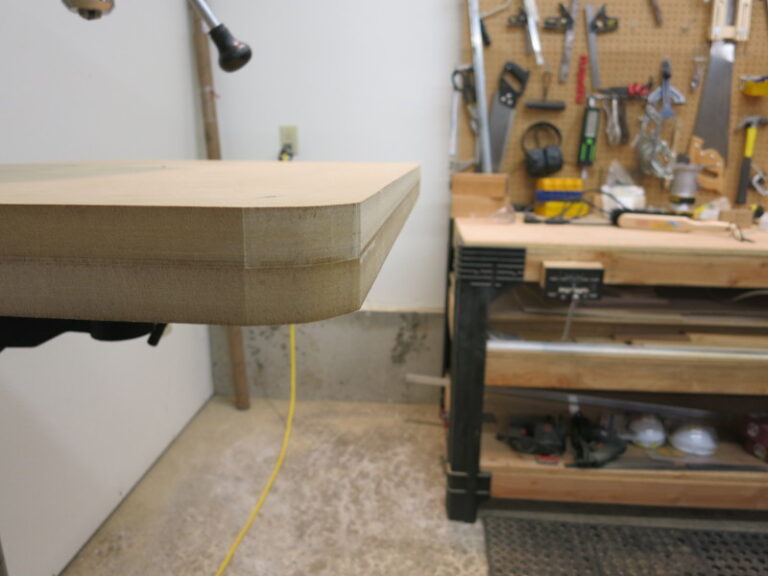
Once the glue has dried, use a trim router with a flush trim bit. With the rectangular table piece on the bottom, the flush trim bit cleans up the slip that happened during gluing, so the top and bottom have the same outline.
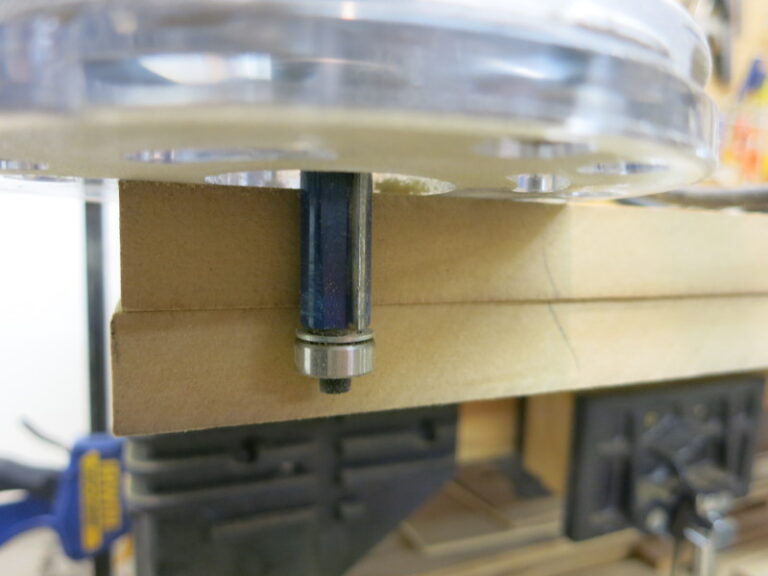
Next, flip the glued table over so that the piece with the cutout for the drill press column and the rounded corners is on the bottom. Run the trim router around the edge (clamping the table down so it doesn’t slip). A little sanding wouldn’t hurt here. The result is a 1 1/2″ thick table with smooth sides.
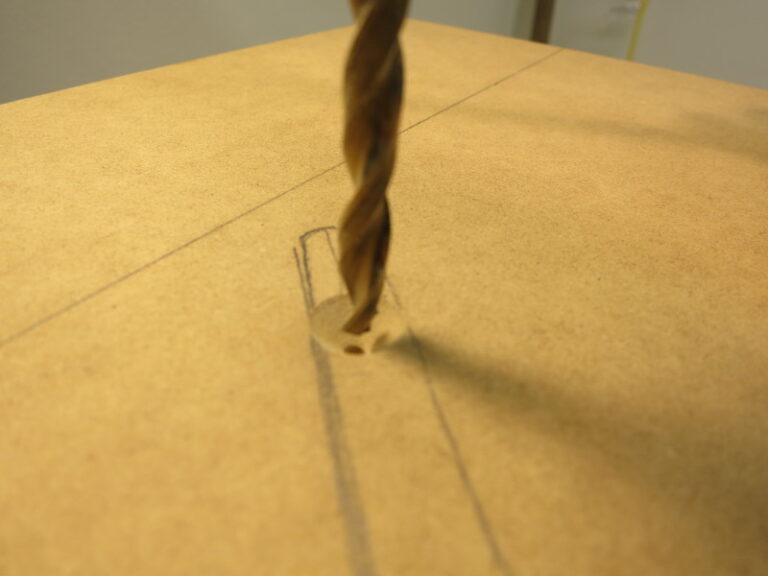
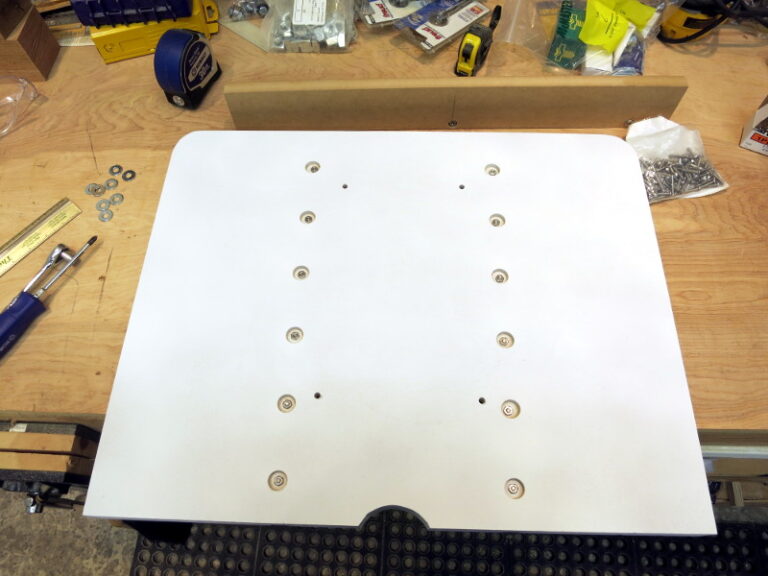
Use a countersink bit to sink the bolts that will hold the table to the iron drill press table.
Now the pilot holes come in handy: they give you a center for drilling the 1/4″ bolt holes after the countersink bit has removed your original marks.
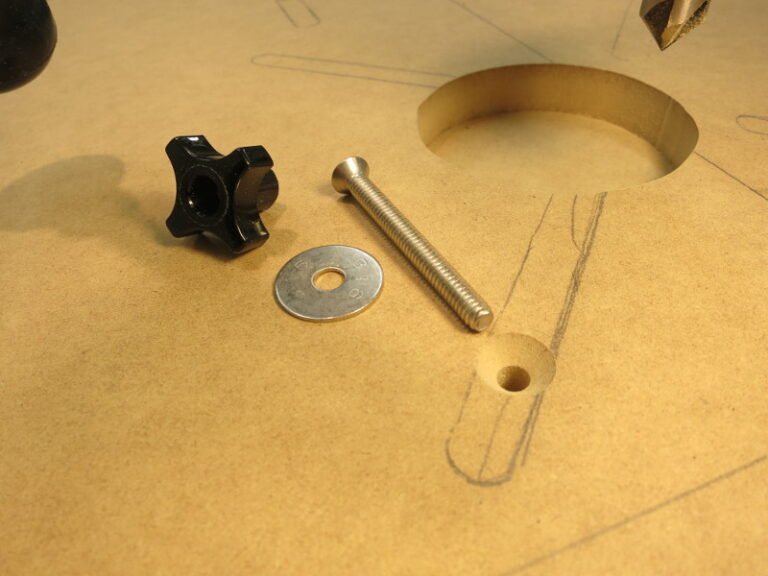
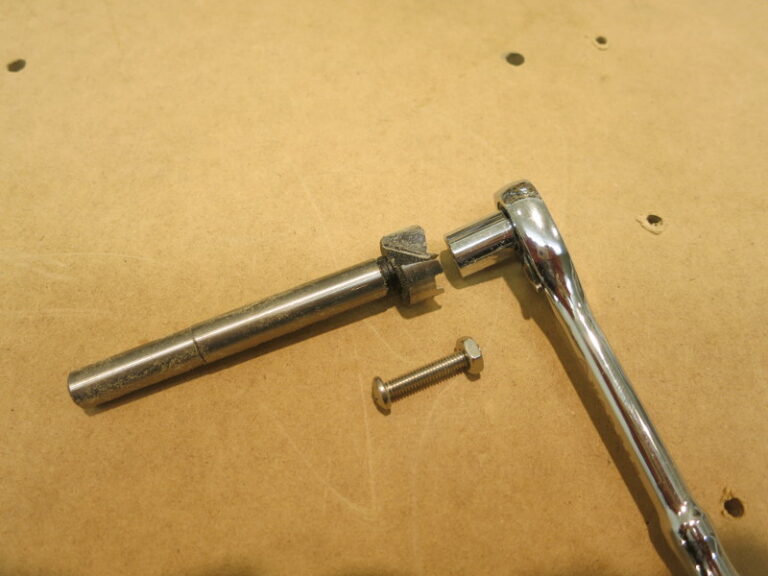
Now that the holes are drilled and countersunk, it’s time to test-bolt the table to the drill press. Collect your parts: Four sets of a 1/4″ flat-head bolt, a fender washer to put underneath the drill press table, and a threaded knob to tighten it all down.
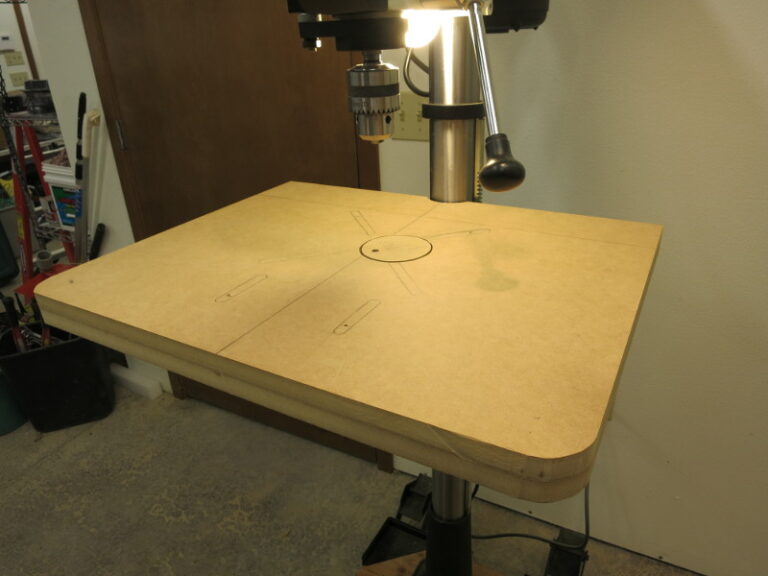
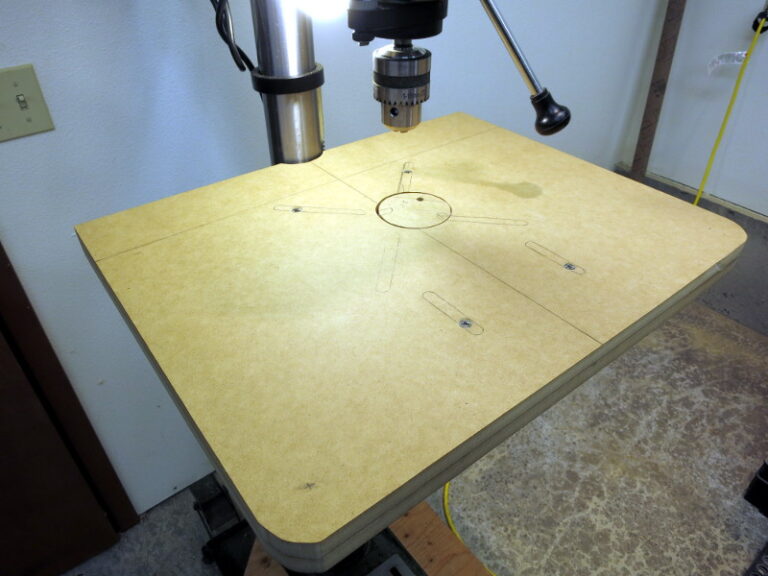
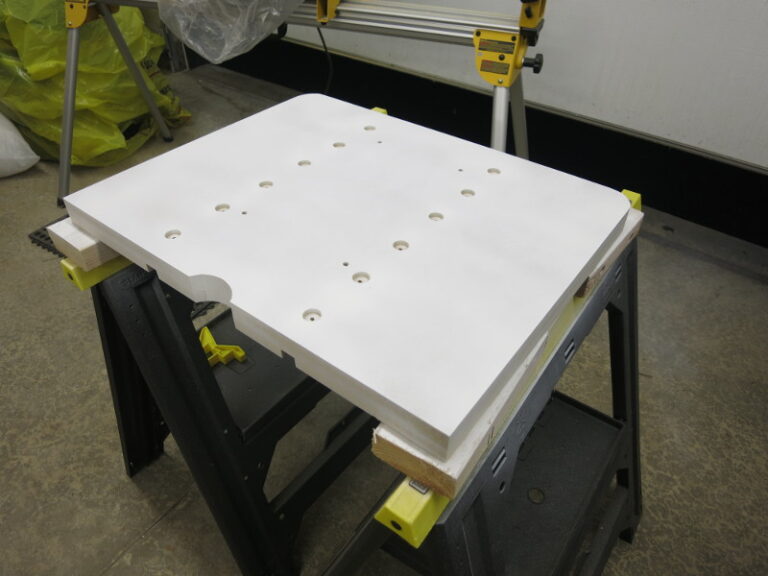
Here’s what the top of the table looks like at this point.
…and the bottom.
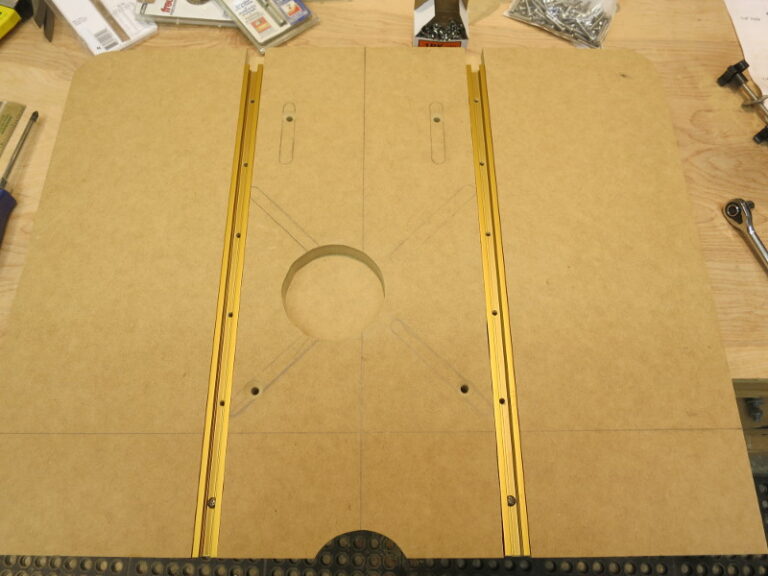
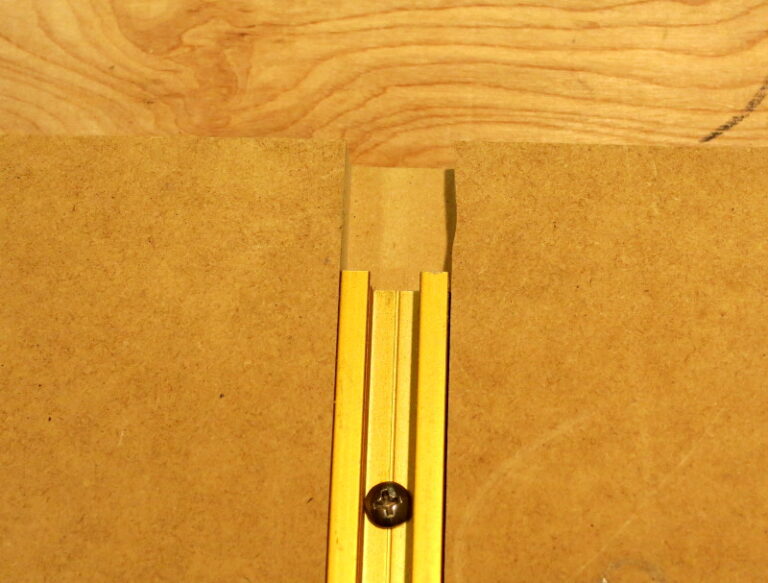
Next you’ll mark the center-lines of the two T-rails that will hold hold-downs when you use the table.
First you need to decide where (left-right) the rails will be positioned. There are two constraints: you don’t want the T-rail any closer to the center than the hold-down can reach; on the other hand, you don’t want the right hold-down’s knob to interfere with the drill press handles.
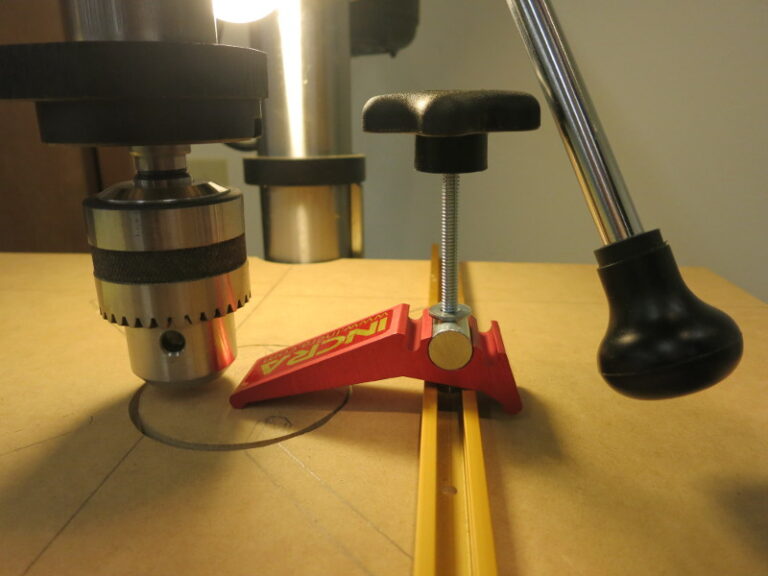
For my hold-downs and chuck, the center of the T-rail is at 4 1/2″ from the centerline. Draw lines for the T-rail centerlines on the left and right of the center.
Next clamp a straight piece of wood to the table, that will be the fence for the router. My router has left and right marks in the base, which let me line up the fence for cutting the T-rail channels. Adjust the fence to make the marks line up, then clamp it to the table.
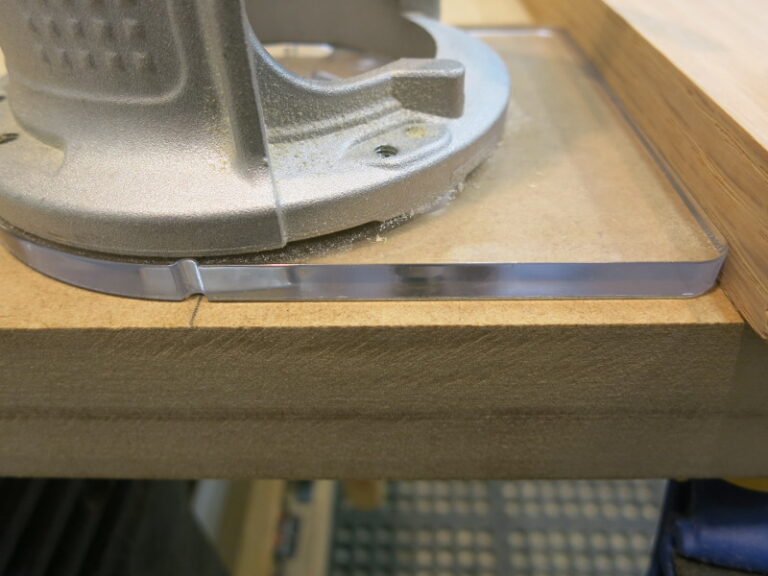
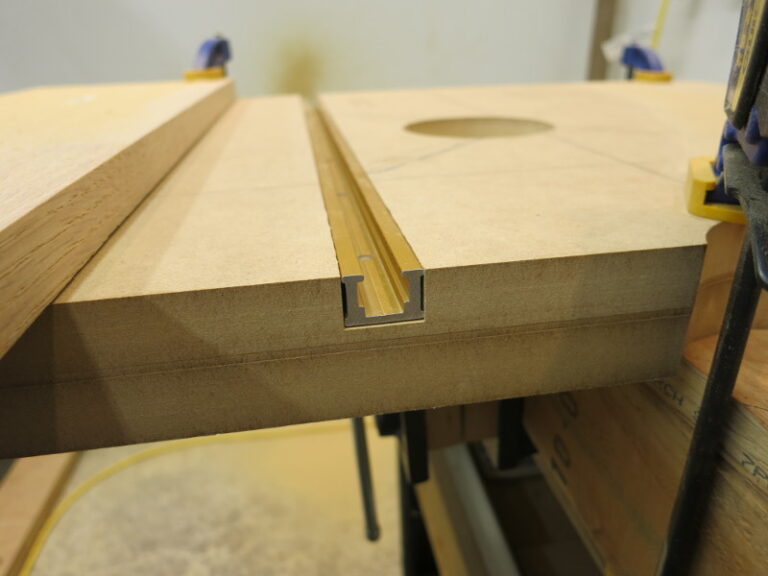
I made a mistake here: in using a router with a fence, always cut with the fence to the left of the router. If you move the router the other way, the bit tends to push the router away from the fence rather than pulling toward it. That is, if you move the router the wrong direction, your channel cuts could wobble some (as mine did). Those wobbly channels look pretty bad later, because the straight T-rails emphasize the wobbly channels.
Next, choose a Straight (flat-bottom) router bit that is the width of the T-rail (3/4″ for mine), and set its depth to just barely deeper than the T-rail height (1/2″ for mine).

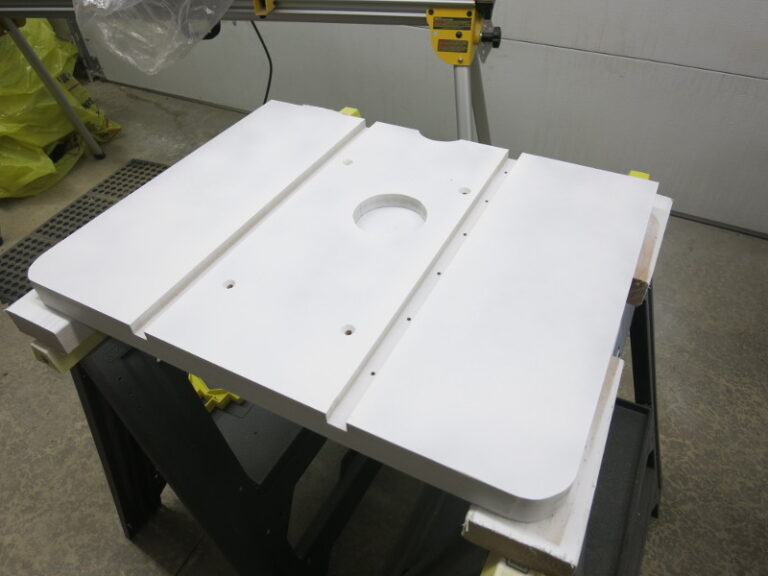
If all goes well, you’ll have lovely channels for the T-rails that will hold the hold-downs.
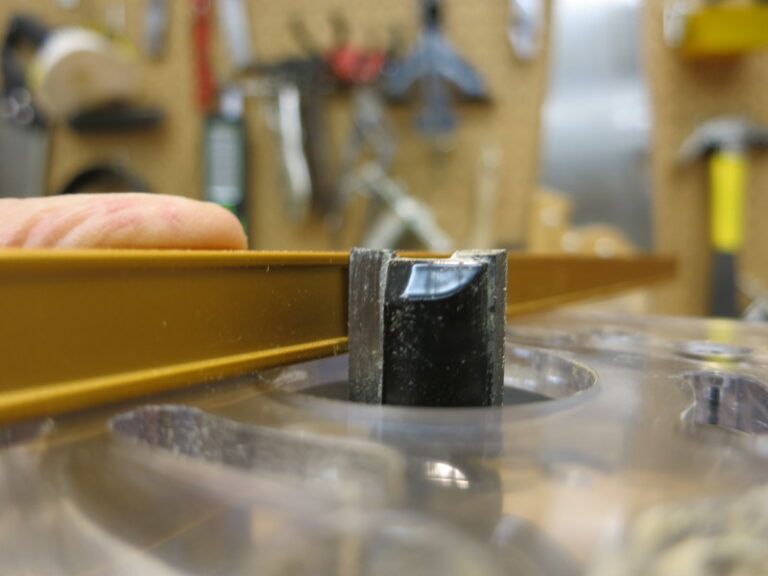
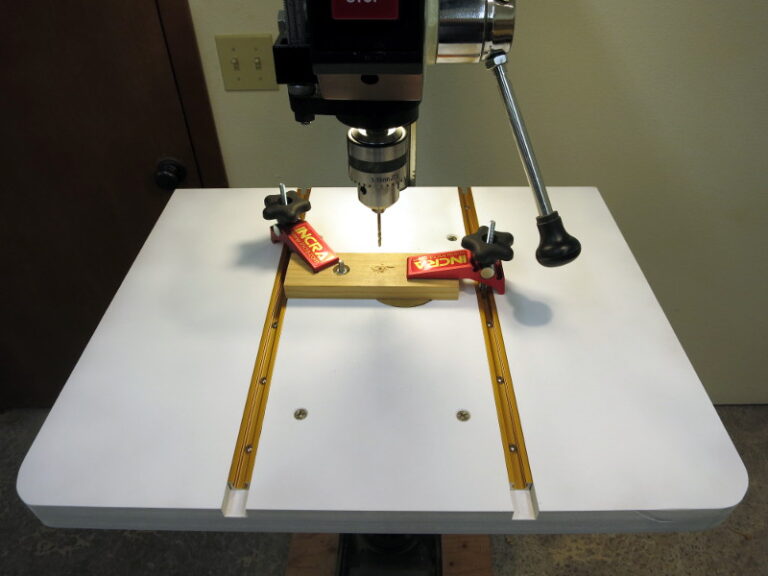
Next you’ll be drilling the holes for the bolts and nuts that will hold the T-rails. You want the bottom of the table to be uninterrupted by nuts and bolts, so choose a bolt length that doesn’t protrude, and you’ll be boring counterbore holes for the nuts.
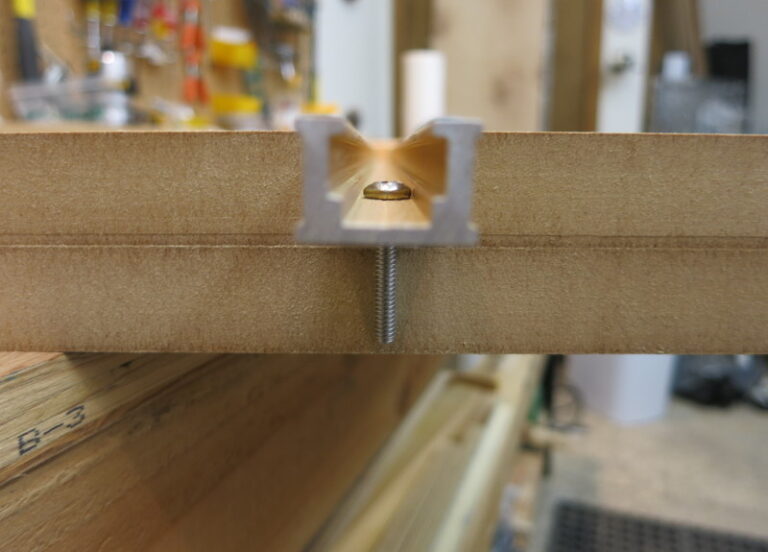
Line up the T-rails in their slots, then drill holes for the first two bolts. These bolts will eventually hold the rails in place while you drill the rest of the holes.
Choose a Forstner bit wide enough to give you space to tighten the nuts on the bolts. I chose a 3/4″ Forster bit because I had plans to add 3/4″ washers (that didn’t work out – see below).
Once you’ve fastened one bolt for each T-rail, you can drill the rest of the T-rail holes, and then bore the counterbore holes for the corresponding nuts. Make those counterbore holes deep enough so that the nuts are below the surface, and so there is enough bolt for the nut to hang on to (allowing for a washer, if you want to use a washer as well).
One note: The Incra T-rails I bought are 18″ long, so it doesn’t help much to have a deeper table. I should have made my table 18″ deep instead of 19″ deep.
Now that all the drilling and cutting is done. It’s time to put a coat or two of paint on the table, to keep it from absorbing water. MDF is notorious for absorbing water and warping, so a sealant is important.
Next, do the final assembly of the table: put the rails in, fastened down by the bolts and nuts, and bolt the table to the drill press table with the countersunk (“countersinked”?) bolts, fender washers, and knobs. I would have liked to have put 3/4″ washers under the nuts that hold the T-rails down – to diffuse the pressure a bit – but found the counterbore holes I’d made weren’t deep enough.
Finally, mark the radius of the waste plug in the waste plug hole with a permanent marker. You might prefer writing that radius on the inside edge of the waste plug hole, so it doesn’t get as much wear over time. I’ll see how well my hole-bottom note will hold up with use.
Finally, you can start using your drill press!
For further work, you might add a Fence as in this design, or build a vertical drilling fixture for end-drilling long pieces of wood, along the lines of this other design.