
I recently made two FreeCAD tutorial videos. In the making, I learned several handy tips for improving the quality of my screen capture videos.
The Tools
I’m a big fan of open source software, so when I looked for a video editor a while ago, I chose ShotCut. I’ve been happy with ShotCut ver since: it works perfectly, and has all the features I need for my modest How To videos. Update August 2025: ShotCut has made the – I think – unwise decision to host their binaries on SourceForge, which in the past has been a cesspool of viruses and malware, and today has so many fake Download button “ads” that it’s hard to download the legitimate version. I’ve downloaded OpenShot – another open source video editor – but haven’t used it much yet.
When it came to video screen capture tools, I chose OBS Studio. Technically OBS Studio is for streaming your screen (gaming), but It’s also perfect for screen recordings for tutorials.
For my other videos, I’ve been doing audio on the cheap, recording audio directly from my phone’s internal microphone. I’ll need to revisit that choice someday, but for now it’s working for me.
Meanwhile, for video screen capture, I found my laptop microphone was terrible: noisy, low-volume, and not very directional. So I hauled out a couple of PC microphones I had lying around from literally decades ago. They were all terrible as well. It was time to buy a decent laptop mic.
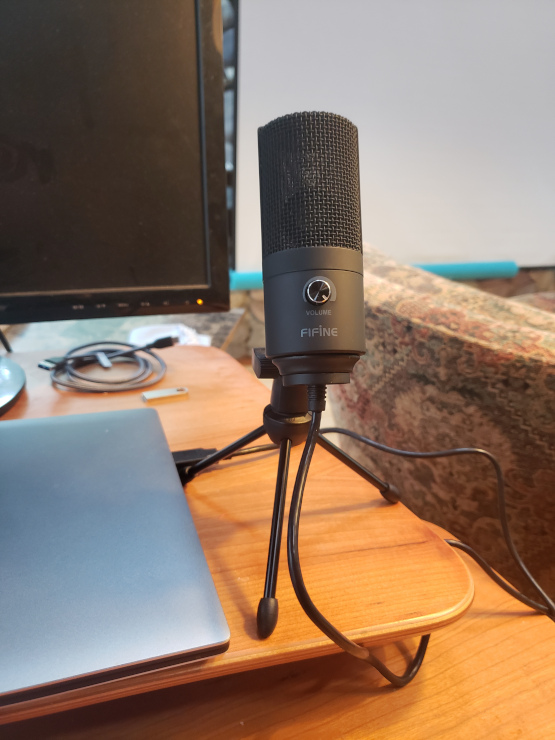
After a little hunting, I found a highly-rated Fifine USB mic with a cardiod (directional) pickup pattern. It’s a good tradeoff between cost and quality, at about $36 USD. Its maximum volume is lower than I’d like (a good sign, that it was designed by an audio engineer), but its signal-to-noise ratio, at 78 dB, is far better than any laptop mic I’ve used.
To post-process the audio a little, I use my long-term friend, Audacity. I’ve used this audio editor for years, and it’s been perfect for me.
Getting screen capture to work at all
When I first tried OBS Studio to capture a FreeCAD session, I found the drop-down menus weren’t recorded. I found the solution in a How To posting on the OBS Studio site.
The problem is that modern laptops have two graphics adapters, one for Windows and one for gaming, so you have to specify which one OBS Studio should record from.
On my Dell laptop, I opened the Nvidia control panel / 3d settings, selected OBS Studio and set that app to run on Integrated Graphics (which is the Windows Desktop adapter).
Once I’d done that, OBS studio recorded my Windows screen sessions perfectly.
Enlarging the Small Mouse Pointer
After posting my first tutorial video, I immediately heard from one user that it’s hard to follow the tiny, default-sized Windows mouse pointer. When you’re watching a screen capture, you don’t know where the mouse is going next, so it can be hard to find the tiny, default pointer.
You can easily make the mouse pointer larger in Windows 10:
- Click on the Windows Icon (usually at the lower-left of the screen).
- Type (without quotes) “Mouse Size“
- In the resulting window, click on Change Mouse Pointer Size
- In the resulting Settings window, under Change Pointer Size, move the slider to a size of 4.
- Close the Settings window.
Unexpectedly, OBS Studio recordings still showed the tiny, default mouse pointer. I found a helpful OBS Studio community member post that explained how to work around this bug:
- Press the Windows key and the ‘+’ key to start the Windows Magnifier,
- then press the Windows key and the ‘-‘ key to set the magnification to 100% (no magnification).
- In the WIndows Magnifier window, click on the gear icon (Settings).
- In the resultant dialog, click on Go to Settings.
- In the resultant Settings window, scroll down to “keep the mouse pointer” and “keep the text cursor.
- Set “keep the mouse pointer” to “Within the edges of the screen“. If you don’t do this, the cursor will keep jumping to the upper-left of the screen.
- Set “keep the text cursor” to “Within the edges of the screen“.
- Close the Settings window.
- Minimize – don’t close – the Screen Magnifier window.
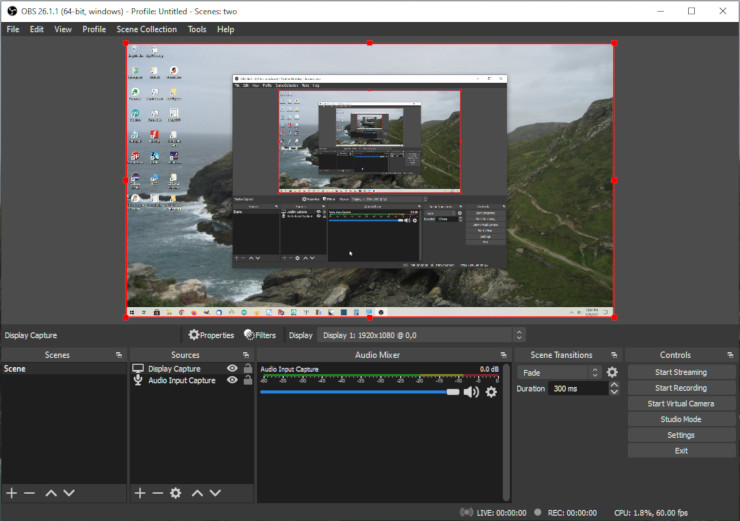
- In OBS Studio, double-click on Display Capture.
- In the resultant dialog, check “Capture Cursor” (in earlier versions of Windows I had to un-check Capture Cursor to avoid capturing two cursors.)
When you’re finished recording, remember to close the Screen Magnifier window, and set the Mouse Size back to 1 (or whatever you like).
Recording audio from your USB microphone
- Plug in your USB microphone before starting OBS Studio.
- Start OBS Studio.
- In OBS Studio, click on Audio Input Capture.
- For Device, select your USB microphone.
- For my Fifine microphone, I turn the volume all the way up on the microphone, and turn the OBS Studio Audio Input capture level all the way to the right (0 dB).
- In the current version of Windows, when I play the resultant .MKV file Windows’ Movies & TV, the audio doesn’t play. Luckily, the audio from that file does play in ShotCut.
Editing your video’s audio with Audacity
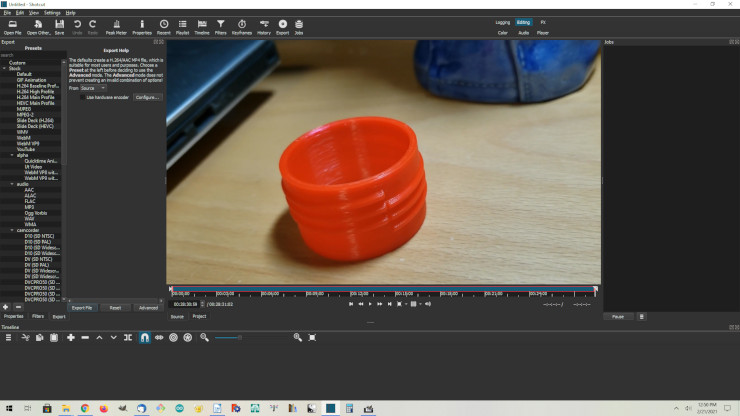
Once you’ve finished capturing your screen capture video with OBS Studio, you can edit that video with ShotCut:
- In OBS Studio, select File / Show Recordings
- Your video should appear in the resulting File Explorer window.
- Close OBS Studio and start ShotCut.
- Drag your screen capture video (which is a .MKV file) from the File Explorer window into the center of the ShotCut window (its Source window).
Once you’re finished editing in ShotCut you’ll need to ‘detach’ the audio from each clip into its own track. I like detaching the audio after I’ve done all the video editing, instead of before, so I don’t have to worry as much about sync between the audio and video.
To detach a clip’s audio into a separate track, right-click in the track, then select More… / detach audio.

Now that the audio is in a separate track, you can Export that to a .WAV file:
- On the left of the screen, in the Presets pane, select Audio / WAV
- Click the Export File button just as you would for saving the edited video.
- When the File Save dialog appears, type the name you want to give this pre-edited audio file, for example UnEdited.wav
- Click Save
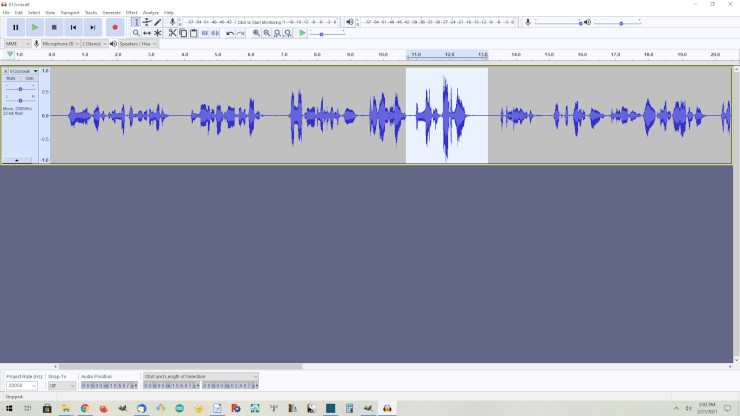
Once the audio is saved, you can edit it in Audacity:
- Start Audacity
- Click File Open, and select the unedited audio, for example “UnEdited.wav“
- To simply maximize the audio, click on Select All, then click Effect / Amplify…, then click OK. That will amplify the audio as much as possible without clipping (overloading).
- When you’re done editing the audio…
- Click File / Export / Export as WAV
- Type the name you want to give this file, such as Edited.wav, then click Save.
Once that’s done, you need to replace the audio track in ShotCut with the new audio track:
- In ShotCut, right-click on the old audio track – on the left box – and select Track Operations / Remove Track
- Add a new, blank audio track: right-click in the video track – on the left box – and select Track Operations / Add Audio Track.
- Drag the new audio file, for example, Edited.wav, from the File Explorer into the ShotCut Source window (the center window).
- Drag from the Source window into the newly-added audio track, making sure to align the start of the audio with the start of the track.
Once that’s done, you can either continue to edit, or you can export the video (plus audio):
- Under Presets, click on Stock / Default.
- Click the Export File button.
- Name your new video, which will be an .MP4 file.