
In my previous post I described how to calibrate a load sensor. This post shows how to measure center of gravity, and shows a failed attempt to mount the load sensors to the scale.
Now that I’m using 4 load cell amplifiers rather than 1, I can calibrate each load sensor separately. This in turn will let the Arduino calculate Pippa’s real weight accurately regardless of what part of her bed/scale she’s lying on.
The easiest way to calibrate all 4 load sensors is to do it all at once:
- Find the center of the scale
- Place a known weight at the center of the scale. Each load sensor will support an equal amount of that weight. That is, for weight W, each sensor sees W/4.
- Write down X = W/4
- read the values from each of the load sensors: Y1, Y2, Y3, Y4
- repeat steps 2 through 4 until you have a table of {X, Y} pairs for each load sensor and for a variety of weights.
- Using the calculations in the previous post, calculate the M and B values for each load sensor (M1, B1, M2, B2, M3, B3, M4, B4)
- Now the Arduino Sketch can load the M (SCALE) and B (OFFSET) for each of the four HX711 Load Cell Amplifiers.
For that calibration to work best, the weight must be placed at an equal distance from each load sensor. So one of the things we must do is to mark the Center of Gravity (not necessarily the center) of the plywood top of the scale.
Remember that the top circle of plywood rests on the 4 load sensors. Ideally its center of gravity should be resting in the center of the square defined by the support point of each of the four load sensors. Two things can make the center of gravity of the top plywood circle different than the center of the circle: 1) errors cutting out the circle: if the saw blade drifted outside the circle for a while, that extra weight can move the center of gravity to one side, and 2) plywood doesn’t have uniform density: it can have voids, patches, and grain differences that can move the center of gravity.
So we need to measure the center of gravity of the top plywood circle.
One handy thing about the center of gravity is that if you suspend an object from a single point, the object’s center of gravity is somewhere directly below that point. Do that twice for a flat object (like the top circle of plywood) and you can know exactly where the center of gravity is.
For a circle of plywood, the rough location of the center of gravity is obvious, but for a more complex shape, say a 1950’s kidney-shaped dog bed, it’s a little harder to guess the location correctly.
Of course, an easier way to find the center of gravity, if you have a few friends to help you, is to balance the top plywood circle on the point of a nail. Once you have it balanced, tap the plywood so that the nail point marks the center of gravity.
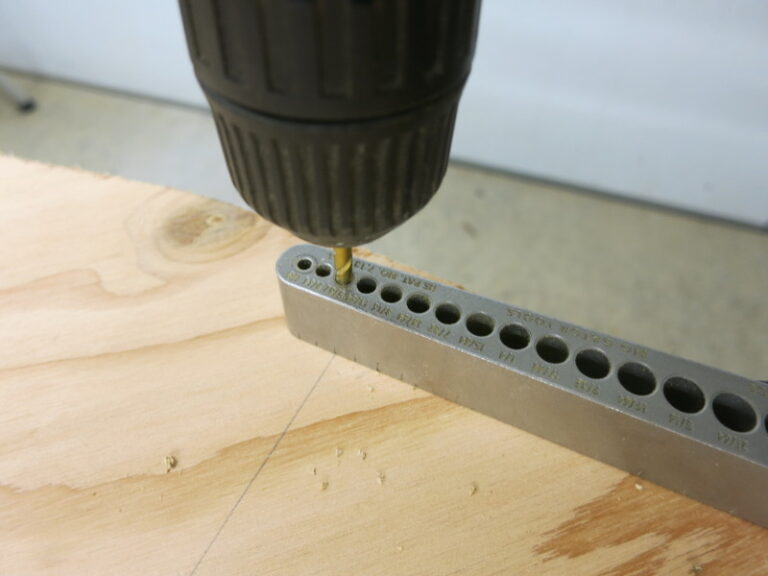
Lacking the time of a few friends, to find the center of gravity of the top plywood circle, we need a hand drill and bits, a drill guide to drill nice straight holes, a weight on a string (i used a plumb bob, but some washers tied to the end of a string work fine), a nail, and (not pictured) a board to put the nail into. This board will suspend the weight of the plywood.

Pick any place near the edge of the circle of plywood and drill a hole there. The hole needs to be slightly larger diameter than that of the nail, so that the plywood can hang freely from the nail.
Hold the plywood circle next to the board (I used a 2×4, slightly taller than the diameter of the plywood circle) and drive the nail through the hole you just drilled, into the board. In this way, the plywood hangs freely from the nail. Now hang the weight on the string from the nail, and mark where the string falls, near the middle of the plywood circle.

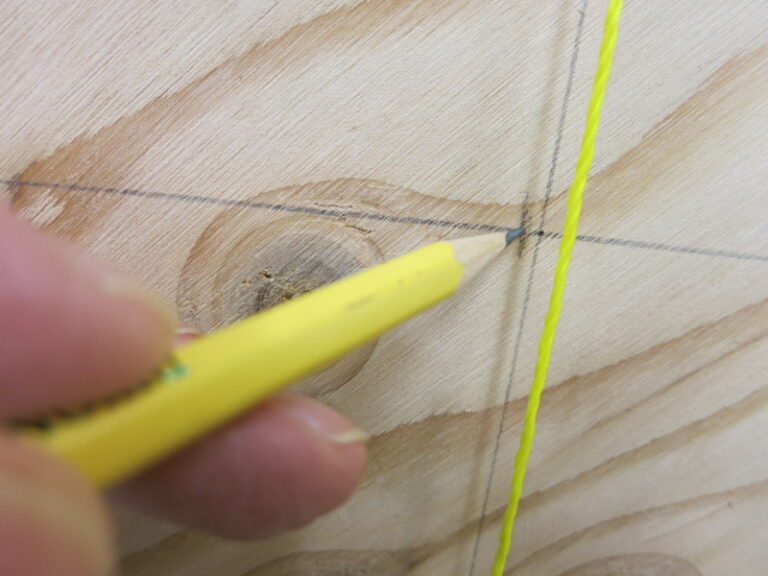
(Note that the center of gravity isn’t quite the center of the plywood circle – the intersection of the two lines I used to make the circle)
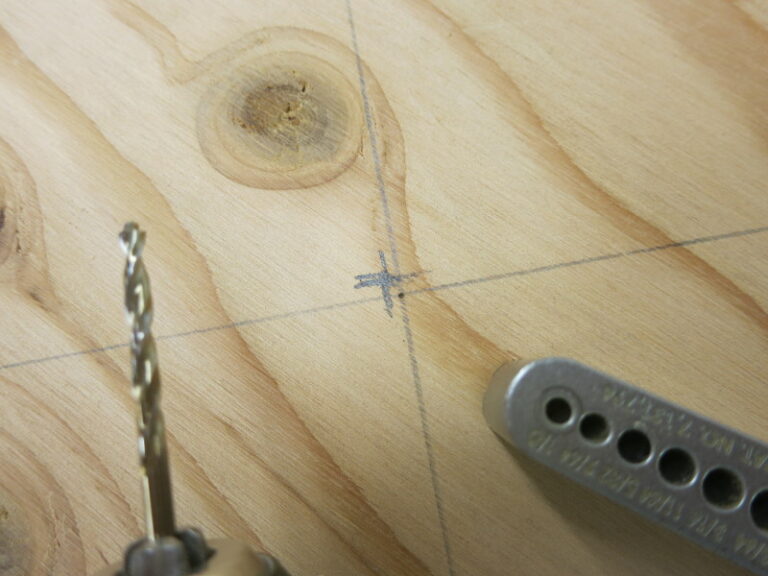
Remove the nail and repeat for another point about a quarter of the way (90 degrees) around the circle from the first hole. The intersection of those two marks is the center of gravity.
The load sensor mounting Fail
I’ve tried a few ideas for mounting the Load Sensors so they won’t slide off their mounting blocks, but nothing so far has worked out. What follows is another example of a fail.
I’m getting close to breaking down and designing a little 3D-printed part to hold the Load Sensor in place, but I’m not there yet.
So I said to myself “Hey, I should be able to hold down the Load Sensor with a pair of bolts and washers, so friction keeps it from sliding.”
The concept looked good.
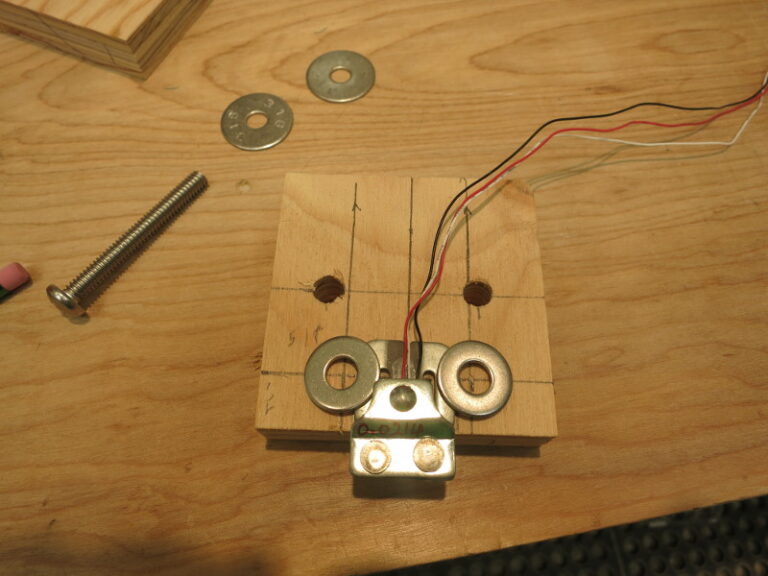
I drilled a test hole to see how things would line up vertically: the load sensor, the washer angled on top of that, and the bolt holding the washer down.
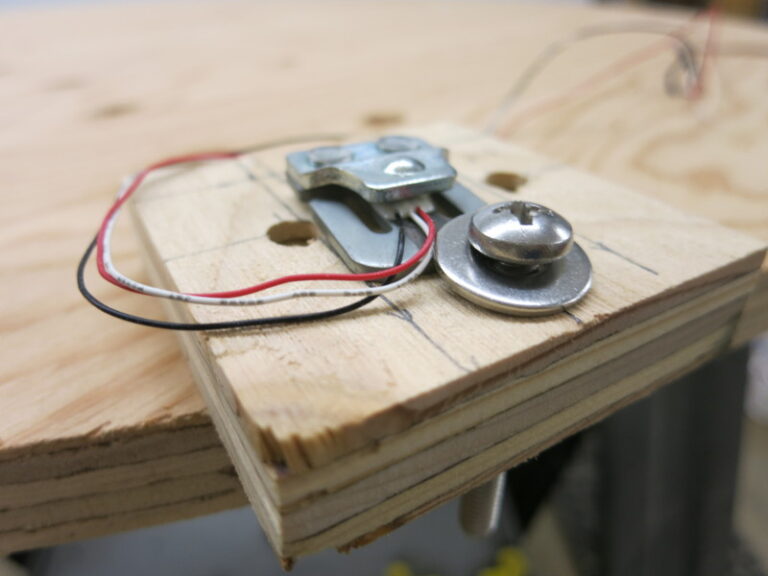
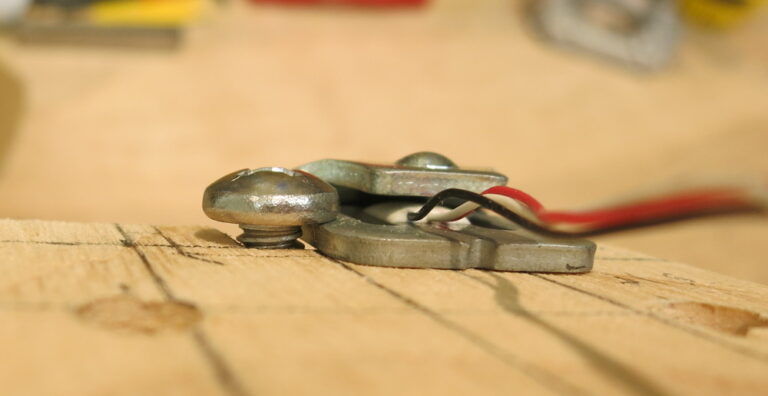
To my dismay, the bolt head was very close to the top of the load sensor. The top plywood circle is supposed to rest only on the four Load Sensors – the contact point is that little bump in the middle of the Load Sensor. If the bolt head is nearly the same height as that bump, the plywood might rest on it as well, causing the weight seen by the Load Sensor to be completely wrong.
A little desperate, I tested whether the bolt alone, without the washer, might be low enough. Nope.
So I’m going to (once again) set aside the issue of how to keep the Load Sensors from slipping, and in my next post turn my attention to the math to find the weight, W, on the scale and the center of gravity {X,Y}, of that weight.