
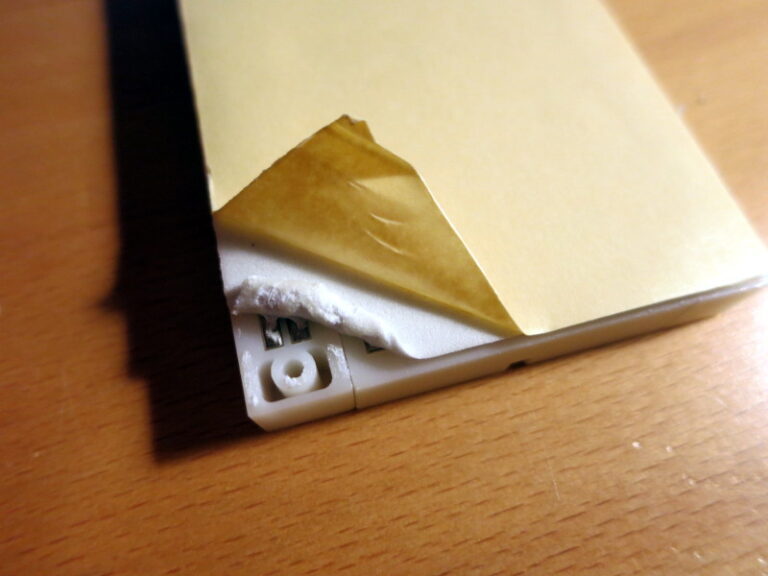
I’ve stored my Robotic Glockenspiel on its side since I finished it in April (it’s huge). The other day I opened the lid and found, to my horror, that the breadboard had completely pulled away from its adhesive pad – only the wires are keeping the breadboard from falling off completely!
Continue reading The Hidden Mounting Holes in Your BreadboardsTag Archives: Electronics
WiFi and Steppers and Slots! Oh, My!
The Lunar Clock project is starting to feel real!
After having no luck making the ESP8266 work with an Arduino Mega, I switched back to the wonderful Sparkfun CC3000 WiFi Shield. It is playing nice with the Mega now – with an interposed Sparkfun TransmogriShield to convert the Mega SPI pins to the Uno pins that many Shields expect. Update: I replaced both these retired boards in a later post.
Continue reading WiFi and Steppers and Slots! Oh, My!How to Soften LED Light with a Ping Pong Ball
Some time ago I read that you can use a ping pong ball to soften the harsh light of an LED, so I thought I’d try it out.
Step 0: pick out a white ping pong ball. I used a standard 40mm ball; I could have used a 35mm Foosball instead.
Step 1: make a hole in the ping pong ball to hold your LED. For a 5mm LED, an ice pick heated on a stove top is an handy tool for making that hole. I haven’t tried a drill press, but that seems another possibility.

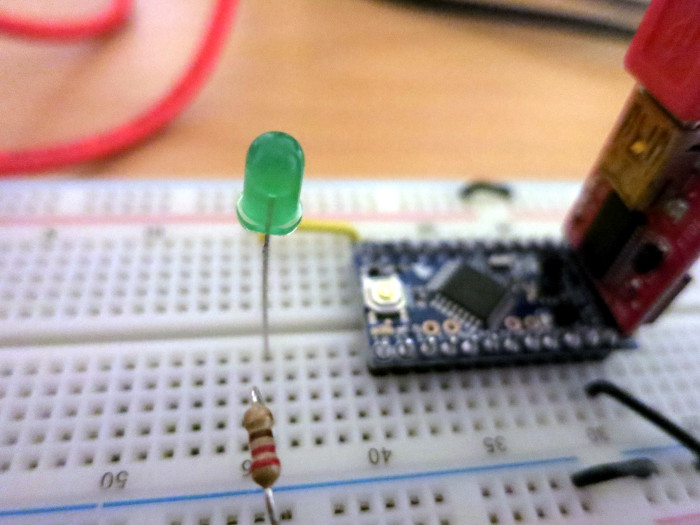
Step 2: set up a circuit to blink an LED, perhaps using an Arduino Pro Mini.
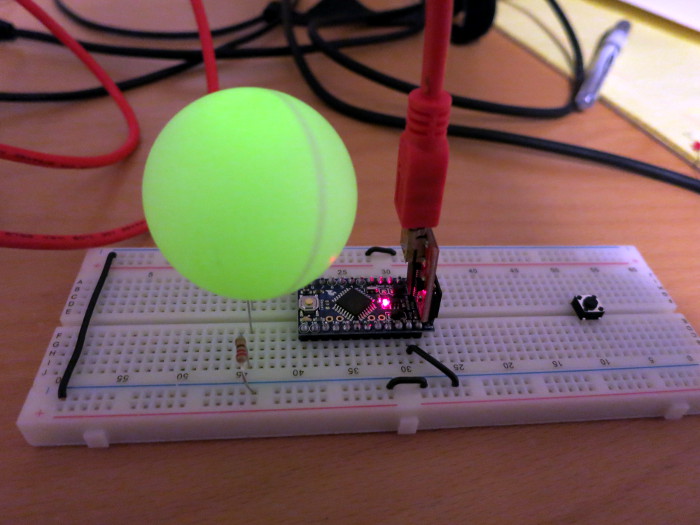
Step 3: press the ping pong ball onto the LED. For a more permanent mechanical connection, you could glue the LED into the ping pong ball using a hot glue gun.
Step 4: Enjoy the magical, diffuse light of the LED in the ping pong ball. You may need to turn out the lights to see it well. Have a look at my Blinking Ping Pong Ball LED video of the result.
So a ping pong ball really is a quick and easy light diffuser for your LEDs – disco time! …or you can paint pupils on them to create blinking night-creature eyes as in this Hidden Creatures Arduino & LED Blinking Eyes Kit video.
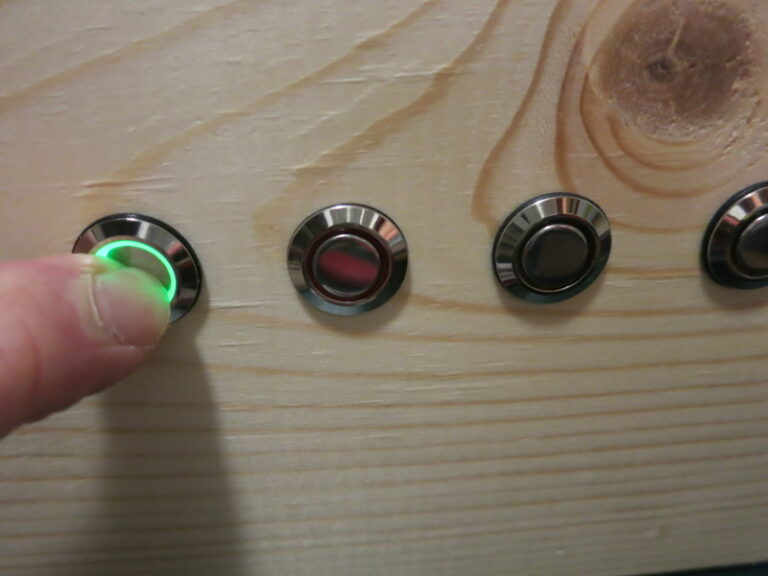
The First Switch is In
Since my last post about the glockenspiel, I’ve been taking a vacation from my vacation (aka working). Today I turned back to the glockenspiel and wired up the first of the 5 lighted switches.
Continue reading The First Switch is In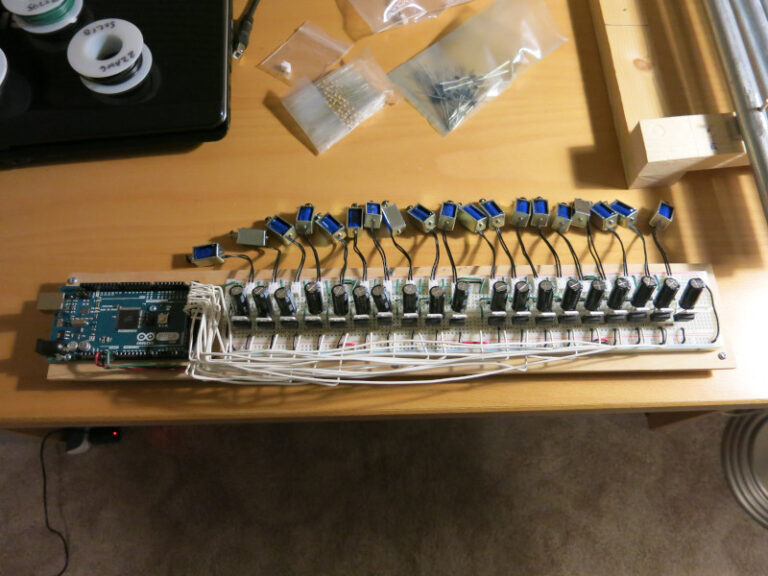
DIY Glockenspiel: the Circuit
Earlier, I described how to build a frame for the glockenspiel. In this post, I cover the circuit that will strike each chime.
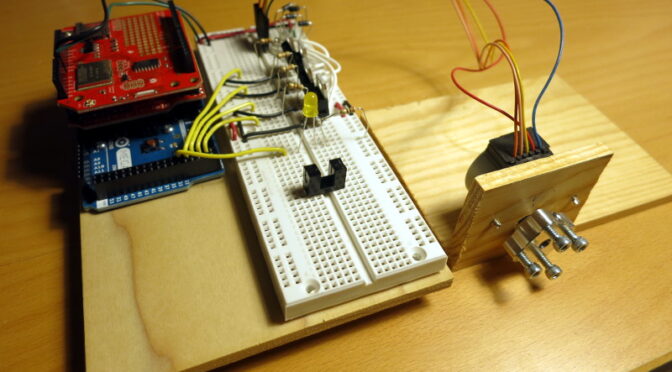
I’ve successfully tested the glockenspiel control circuit. It’s an Arduino Mega 2560, a Sparkfun Wifi Shield, and 19 repetitions of a simple solenoid control circuit.
Continue reading DIY Glockenspiel: the CircuitNerd Christmas Tree
I’ve successfully assembled my second soldering kit: The Velleman MK130 ‘3D’ Christmas Tree. It’s a set of blinking LEDs that sit atop a 9V battery… or you can add some long wires and hang it as a Christmas ornament.
At any rate, it was good practice for soldering, and the result is kinda cute. See my YouTube Video of the Kit for the whole experience.
I figure I’m ready to build an Arduino proto Shield next!
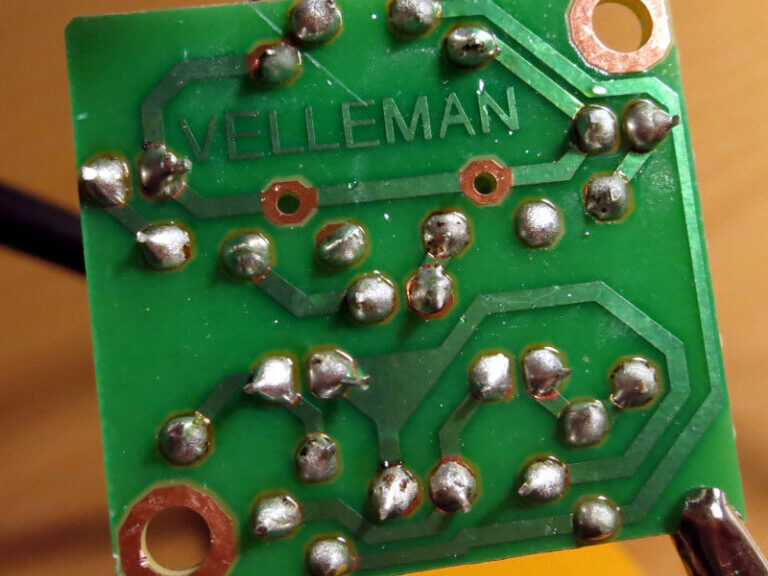
Ah, the Lovely Incense of (Lead Free) Solder
Since I’ve been doing Arduino work, I’ve accumulated a few board and Shield kits that I need to put together. I haven’t soldered since college, so I decided to brush up on my rusty skills by buying one of those little electronics project kits: a Velleman MK102 Flashing LEDs kit.
Continue reading Ah, the Lovely Incense of (Lead Free) SolderThe Definitive Mad Science
My definition of Mad Science:
- It must be based on actual technology, vs. pseudo science.
- It must be provocative, causing an initial reaction of horror or revulsion.
- The horror or revulsion must be based on the concept rather than being simply disgusting.
- It must have an artistic element, vs. being just science.