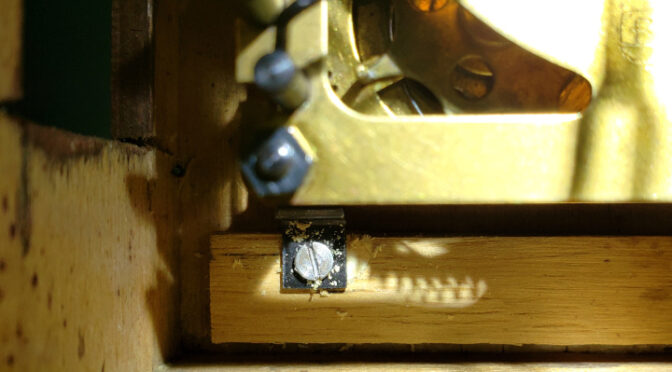
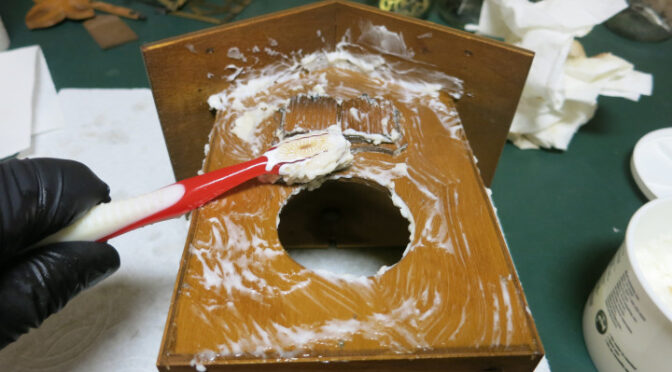
I’m repairing a cuckoo clock that has a commonly-seen problem: one of the screws mounting the movement to the case has stripped its hole. Normally, I’d try filling the hole with a wood filler, but this time I tried something different: “Bushing” the hole with a plug of new wood.
In digging around for clock case repair advice, I found a wonderful book, Extreme Restoration by T.E. Temple, which covers many clock case restoration methods. Its section on repairing stripped nail and wood screw holes in clock cases inspired me to try using a wood plug to patch the stripped hole, because that author has found wood plugs to be an excellent long-term repair.
Since I attended my first local chapter meeting of the NAWCC (National Association of Watch and Clock Collectors) I thought I’d make a quick gallery of the clocks I’ve worked on so far.
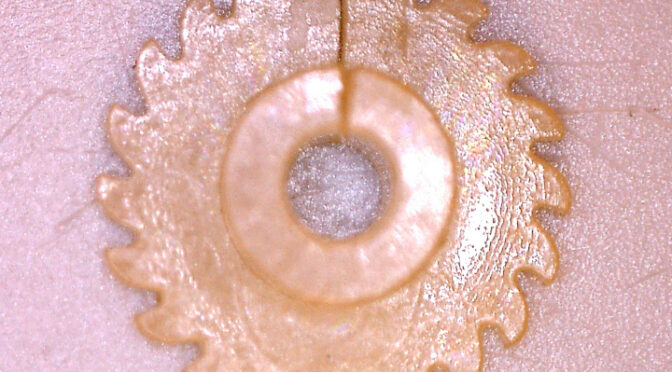
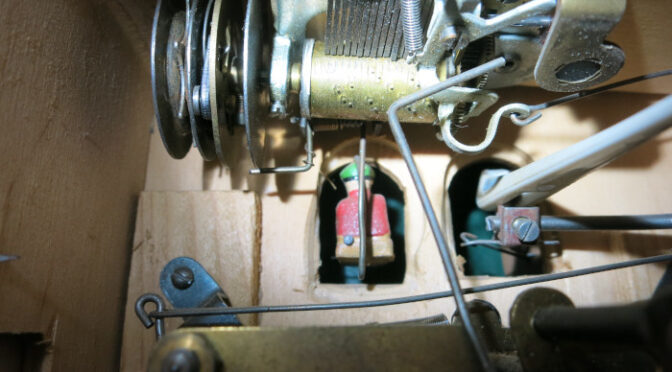
While repairing the latest musical cuckoo clock I discovered a problem in the musical movement: a cracked plastic gear. I was at a loss as to how this could be fixed, but once again found the solution from expert posts on the message boards at the NAWCC (National Association of Watch and Clock Collectors). The whole story follows…
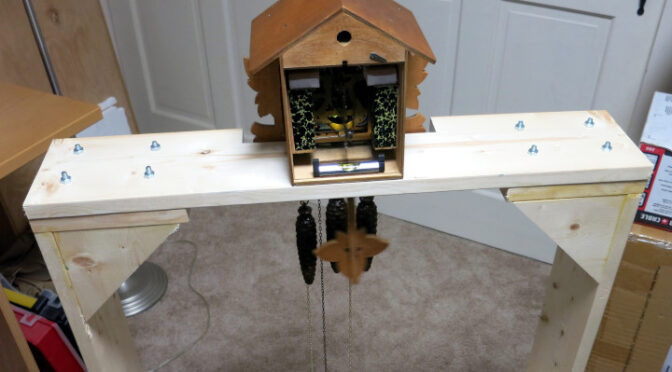
The family cuckoo clock I’m working on is being capricious about when it decides to play the music, so I’ve built a test stand that will let me see what’s going wrong.
After looking through the wide variety of weight-driven clock test stands on NAWCC.org. I decided to build a floor-standing U-frame.
TL;DR: There are links to rough drawings of my completed plans at the end of this post, so you have something to start your own design from.
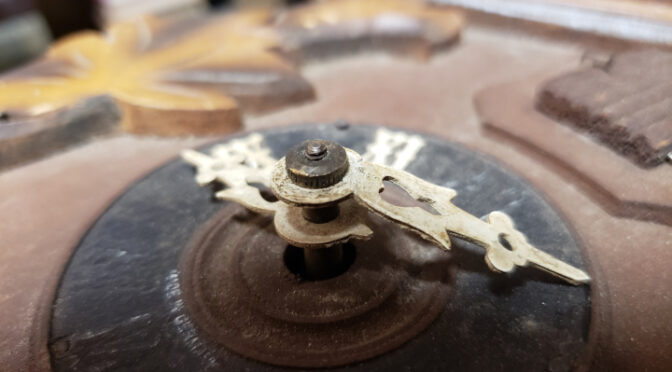
Once I had the eBay cuckoo clock cleaned, adjusted, repaired, and running, I put the hands on. To my surprise, the minute hand kept slipping, no matter how I tightened the hand nut that’s supposed to hold it in place. The solution to this mystery lay in a troubleshooting video from a cuckoo clock seller in the Black Forest.
An older clock has usually spent years in the company of a smoker or near a smokey fireplace, accumulating layers of tar, ash, and who knows what else. A simple dusting or cleaning with a wood polish won’t necessarily remove these layers of smoke, so when it’s time to clean a vintage clock, it doesn’t hurt to clean the case as well.
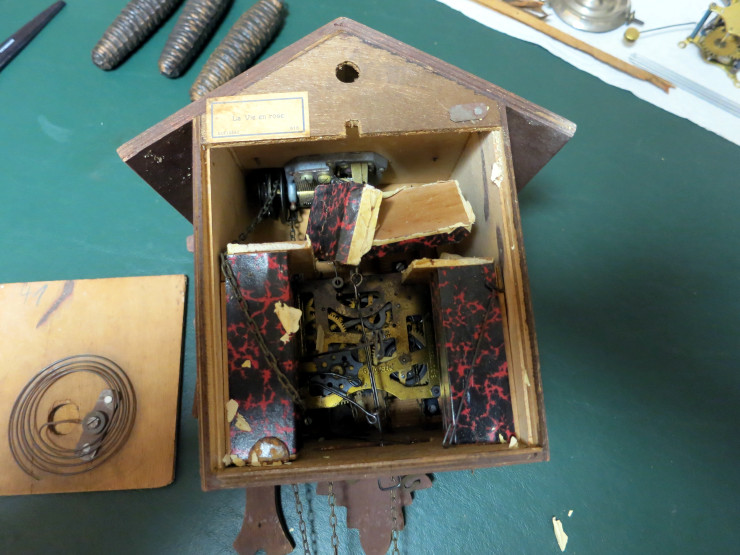
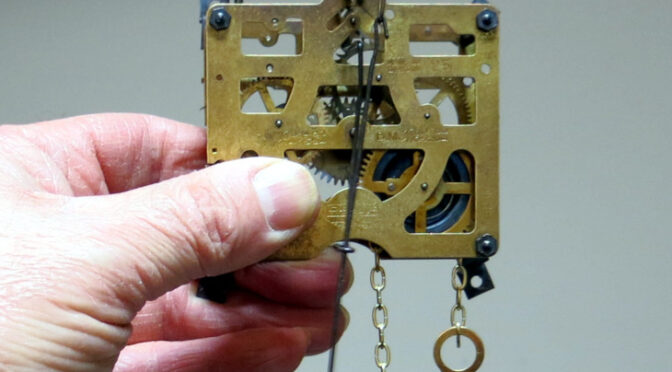
I’m in the process of cleaning and repairing a family musical cuckoo clock. I’ve watched a lot of videos on repairing cuckoo clocks, and have disassembled, cleaned, and repaired one cuckoo movement, so I think I’m as prepared as I can be for working on the clock movement.
The musical movement is another matter. What follows is a detailed How To that captures what I learned, what to do, and what not to do.
My Ansonia kitchen clock had a loose warning pin – the pin that stops the clock’s gonging at the right time – so I decided to bite the bullet and do my very first actual metalworking, no-going-back, clock repair!
Because of the economics of cuckoo clock repair, you can easily find old, dirty cuckoo clock movements on eBay for a fraction of what a new movement costs. These movements come with no documentation, so you get to work out which chains, weights, and bellows (cuckoo whistles) are right for them.
In this post I calculate the run time (1 day vs. 8 day) of a cuckoo movement I recently bought, and the Links Per Foot of the chain it uses. These two numbers tell me what parts to buy to make a clock case for this movement.
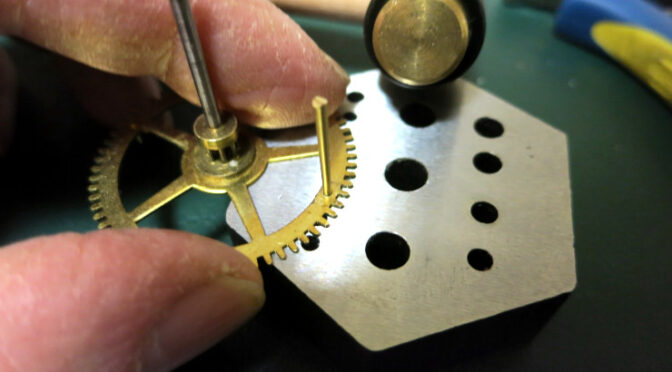
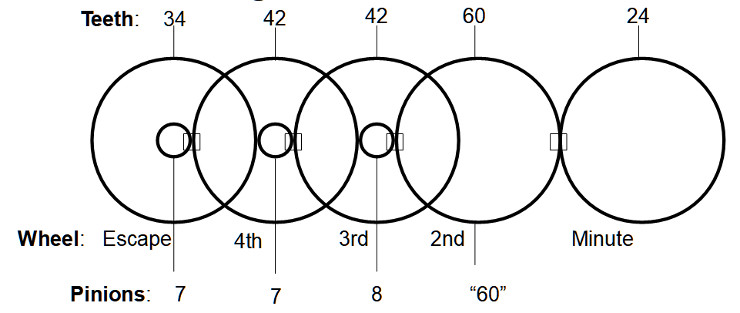
In an earlier post I calculated the ideal pendulum period for the Korean clock by counting its wheels’ teeth (outer teeth) and pinions (inner teeth). This post is an update based on the errors I made while attempting to do the same for my second clock: the Ansonia kitchen clock.
What follows is a more detailed “how to” for calculating the pendulum period based on gear ratios.