
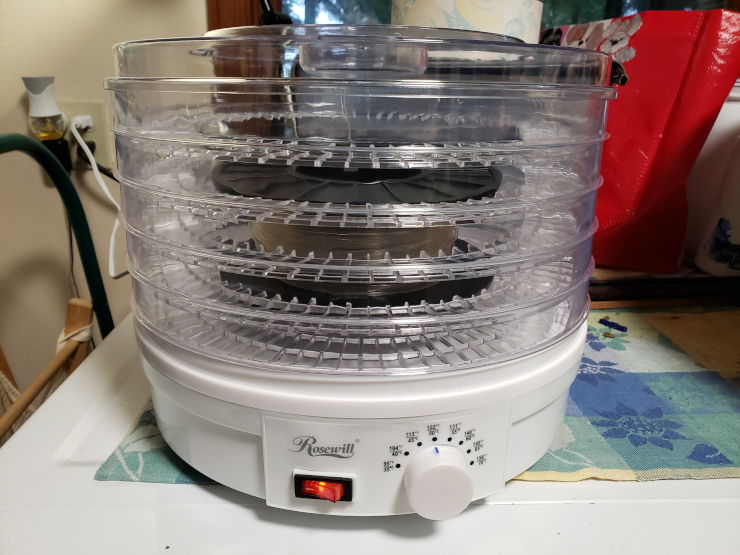
I’ve occasionally seen posts and videos about how to dry 3D printing filament using a food dehydrator, but never felt the need for one… until recently. I had a failed print that looked like wet filament was to blame, so I decided it was time to make my filament dryer. This post is about my experience – mostly good – with that dryer.
Continue reading Making A Filament Dryer from A Food Dehydrator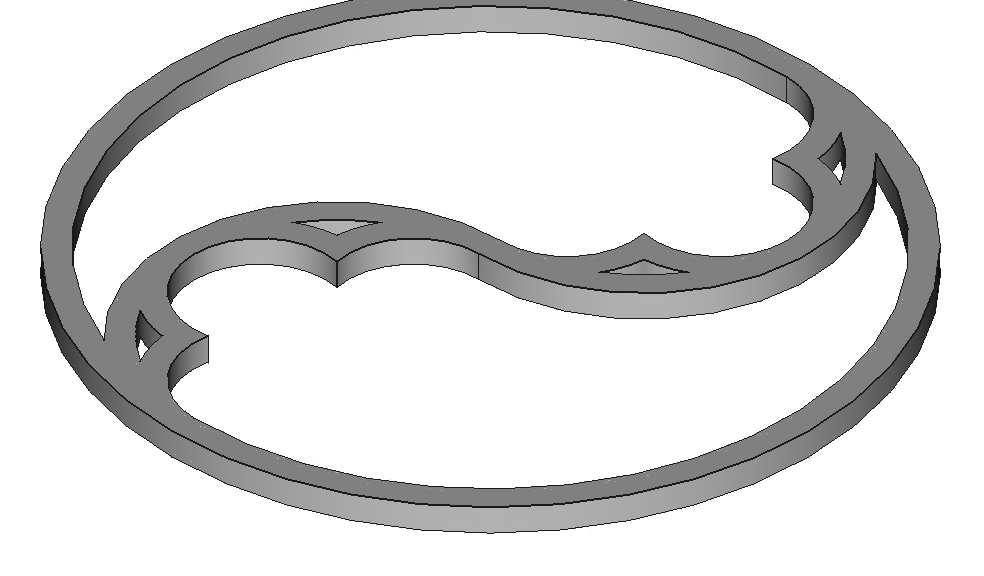
Designing a Gothic Duefoil in FreeCAD
If you’re interested in Gothic architecture, you may have seen my post on Designing a Gothic Trefoil. In this post I walk you though the design in FreeCAD of a simpler ornament, the Gothic Duefoil: a circle divided into two arches, which are themselves each divided into three lobes.
Continue reading Designing a Gothic Duefoil in FreeCAD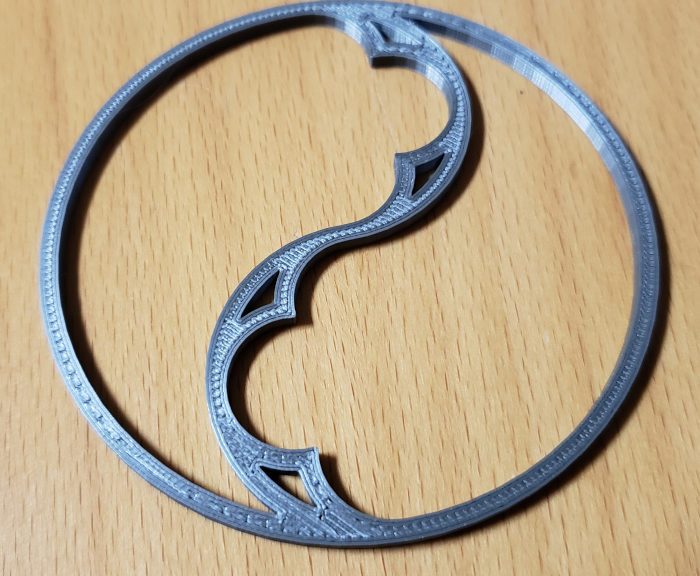
Designing a Gothic Duefoil in Fusion 360
If you’re interested in Gothic architecture, you may have seen my post on Designing a Gothic Trefoil. In this post I walk you though the design of a simpler ornament: the Gothic Duefoil: a circle divided into two arches, which are themselves each divided into three lobes.
Read more
Chevy Bolt Tips
In January 2020 I started shopping for an electric car, buying a Chevy Bolt at the end of March. This post is a collection of the handy tips I’ve learned along the way.
Continue reading Chevy Bolt Tips
Choosing and Buying an Electric Car
In January 2020 I started shopping for an electric car, buying a 2020 Chevy Bolt at the end of March. This post is a summary of the resources and methods I used to choose that car among the – happily – several likely electric cars on the market.
Continue reading Choosing and Buying an Electric Car
Charging a 2020 Chevy Bolt Near Hillsboro Oregon
In January 2020 I started shopping for an electric car, buying a Chevy Bolt at the end of March. This post is a summary of what I’ve learned about charging the Bolt, both at home and on the road.
This is an evolving page about a rapidly evolving business. I’ll add more information as I learn it.
Continue reading Charging a 2020 Chevy Bolt Near Hillsboro Oregon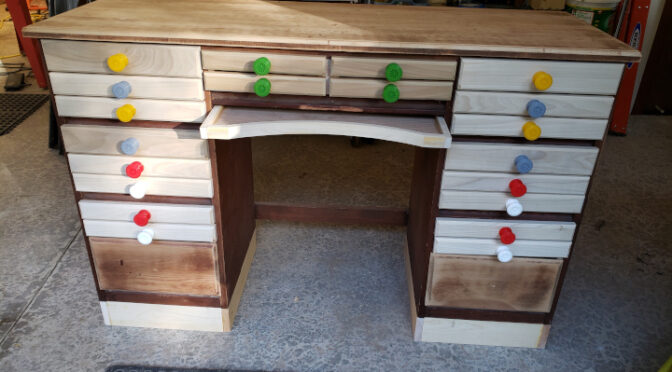
Progress on My Clockmaker’s Bench
In August I bought an old, 7-drawer student’s desk at a garage sale. Since then I’ve been converting it to a clockmaker’s bench. This note is a quick update; I plan to write a full, how-to booklet once I’ve completed it.
I learned amateur clock repairers often make their own benches, starting from a solid writing desk. I bought mine at a garage sale.
Continue reading Progress on My Clockmaker’s Bench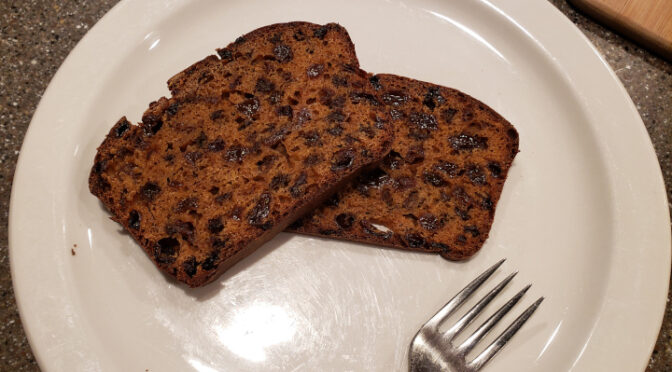
An American Version of Welsh Bara Brith Tea Bread
During our trips to Wales we found that every little tea room served a wonderful fruit bread called Bara Brith – literally “speckled bread”. Recently, after having a tough bout of Bara Brith withdrawal, I decided to make my own, by adapting the Welsh recipe to Metric-impaired Americans like myself.
Continue reading An American Version of Welsh Bara Brith Tea Bread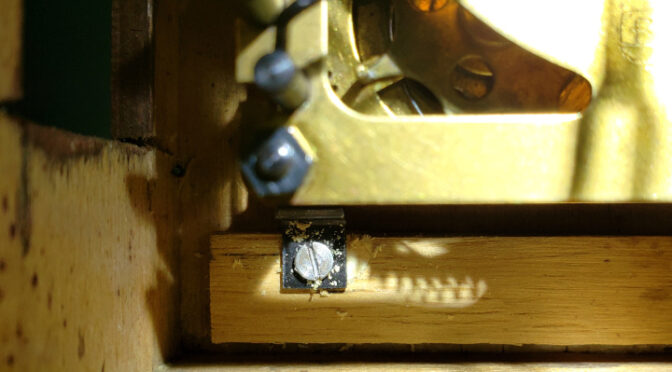
Repairing a Clock Case’s Stripped Wood Screw Hole
I’m repairing a cuckoo clock that has a commonly-seen problem: one of the screws mounting the movement to the case has stripped its hole. Normally, I’d try filling the hole with a wood filler, but this time I tried something different: “Bushing” the hole with a plug of new wood.
In digging around for clock case repair advice, I found a wonderful book, Extreme Restoration by T.E. Temple, which covers many clock case restoration methods. Its section on repairing stripped nail and wood screw holes in clock cases inspired me to try using a wood plug to patch the stripped hole, because that author has found wood plugs to be an excellent long-term repair.
Continue reading Repairing a Clock Case’s Stripped Wood Screw Hole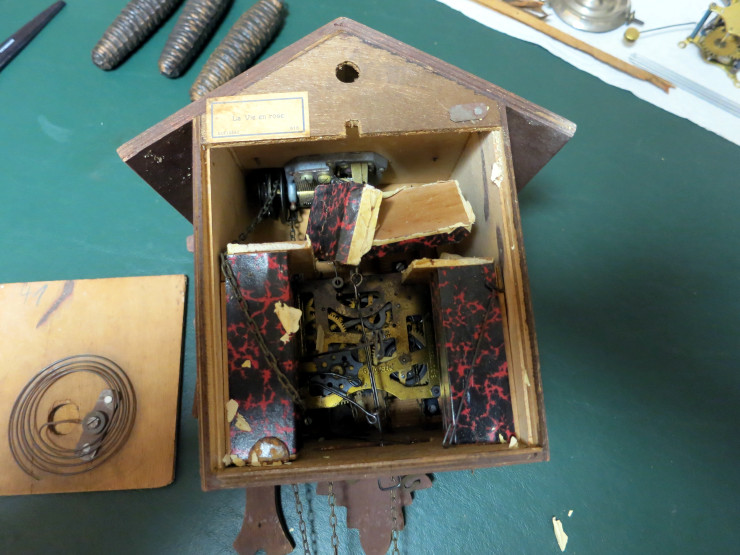
My Clock Repairs So Far
Since I attended my first local chapter meeting of the NAWCC (National Association of Watch and Clock Collectors) I thought I’d make a quick gallery of the clocks I’ve worked on so far.
Continue reading My Clock Repairs So Far