

A short time ago I excitedly received my very first shipment from the laser cutting service Ponoko. Here’s a narrative of the unboxing, to let you know all the lovely details.
Continue reading Unboxing My First Ponoko ShipmentTag Archives: Maker
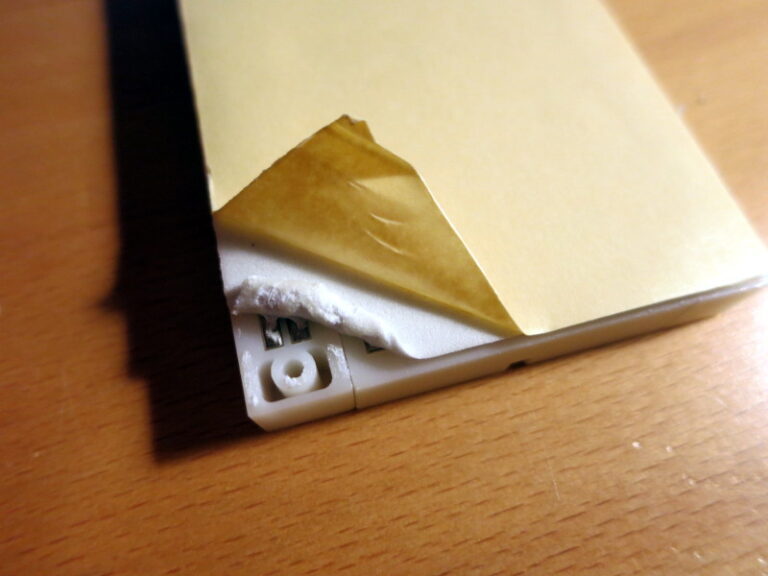
The Hidden Mounting Holes in Your Breadboards
I’ve stored my Robotic Glockenspiel on its side since I finished it in April (it’s huge). The other day I opened the lid and found, to my horror, that the breadboard had completely pulled away from its adhesive pad – only the wires are keeping the breadboard from falling off completely!
Continue reading The Hidden Mounting Holes in Your Breadboards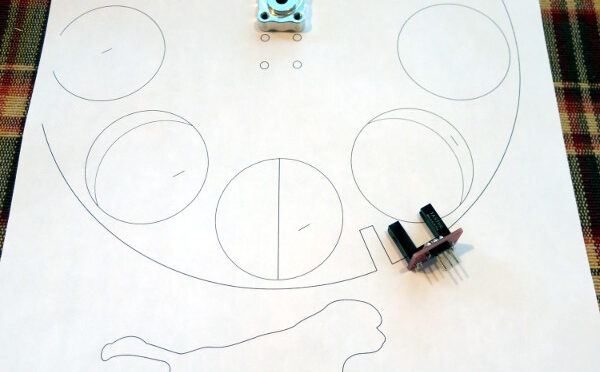
My First Laser Cutting Order Ever
I’m delighted at how well the lunar clock is going! While waiting for stepper motors to arrive, I’ve been using Inkscape to create the laser-cutting pattern for the wheel that will contain images of the various phases of the moon. After a few hours of stumbling around (I’d never used Inkscape), I was drawing circles, arcs, and lines with abandon.
Continue reading My First Laser Cutting Order Ever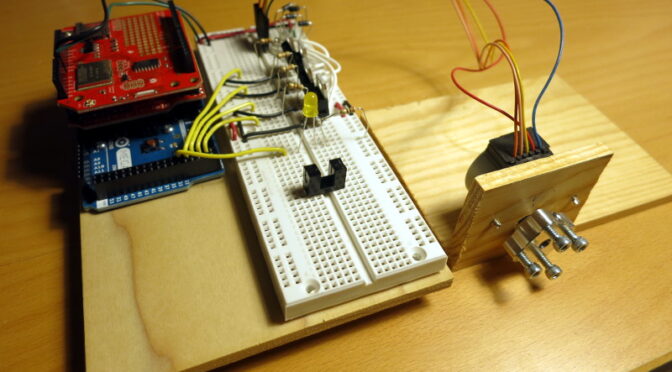
WiFi and Steppers and Slots! Oh, My!
The Lunar Clock project is starting to feel real!
After having no luck making the ESP8266 work with an Arduino Mega, I switched back to the wonderful Sparkfun CC3000 WiFi Shield. It is playing nice with the Mega now – with an interposed Sparkfun TransmogriShield to convert the Mega SPI pins to the Uno pins that many Shields expect. Update: I replaced both these retired boards in a later post.
Continue reading WiFi and Steppers and Slots! Oh, My!Started Work on a Lunar Clock
Last night I’ve started in earnest on a Lunar Clock project: a gizmo to physically display the current phase of the moon.
I say “in earnest” because I’ve created a GitHub repo for it, and a repo for the main library it uses. I wrote a (since obsoleted) library to filter out ESP8266 WiFi Shield messages from the text returned in an HTTP Response.
Continue reading Started Work on a Lunar Clock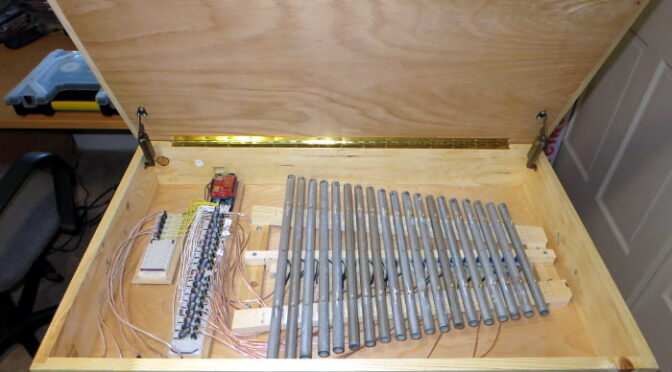
The Robotic Glockenspiel is Complete!
After putting the finish on the wooden Glockenspiel case, I reassembled all the electronics, mechanics, and the box hardware (hinges, etc.). It works great! See my Arduino Robotic Glockenspiel Complete Demonstration video.
Ok, I still want to adjust the amount of silicone on each solenoid, to smooth out the sound, eliminating the clanking on all the chimes…but that’s for later.
As a reminder: the sources for the Glockenspiel are on the Glockenspiel Github site.
Adding a Finish to the Glockenspiel Case
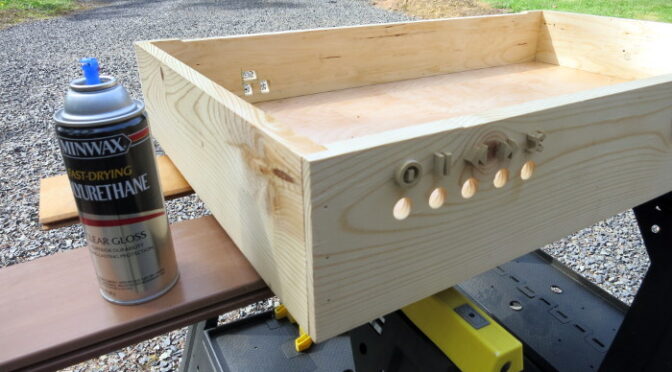
Previously I finished the labels for the glockenspiel. In this post I literally Finish the case.
Last weekend and this weekend are nicely warm enough, so I’ve put a few coats of Minwax gloss polyurethane finish on the Robotic Glockenspiel case. In a few days the finish will be dry, and I can do the final fine-sanding (to remove dust captured in the Finish) and assemble the thing.
Continue reading Adding a Finish to the Glockenspiel Case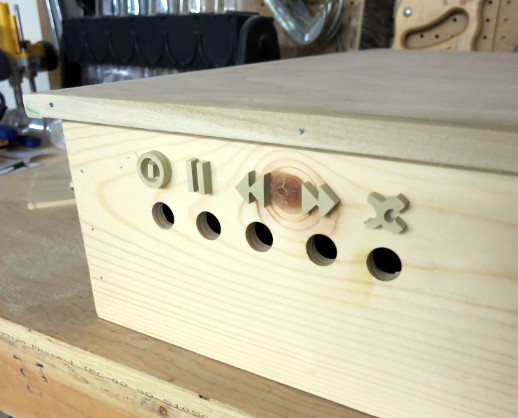
Final Labels for the Glockenspiel Buttons
Since trying out woodburned labels, I made another attempt at scrollsawing the button labels for the Robotic Glockenspiel, and am happy enough with the results that I’ve glued the labels to the glockenspiel box. I’m so happy to have finally made up my mind – whew!
So this blog is a sort of “How to Scrollsaw” in a nutshell.
Continue reading Final Labels for the Glockenspiel Buttons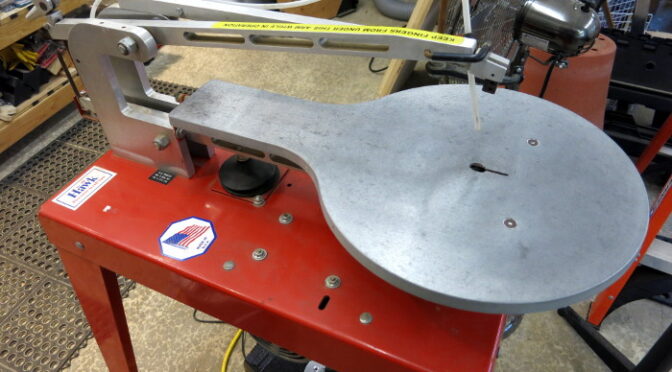
Scrollsawed Button Labels for the Glockenspiel
Since putting a lid on the glockenspiel case, I’ve been wrestling with exactly how to label the robotic glockenspiel buttons: If I had a laser engraver I probably would have engraved (woodburned) the labels on; sticking paper labels on could look pretty sloppy; decals sounded like a production of their own, with the risk of gumming up my printer; painting the labels would require a steady hand; woodburning by hand is another option; so is gluing on scroll-sawn raised labels.
Continue reading Scrollsawed Button Labels for the Glockenspiel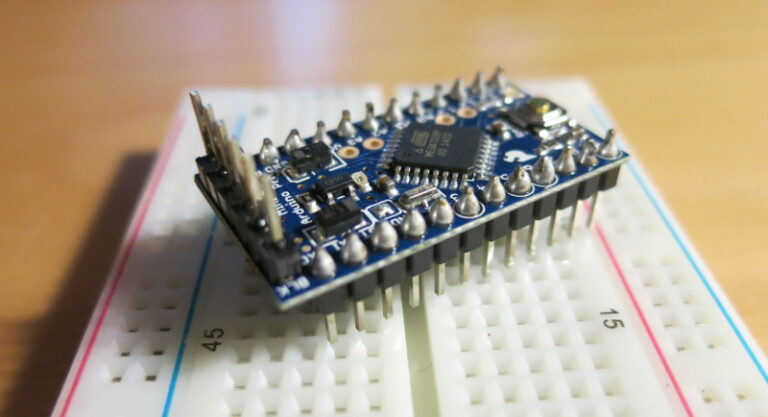
Arduino Pro Mini, and How to Solder Male Headers
I recently decided to try out the Sparkfun Arduino Pro Mini 5V board. It has almost all the I/O that an Arduino Uno has, in a much smaller board. It comes without connectors, so you can solder in whatever style connector you need. For my uses, I needed to solder on male headers that allow it to plug into a breadboard.
So I tried out a new way of soldering male header pins onto a board. First I snapped off two 12-long headers from a strip of break-away male headers. Then I plugged those headers into a breadboard and laid the Arduino Pro Mini board over them. To keep the flux and solder spatter from getting into the breadboard holes, I put a piece of paper over the unused parts of the breadboard.
Continue reading Arduino Pro Mini, and How to Solder Male Headers