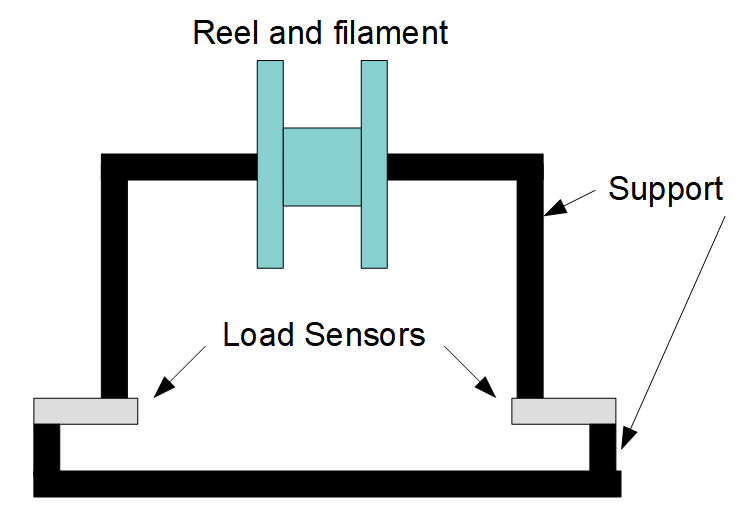
An idea’s been forming in the back of my head for a while: that it should be possible to estimate the amount of 3D filament left on a reel by simply weighing the reel with its filament, and subtracting the reel weight. Sounds simple, no?
Today I realized that it may be possible to modify a printer to give a live estimate of filament left on the currently-mounted reel, by “live weighing” the reel, and knowing the reel weight and filament density.
Recently I’ve had the pleasure of publishing Linda Needham’s most recent book through Kindle Direct Pubishing (eBook) and CreateSpace (paperback). Her book is the 20th century historical romance, “The Legend of Nimway Hall: 1940-Josie“.
In the process, I learned a lot about indie publishing (see this site’s Creating eBooks menu for my notes so far) and experimented with how to make a CreateSpace book cover (a professional created Linda’s book cover).
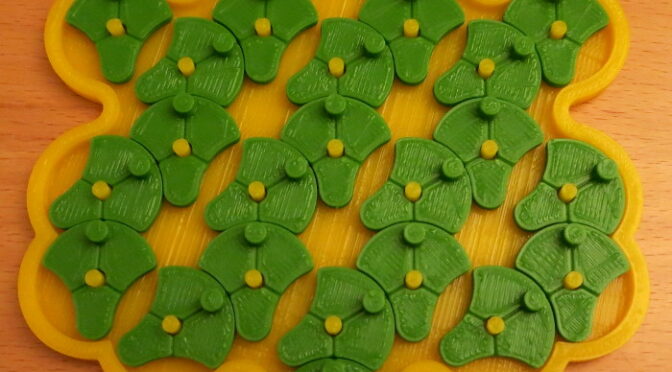
25 Lotus Flowers is a rotating-piece puzzle I recently invented (at least I’m ignorant of any earlier versions). The object is to turn the 25 lotus Flowers to form a given pattern. The challenge is that each Flower prevents one of its neighbors from turning, so you usually have to turn several Flowers before you can turn the one you want to turn.
I called the puzzle 25 Lotus Flowers because the 25 puzzle pieces look to me like ancient Egyptian images of lotus flowers, and the addictive nature of the puzzle reminds me of the Lotus Eaters in The Odyssey.
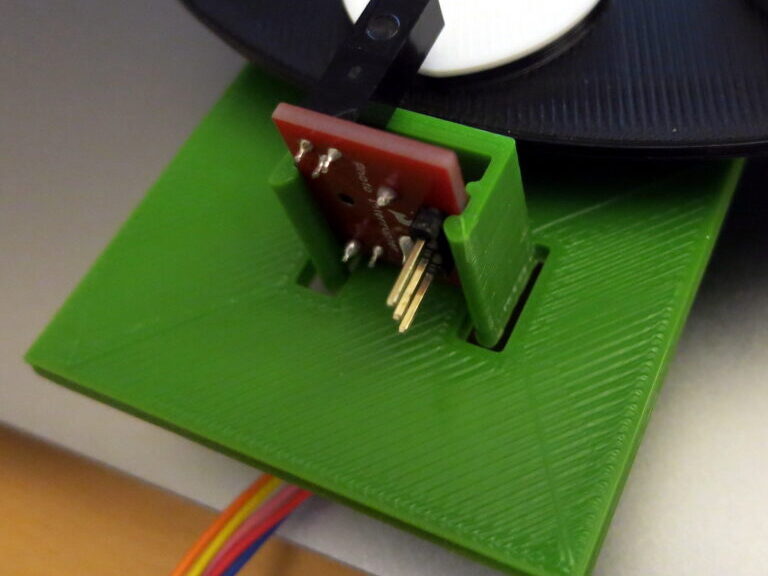
In my previous post, I replaced the electronics of my several-year-old lunar clock design with modern parts. In this post, I’ve replaced the laser cut parts with 3D printed parts, with particular attention to the clip that holds the photo interrupter in place.
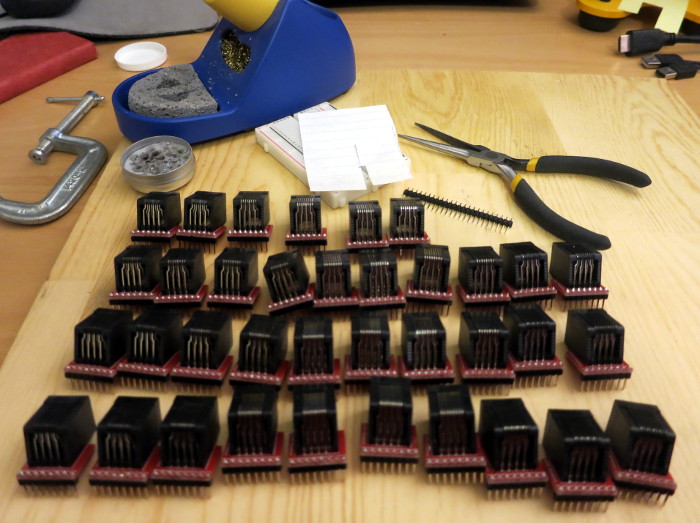
In my previous post, I designed a 3D printed sensor junction box for my well tank depth sensing project. In this post I solder… a lot.
I have 36 RJ45 jacks, 36 breakout boards for those jacks, and a pile of break-off headers for those breakout boards. Each breakout board has 8 holes for the RJ45 jack pins and 8 more holes for the header pins. That’s 36 * (8+8) connections I need to make to attach the breakout boards to the jacks. That’s 576 connections to solder!
In my previous post, I finished the Web Service that the ESP8266 uses to upload well tank temperatures (and eventually a depth estimate) to a cloud database. In this post, I turn to the mechanical design of the case for the RJ45 jacks for the 1-wire interface.
In my previous post, the ESP8266 Arduino Sketch was reading 12 temperature sensors. In this post, I describe the progress on the web side of things: the PHP web service that stores temperatures in an SQL database.
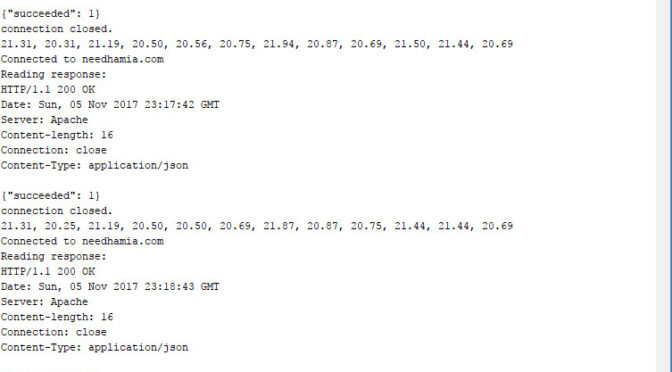
I’m really happy with the ESP8266 so far: it reliably connects to a given WiFi access point, and now it’s reliably doing an HTTPS POST of data to my PHP web service.
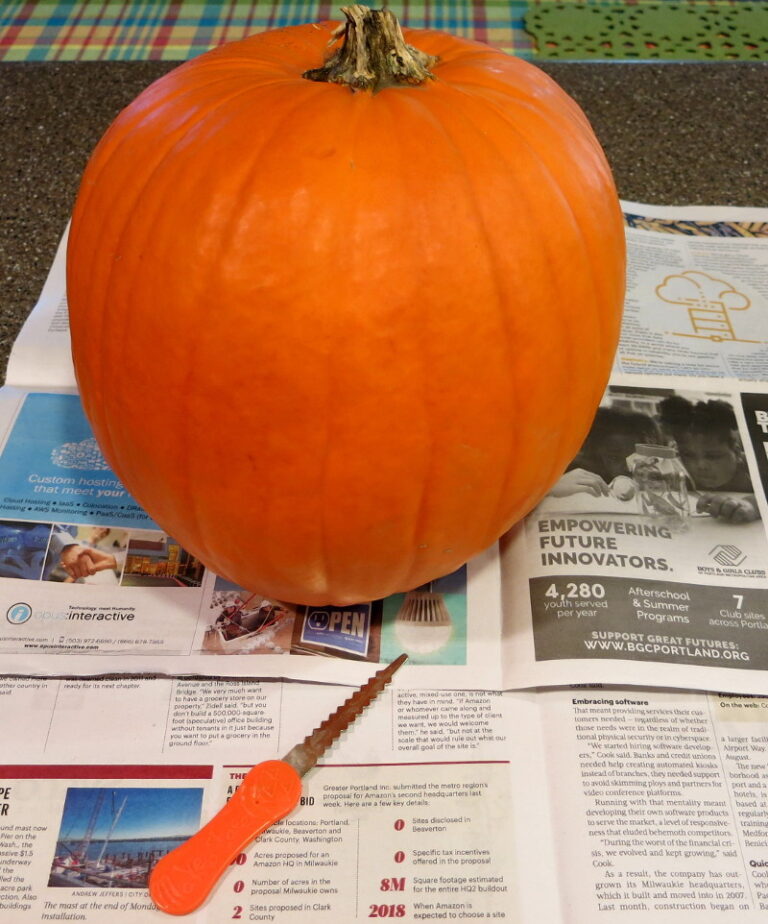
At this time of year when Sparkfun, AdaFruit, and Arduino tweets are filled with high-tech Jack O’ Lanterns, I thought I’d document the making of an Old School Jack O’ Lantern.
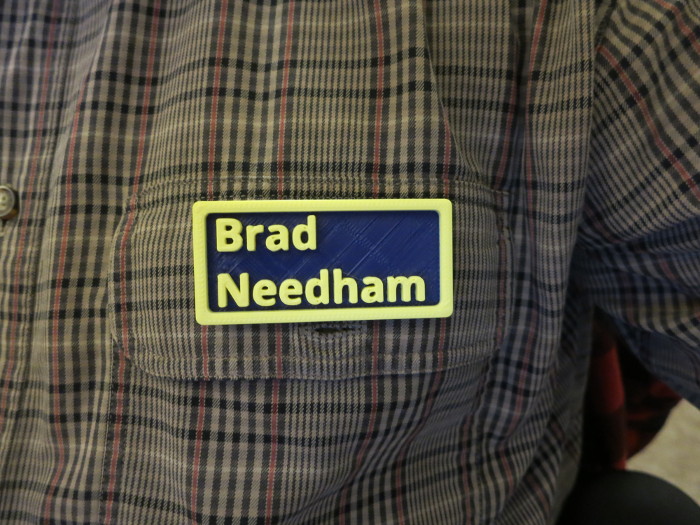
Last month at the Portland OR 3D printing Meetup, someone suggested we should all make our own name badges so Shashi wouldn’t need to bring as many “Hello, My Name Is” paper tags to the Meetups. Game On!
In this post I explain how to make your own, two-color 3D Printed name badge just like mine.
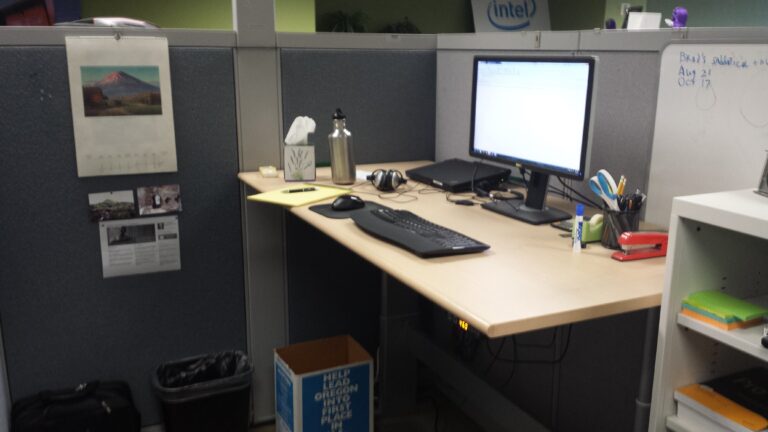
If you liked my 1984 desk, you might appreciate these less-olde-timey photos, of my 2014 and 2016 desks.
It’s July 2014. In a few months, Apple will introduce the Apple Watch. I’ve been working at Intel for almost 22 years. As I sometimes do, I took a photo of my office desk.